FREE SHIPPING on all orders over $75!

Introducing our New Media & Creative Team

By Kristan Kremer on March 27, 2017

It’s Springtime already! Time sure has flown. And with the change of seasons, it’s also time to announce our new Media & Creative Team. Please join me in welcoming this talented new group of ladies.


Jasmine

Jasmine is known on Instagram as @simplybyheart. She’s active in the planner community and loves florals.


Amanda

Amanda is known on Instagram as @leftyloveslimelife. She’s into bullet journaling and is sure to inspire you with her beautiful hand lettering. Subscribe to Amanda's YouTube channel here.


Erin

Erin is known on Instagram as @live.life.inspired. She’s a college student and blogs at www.livelifeinspired.wordpress.com.


Please be sure to follow our new M&CT members, use their $10 off links, and interact with them in our Facebook group. Welcome to the Limelife family ladies! We cannot wait to see how you inspire us with your talents and creativity.

If you're interested in joining a future round of our Media & Creative Team, make sure you're following us on Instagram, Facebook, and subscribed to our newsletter. We'll announce there when we start the search for new members.


Staying Organized While Traveling

By Kristan Kremer on March 24, 2017

Traveling can mean fun, adventure, and relaxation. It can also mean stress, lack of routine, and difficulty staying organized. If you love planners, chances are you love to be on top of things and plan ahead, right?  For us planner-lovers, being away from home can make planning, organizing, and feeling “completely together” difficult.  


With spring and summer breaks coming up, I figured now is the perfect time to share a few of my tips for staying organized while traveling.


Last summer my family and I drove for two days to reach our vacation destination. Our car was packed. And I mean packed. We stuffed our car with snacks, waters, and the essentials needed to keep our preschooler entertained during our long car ride. (Yeah...that's a lot of “essentials.”) We had so little room left that I decided to leave my planner at home. “I'll be fine for a week without it,” I thought.


Was I “fine?” Sure. But there were times when I longed for my planner to help me feel less stressed and more “on top of things.” Not being able to write things down and keep track of our plans left me relying solely on my memory. (Which isn't  a good thing when you suffer from mom brain.)


So here is tip one.


Bring a Travel Planner


Whether it’s a small, pocket-sized option or something you've concocted, if you use a planner in your day-to-day life, using it while on vacation or while traveling will be second nature to you. I’m planning on using the new Cahier Traveler’s Notebooks during our vacations this year. Our trip this spring will only be for a few days so I'm bringing the Weekly Layout E notebook with me. But if we take a longer trip this summer, I will probably switch it up and use the Monthly Traveler’s notebook. There are a few reasons why I chose the Cahier Traveler’s Notebooks instead of a smaller planner. Firstly, they're small while still maintaining a good amount of space for writing (big handwriting over here). Secondly, they don't have coil bindings so they are easy to slip in and out of a bag or purse. And lastly, I like that the months and dates aren't already printed in the notebook. This means I can write in the dates myself and use every single page of the notebook. Instead of just using the pages of the months I'm traveling.


Bag Choice


The bag you'll be carrying day-to-day should allow for easy, on-the-go organization and the inevitable wrappers/napkins-in-the-bag scenario. (Hey, it's better than littering.) So a good size bag (spending time stuffing a small bag with items is no fun) with pockets/compartments is must. I also recommend zippers instead of snap or magnet closures. There's  nothing like not being able to find your phone or wallet and panicking that it may have fallen out of your bag during your travels to throw your entire schedule off course.


Allow for Free Time


Those of us that like to plan may or may not be guilty of finding comfort in planning out every minute of our travel/vacation. My advice? Allow for some free unscheduled time. Chances are, something unplanned will happen during your time away. Whether it's an unforeseen rainstorm slowing down your travel time or an amusement park shutting down it's rides until the risk of lightning passes, having unscheduled time will allow time in your schedule for the “uh-oh’s” and last minute changes.

Using Month at a Glance

By Kristan Kremer on March 17, 2017

Hello again planner friends! I often get asked what I do with my month at a glance layout. Do I really use it? Do I decorate? How do I decorate it and still have it be usable? How do you fit everything into those boxes?  For me, the month at a glance is the heart of my planner. I keep the entire year worth of month at a glances in my planner at all times, usually covered in sticky notes. That’s the secret. Sticky notes. Since things change so much, I can make sure I know what is going on months out, and not worry about having to erase, cover up, or move things around, I just put it all on sticky notes and change as needed. About two weeks before the new month starts, I sit down and do my monthly layout for the upcoming month. Monthly layouts are one of my favorite things to do because Limelife always has the same amount of boxes on the month no matter what, meaning, there is usually empty space to get creative or add a little extra decoration. Right now I am slightly obsessed with mermaids. After the winter we have had here, I think I am really ready for warmer weather, so I decided to do an ocean/mermaid spread for this month. March is also be a month of multiple sports for both our boys, so there is a CRAZY amount of information that I need to cram into this layout, that’s why I thought this would be a good month to share with you all  how I do my monthly layouts.

Let's get started! First I wanted to stamp out my decorative background which I will color later. This is not a pretty picture that I am sharing, this is a real life picture. Stamping large stamps can be difficult, so I wanted to show what I use to make it a little easier. I always stamp on a hard surface, and to make sure that when I apply pressure that it disperses evenly, I stamp on a board that a friend cut for me. I use a large block and walk my fingers back and forth on it to try to make sure the entire stamp gets down on the paper. I also use old scraps of paper for any overhang from a stamp so it doesn’t get on my table or board.

Next, it’s washi time. I have some amazing mermaid themed washi that I have been excited to use in a layout. Washi can really be the ‘tie it all together’ element of a layout, so I picked three washi tapes to allow myself some freedom with color choices for ink.

This next part is what makes the crazy busy life possible to fit in a monthly layout….stamps, small stamps, color coding inks, and minimal handwriting. I have big handwriting, and so if I tried to fit this all into the boxes by just writing, I would miss stuff because of how messy it would end up being. The “barely holding it together mom” would emerge more often than not if my month at a glances weren’t usable and holding life together for us.

With the important information down, all the functional stamping done, it is time to do the creative stuff! Prismacolor soft core colored pencils work amazingly well on Limelife paper! It’s so easy to blend the colors. For example, for the little fish in the photo, I layed yellow down first as the all over base color. I added some blue and blended it out into the tropical green color. I added a little orange next  by outlining the face and blended out to create the sherbert color for the face. Between the pencils, the paper, and the blending pencil, the colors can become so vibrant and look like pens. I also used glitter gel pens to add little accent details. Just by adding little details like that can be a game changer for your layouts and decorations. The fish becomes more interesting, the mermaid jumps off the page more.

Amidsts all the craziness, our planning can keep us grounded and feeling a little less overwhelmed, and more confident in handling life.  I hope I was able to provide some inspiration on how to use your monthly layout and get everything down on those pages that you need!


Thanks for stopping by the blog and see you soon!

~Lindsay

@glam2plan_pnw


Planner Stamp and Sticker Organization

By Kristan Kremer on March 03, 2017

I am a self confessed planner stamp & sticker hoarder  addict. But I was finding I was doing more "collecting" than using and I felt like most of that was due to the fact it was so complicated to dig through my drawers and collect all the things I needed plus since my stamps and stickers were just very disorganized in my storage I decided I need to take some time to organize them and have all my goodies in a manageable place and thus I would get to use them more. 

I love Ikea but unfortunately for me I do not live close to one. So anytime we go on vacation the first thing I do is see if one is close by and fortunately I took a vacation in January and was able to get to one close by. I had wanted to purchase the Raskog cart for a long time and finally I was able too. 


Top Shelf holds my most used planners, some pencil cases, Mambi sticker books and then my favorite washi tubes and single washi's in the smaller photo cases. 


 2ND shelf I have larger stamp sets that do not fit in the photo containers and I didn't want to take out of the original packaging. I am weird like that. I also have baby wipes for cleaning my stamps, my levenger punch and some colored pencils on that shelf. 


Prior to leaving on vacation I had purchased some storage items so that I could take some things on my trip and keep everything tidy. I went to Joann's and I purchased the following products:


Photo Keeper that has 5 internal photo boxes in it that hold 5 x 7 photos and fit the planner stamps perfectly. 


As you can see the stamps fit in the large 5 x 7 photo boxes well and I fit several in each.


I also bought a few singles of the photo boxes in a smaller size 4 x 6 to hold some washi tape you can see above. I couldn't find the link online, I purchased at the store itself. They are made by IRIS


I also bought the one shown also above that was an Artbin Essentials and it is great cause I fit at least 36 of the dew drops in it. All of these were found in the store and are not always available online from Joann's but I am sure you could find at other online sources. 


Here are some items to make a quick simple sticker book:


Binding discs or use a ring binder

Paper punch

sheets of cardstock

Adhesive for attaching your sticker sheets to paper


I started out making my sticker book by sorting my stickers by shops. Just put some adhesive on the back on the sticker sheets and lay down on your paper and you are done.  I think it would be great in the future if I set it up with tabs and sorted it as well but this time I just didn't take the time. But now I have a system that all my stickers are right next to me when I plan and I can easily find the right sticker and utilize them now. here are some pics of the sticker books I have made. 


I can't tell you how much more efficient organizing these things can make you. I hope this helps some of you get your planner groove back by getting organized!

Planning on the Go: Why I Use Two Planners

By Kristan Kremer on February 24, 2017

Hello again my planner friends! I hope that the new year is starting out well for everyone. At this time of year, so many of us are getting organized and all of us love our planners. Lots of us have multiple planners, and I can now honestly say, I belong to the multi-planner girl group, and I actually use both of them! I have an standard 7x9 planner in layout L in an A-5 binder, which is my main planner and also where I love to do my creative layouts. This planner tends to go with me most places, however, if I am going to be out all day, it gets too heavy in my purse, so I usually leave it at home on those long days. That’s where my cute little personal size planner in layout L comes in. That is ALWAYS in my purse, filled with chicken scratch, notes, and our schedules.


Once a month, I sync up these two planners by taking an hour and sitting down and making sure they match. I put our schedules in my personal size for the next month, as well as make my on the go food log to keep track if I’m out all day. If I don’t make sure I take that time to sync them up, I miss things, and life does not go smoothly. As you can see, much of my pre-planning is done with sticky notes. I love the sticky note system because I go back and make it pretty when the time comes.


I love using stickers in my personal size planner and keep a stash in there to add to the pages when needed. I have pretty large handwriting so I like to keep a lot of blank space in my personal planner by keeping the stickers to a minimum. Most of my sticker decorating is done in the parking lot waiting to pick up the kiddos from school because the parking lot is crazy busy and I have to get their early to get an actual parking spot and it’s a fun way to pass the time.Planning on the go at its finest!


My food tracking section is quick and simple to create. As I said, it’s not something I will use all the time, just when needed and my regular planner is not with me. I used stamps and a stencil and a few pens to create this section in my personal planner.
This is just purely functional, it doesn’t have to be perfect. I have a place for a date, and a lunch and dinner section. I divide each section using a pen and stencil and call it good. It doesn’t bother me at all that the days are not even. It’s all about figuring out what works for you and your life. Some people that would drive nuts! In my primary planner, it would drive me nuts too. Here, in my personal size, I am totally fine with it!


Recently a friend told me about the dollar spot adhesive pockets….and sheets of stickers fit perfectly in these pockets! I added one of these adhesive pockets to my dividers in my personal size planner and have stickers stashed throughout my planner now ready to use! It’s such an easy way to add more storage to our planners.


So that is how I make two planners work for me, functional and fun.
Thanks for stopping by and checking out the blog, I hope I was able to give a little inspiration and motivation to keep trying new things and having fun with your planner or should I say planners!


~Lindsay
@glam2plan_pnw


Notes Pages

By Kristan Kremer on February 17, 2017

Hello Planner Friends! Let’s talk about the note pages in our Limelife Planners! One of the many wonderful things about our beloved Limelife Planners is the amount of note pages we have! We have so many note pages, that we can get crazy creative with them. Today’s blog post was inspired by all the amazing bullet journalers out there and the super creative layouts they do, but using our note pages and incorporating them into our planners. I have learned bullet journaling is not my strength. I am terrible at measuring, drawing straight lines and making sure everything is equal and same sized. I’m sure if I practiced I would get better, but I really appreciate how bullet journalers are able to create their layouts. So this is very loosely inspired by bullet journaling, and I will go as far to say, is in no way even near actual bullet journaling. But I think that this is one of the best parts about using planners and sharing our ideas. We see something that inspires us and catches our eye, and we figure out how to make it work for our lives, we put our twist on it.


For this project I used two note pages to create a chore/cleaning chart with daily, weekly and monthly sections. I wanted to use copic glitter pens to color my cleaning icons, and those will bleed through paper, including cardstock, so that is why I used two note pages here. I started out by choosing mermaid themed washi tapes to decorate my pages and stamped out my headers.You could also hand write your headers in if you don’t have stamps. I love beautiful lettering, but that is still a work in progress for me so I went with stamps.


Next I used pencil to write in my sections and measure and mark off where I wanted to make my lines. I used a stencil from the office supply store as my straight edge and black pen to draw in my lines.

After my boxes were drawn in, I used cute cleaning icon stamps to label my sections and left lots of room for additional notes I might want to write in when needed.

I love to color and typically use soft core colored pencils. I have copic glitter pens that I use to accent and add detail with, but only use them on sticker paper because they bleed through everything! But here I used them to color my icons since I am not worried about what shows up on the back of my pages (I will show you why in a bit). I did use my pencils to color my lettering because I wanted a watery look and needed to be able to blend the colors to make them soft.


After coloring I wrote in labels and days of the week in the boxes and added washi tape to the edges of my pages. Next I put the pages back to back so I could laminate them, which means this project is reusable! This is also why I didn’t care about my pens bleeding through the paper. Using a wet erase marker, I can check things off, write notes in, and a cleaning supply shopping list, and only a damp paper towel is needed to to clean the marker off and it’s like brand new again. That’s why I went all out with making it cute and decorating and coloring it. This will have a permanent home in my planner to keep me on track with what I need to get done around the house and I won’t have to clog up my weekly pages with cleaning lists.


I marked holes in my laminated cleaning schedule with a wet erase marker and hole punched it and then added an adhesive tab to the edge of the page so this will be easy to find in my planner and just flip to quickly. A helpful tip for using wet erase marker in our planners….it can rub off on pages. So if you do plan to use something like this in your planner, find a home for it where a little smudged ink transfer won’t make a huge difference. Mine is going in the back of my planner between a divider for my notes section and old notes pages from a previous planner. I hope that you enjoyed this planner project and I was able to provide you with some ideas about how to use our note pages. I know I have a running list of projects I want to try out with them! Thank you for stopping by and checking out the blog! See you soon!


~Lindsay

IG @glam2plan_pnw

Easy Kids Craft for Valentine’s Day

By Kristan Kremer on February 10, 2017

Before I had kids, Valentine’s Day was a holiday for the hubby and I to casually spend time together. To be honest, we didn’t pay much attention to the holiday until my son was born. Yes, I would get my husband a card and a little gift and he would get me flowers, but we never really made a big deal out of the holiday. Then we had our son. And the holiday took on new meaning. It became a day for us to show love as a family. To reach out to loved ones in hopes of making them smile.

It also took on a whole new component that had never been there before. Crafts. When you have kids, holidays are all about crafts. The build-up to the holiday is, at least. Whether it’s drawing a holiday themed picture or creating gifts for others, crafts are a way for kids to participate in, prep for, and learn about the day they are celebrating.

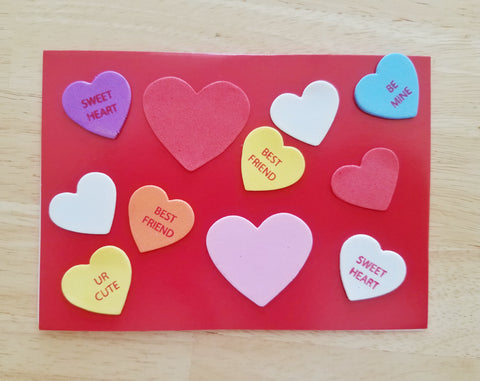
I’ve already come clean about my Pinterest fail rap sheet. So, you know I’m not one to guide anyone (never mind a child) through an elaborate craft. But I do have this super simple Valentine’s Day craft that kids of any age can do. And, it doubles as a special Valentine’s Day card for family and friends; two birds, one stone.


You can buy the supplies at any craft store. They are even available at some dollar and big box stores. All you need are blank cards and decorative, Valentine’s Day themed stickers. If your kids are a little older you can throw in glitter glue, ribbon, paint, and other craft supplies. Then, simply give your kids the supplies and let them go to town creating their masterpieces. Not only do they get to have a fun, creative way to get ready for Valentine’s Day, they also can give their creations to loved ones as one-of-a-kind gifts. It’s a way to show kids that you don’t have to spend a lot of money on exotic flowers or fancy chocolates to show someone you appreciate and care about them.


Tip: If you’re using any kind of glue or paint, make sure to do this craft at least a few days before gifting (or mailing) to be sure that work of art is fully dry. I also use my planner to mark holidays, not just because it looks pretty, but also as a big reminder of how much time I have left to prepare. The days seem to fly by over here! I lose track without my planner sometimes, anyone else?


Fresh Start and Intentional Goals

By Kristan Kremer on February 06, 2017

I am so excited about the new free download that is available and I hope it helps you become more intentional with your time and goals. 


I wanted to write a bit about my experience with the “fresh start” phenomenon.  Throughout December, like a lot of people, I overindulged and was looking forward to recommitting to diet and exercise in January.  I wanted to find a balance between being “on” and “off” since it’s something I struggle with.  (Is anyone else a 0% or 100% kind of person?  It’s tough, sometimes, huh?)  I kept thinking that January 1 would be my day, but there was one problem.  My family was out of town until January 3 on vacation in Florida. On New Year’s Eve, we all came down with a stomach bug.  We returned home with no groceries and piles of laundry.  I was feeling overwhelmed with where to start because in my head, I had earmarked January 1 as a starting point and anything else was a failure.


On Friday January 6, my office announced a biggest loser challenge starting the following Monday.  My MBA classes were also starting up that same day.  Plus, I had 3 days to plan meals and grocery shop.  I decided Monday January 9 would be my day to recommit.  Though it wasn’t January 1 like I envisioned, it was still a great day to begin.


I tried to look for ways to keep accountable.  I started writing more exercise and meal related items in my Limelife Planner.  Three years ago, I discovered a walking path behind my office and realized while I didn’t love running, I did love walking.  I’d fallen out of the habit of taking a lunchtime stroll to clear my head, so I decided to make walking more of a priority.  A few friends are getting together for the Flying Pig Marathon, Half Marathon, and Relays in May and I’d been debating joining them.  Suddenly my fresh start had more of a purpose, so I’m working towards walking some miles with them in hilly Cincinnati. 


Additionally, my friend Hannah recommended The Beck Diet Solution book which has a different approach to thinking about dieting and exercising.  There is no plan one plan or solution imposed – which is very freeing.  The first part of the book is dedicated to planning and thinking, before any changes actually take place.  I’m benefitting greatly from re-framing my thoughts. 


Taking time to plan and be deliberate about what my goals were has made all of the difference.  I feel mentally clearer and am sleeping better.  I am able to manage my time efficiently.  The number on the scale matters less because I am seeing rewards in other ways.  It feels cliché to say “this time is different” but it sure does feel that way.  I have aligned multiple facets of my life towards some much needed self-care, which then has a positive effect on my family, friends, and employees.


I’d like to encourage anyone if they are feeling burdened by the “shoulds” and misaligned expectations in their head to take some time to plan and be intentional about where they are and where they’d like to be.  Setting yourself up for success is just as important as executing your plans.


“In preparing for battle I have always found that plans are useless, but planning is indispensable.” –Dwight D. Eisenhower


This guest blog post was written by Amanda Cahill, mom, friend, and Limelife Planners supporter. Follow her on Instagram @leftyloveslimelife

8 Gifts to GIVE for Valentine's Day on any Budget

By Kristan Kremer on February 03, 2017

Is it me or are you over the chocolate candies and roses? I get it ... Hallmark Holiday blah blah but secretly WE ALL WISH our boyfriends, spouses, husbands, wives, whoever saw this list I created! (HINT HINT ... forward and share). I am the type to get my man a shirt and maybe cologne. I think of this day as snow your man you love him, not only by gifts but words, and well a heartfelt gift. I ordered dark chocolate dipped strawberries for him on year (they are his FAVORITES). I made a heart with post it notes stating the reasons I love him ... cue the awwwww ....


For real though, if you're looking for something that your lover can keep and won't die after 1 week for $50... look no further!

  1. Limelife planner : I KNOW ... who would have thunk ... but come on LLP has something for everyone. Shop here and save $10 (new customers only).
  2. Birchbox - For Women OR Men: this gift is great for multiple reasons, their selections of products are fabulous, each month you get a box of 5 goodies based on the quiz you take. It's so nice to get to try new products (I have not bought eyeliner in 2 years!) It's $10 a month, buy one or buy 3 months or A YEAR!!! Here's the link.
  3. NothingBundtCakes.com - yes I said it ... bundt cake... these are the most AMAZING cakes you will ever imagine! The red velvet A++! Double chocolate ohhh my! You can personalize or make a tower of three mini bundt cakes (this is what I do!) either way ... this will win anyone over!!!! Skip the chocolates ... grab a Bundt Cake!
  4. Jewelry! Not just any jewelry... personalized. Who doesn't love something you personalize to make it their own! My favorite shops right now would be these : E & E Project, great jewelry! This is one of my favorites.  Or Lisa Leonard Designs, love her stackables and really everything! I'll take the whole shop, one of each. 
  5. FitFabFun Box Subscription - talking about a great box to receive as a gift. These are full size items and is a variety of accessories, makeup, etc. It's an amazing box and she will love you more if you get her this subscription. Here's the link.
  6. The Blowout Bar (or a salon) gift card - that's right, treat her right, get her an appointment on Valentine's Day to go have someone wash and shampoo her hair and style it. She will feel amazing ( and look it amazing ). Any girl or guy LOVES to be pampered.
  7. SPA DAY - Manicures/ Pedicures - GO TOGETHER! Guys could use one just as bad as us women! Use Groupon for finding the best deal! Couple massages with mud bath sounds amazing! A couple who relaxes together, stays together!
  8. Gift Card - honestly who doesn't love a gift card? Grab a gift card to his or her favorite coffee place, or where they get their cologne or perfume. Attach the GC to some flowers or a candle and I'm sure anyone will adore you for it!

Happy Valentine's Day you lovebirds! Get out there and show that lover how much you love them!

Health Tracking with Layout C

By Kristan Kremer on January 27, 2017

Happy New Year planner friends! I’m back on the Limelife Blog to share how I am using my Layout C in my planner starting this January. Back in July, I ordered my planner for the new year. I ordered two….because I really wanted to try Layout L, but being a creature of habit, I also ordered Layout C which I had been using for a year, just in case I didn’t like Layout L. Well, I love Layout L, and I can’t stand to have an entire planner not get used, especially when it’s so pretty. So, I’m jumping on that whole let’s get healthy band wagon and use my layout C to help me do this. I have a husband and two boys who can eat anything and everything they want and they are not squishy and cuddly like I am. I don’t have an end goal in sight, I just want to feel better, and not be quite as squishy and cuddly. My goal is to move more, eat healthier and have more energy. I am super private about this type of stuff, mostly because I do not want people hounding me to join their weight loss groups, so I was really hesitant to share how I am using this in my planner. One thing that I have learned over the past couple years in the planner community though is how supportive and loving of a community it is. Plus I have gotten better at just saying NOPE. So here we go! This is how I am using layout C in my planner for the next year!

I ordered both 7x9 planners this year uncoiled and Limelife punched it for me to fit A-5 ring planners. The reason I requested this is because I love moving things around, adding sections, taking out sections and using things in a creative way. At the back of my planner, I created a “Loosing It” section to track my health, movement and mood. I started out by taking the weekly pages for January and washi taping them. I dug into my fun washi tape stash, the cutesie ones that I hardly ever use, to make it a bright and fun part of my planner since at times, I’m sure I’m not going to feel so excited about visiting these pages.

Layout C has 6 boxes to use daily, so I wanted to brainstorm how I’m going to organize this before I just jumped right in and started stamping. After I mapped out how to use my boxes, I dug through my stamps and got everything I needed to I could quickly get this layout done.  I decided to stamp an entire month at a time because I know that this will be an easy section to neglect and not set up every week.

The first two boxes I’m using for food/meal tracking. Boxes 3 & 4 will be used for Carb and Sugar tracking (the addiction is real!), and the last two boxes will be to track movement and mood. I will color in what mood I am in every day. When choosing the four mood options, happy, meh, irritated, and stressed were the four most common that I am, as much as I hate to admit. Friday will be my weigh in day.

Lastly I added my menu section so I can plan for the week, and my water jug to make sure I’m drinking enough water. This actually shouldn’t be a problem for me, I love water. I just love coffee so much too, and will often drink coffee well into the afternoon instead of switching over to my water earlier in the day. For the entire month of January, the format will be the same. Come February, I will evaluate and see if I need to change anything, but for now, this is feeling good, and most importantly, feeling doable for me.

I wanted to add something fun to this whole section of my planner. So I made a tracker for pounds lost. I printed out a digi stamp and colored her, cut the section marker on my Cricut, and stamped hearts to color in for each pound lost.

Since I did 4 weeks at once, this project took me about an hour. I kept it simple, usable and plenty of room to write. The great thing about Limelife Layouts, is that they can be used in multiple ways, not just for planning our busy days. It’s fun to figure out how to use what I have and make it work for me, and there are so many wonderful planner girls out there that inspire me to be creative and think outside the box. I hope that I was able to share some of that inspiration with you as well!

As always, thanks so much for taking time to stop by and check out the blog! You can find me on Instagram: glam2plan_pnw


See you soon!

~Lindsay