Free Domestic Shipping over $75!

Bringing in the New Year with a Plan

By Kristan Kremer
on January 13, 2017

Bringing in the New Year with a Plan

Happy 2017, everyone!  With a New Year comes new goals, right?

Now, I'm typically not a New Year’s resolution girl. But, this year I really want to get better about meal planning. I tend to make healthy choices when it comes to food and exercise, however, there are often days when it's 4:30pm and I have absolutely no idea what I'm going to make for dinner.

Having a plan will not only cut back on this stressful mealtime-scramble, but also save some money on groceries since I will know exactly what we will be eating that week. (No over buying!)

I’m not into the complicated.  (Who is?)  So I've been looking up meal planning tips to try to make this as easy as possible for myself...and for all of you interested!  The tips below are a few of my favorites.  They’re simple, they’re easy, and they account for “life happened” moments.  

Write it Down

This is the most obvious tip. Writing it down will, of course, help you to keep track and remember the meals you are planning. I'm a planner girl, so I've decided to use Limelife Planner's Meal Planning Notebook to help me stay on track. (Plus it makes things that much easier to organize!)

Save Recipes

Save yummy/healthy/easy recipes as you find them. I save mine on Pinterest so they are there to refer back to when I'm ready.

Schedule a Few Leftover/Easy Meals

Let's face it. We all have those days that are so rough that we make the “I’m not cooking!” declaration. Having a quick, easy meal on hand can save you from spending $25 on pizza delivery. Crockpot meals are also awesome for THOSE days.

Theme it Up

Having a favorite meal weekly can make planning just a bit easier. Plus, it gives everyone something to look forward to each week. Who doesn't love Taco Tuesday?

Shop Sales

Use sale items to your advantage. Check your grocery store's weekly sales and try to plan meals using those ingredients.  Some stores make this process super easy with a fully integrated app.  Shopping weekly sales can not only save you money, but also may dissuade you from repeating the same recipes over and over.

Do you have any meal planning tips? Let us know!

Limelife Unboxing & Notebook Project

By Kristan Kremer
on December 30, 2016

Hello again Planner Friends! We had a bit of snow this week, which was promptly coated in a nice sheet of ice, which is typical in the Pacific Northwest. When snow happens here, our city shuts down. We ended up having two days off from school with less than an inch of snow….that ice gets us every time! Of course the snow was scheduled to hit on delivery day of my new Limelife goodies. Amazingly enough, the mail carrier made it to our mailbox before the snow set in. I was good, and patiently waited to open the box until the kids were frozen from playing outside and wanted a hot chocolate break. Hot chocolate was made, kids snuggled on the couch by the fire watching Elf, and I got to open the box!


I decided to order personal size inserts which I am going to exclusively use for volunteering, PTA and school activities. I wanted to be able to easily keep this with me at all times, and not have it weigh ten pounds in my purse! I also ordered one of the notebooks and a happy surprise of stamps came as well!


The notebook! This notebook is amazing! I asked for a customized quote from one of my most favorite songs ever, “I found the secret of life: I’m okay when everything is not okay.” This notebook will be my companion for at least a year, and will be filled with braindumps, lists, journaling, planning, lettering, notes, venting….so I wanted a quote that would resonate and ground me every time I look at this notebook.

There are layout options for notebooks! I chose one that I felt i would be able to use in multiple ways.

Right away I decided to start a project in my notebook, a Christmas Brain Dump to help me get organized. I broke out my Christmas washi and got to work. I covered up “today is” with washi and used a white gel pen to label my boxes as Gifts, Projects and Cooking. I dropped my lightbulb stamp, and that’s why I have some well placed reindeer washi cover up my oops in my ‘Last Minute To Do’s’ section. Don’t be afraid to stamp! The worst thing that can happen is you mess up and cover it up with washi, a sticker or label paper.


After completing my Christmas Brain Dump in my notebook, I put my inserts into my Kate Spade ring bound. I chose layout L for my personal size, I have fallen in love with layout L, there is so much that can be done with it! I knew it would work for me in personal size too! Here are some photos of the personal size.

Thanks for stopping by to check out this blog post! Next time, I will show you how I am using my personal size layout L! See you soon.


~Lindsay

IG: glam2plan_pnw

Being Grateful

By Kristan Kremer
on December 23, 2016

You know how there are days that you just say to yourself, UGH is this day ever going to be over? Do I have to wake up and do this? We all have BAD days, but you know that saying "A bad day does not mean a BAD life!?" Well, it's true. Life can be so much worse. Just because you have a bad day or bad report or bad anything doesn't mean it's the end of the world.


In certain moments, even certain days I catch myself thinking ugh, is it 8pm yet? (Bedtime in our house). Or why do I have to attend this event or can everybody just leave me alone for a little peace and quiet! The fact is we all need a little peace for our sanity sometimes, we all need a little one on one with ourselves, our partners and even our children. It's important to take that time out for ourselves. The truth about it is ... Some of us can't do that, some of us don't have anyone that can "fill in" for them while they take a minute or a night for themselves. The truth is some of us don't have the luxury of a night out because they are a single parent and maybe live far from family or don't have family left, maybe they can't afford a sitter or maybe they don't trust anyone because they have anxiety or have been in a situation before. The truth is the reason I'm saying all that is because sometimes I'm ungrateful for things that others clearly don't have.


Sitting here really makes me think about the little things I complain about and then how little and LUCKY I am. Even at the end of a rough day, there's always things to be grateful for! For instance ... Breathing, waking up, have a warm bed, roof over my head, food on table... the list goes on. 
Life as I know it is actually pretty great. Don't get me wrong I do not live the perfect life AT ALL, but I do feel blessed with the life I live. Every night before bed, I remind myself of this, I remind myself that even though there was a lot of tantrums, tears, no naptime and bedtime took over an hour, I have to remind myself YOU ARE LUCKY! You wake up... You have 3 HEALTHY, HAPPY (and sad at times) children, who love to play, who love you with all they have no matter how much you suck that day! You are lucky you were able to conceive three babies, carry them on your own, pay for them, afford them, give then food and a bed. You, Jamie, are so blessed.


Like I mentioned before I have days NOTHING is right and I whine about small things, that others can't whine about. EVERY November a lot of people do the 30 days of thankful - some people get annoyed by this social media posting, others join in and people like me took it all in and continue it through the year. During November while doing this 30 days of thankful I realized it reminded me of what I have and what others might not. We all can vent and no one is perfect, no family is flawless and no relationship is full of no fighting. Things like that make relationships and family stronger. By continuing what I call my Grateful posts , I have found myself going to bed smiling more and waking up more grateful - less unhappy. When I hear my babes at night lately - I don't complain ... Thank goodness she's crying, this means she's alive, thank goodness she wants me, this makes me feel alive, thank goodness she wants to be rocked - one day she will be too big.


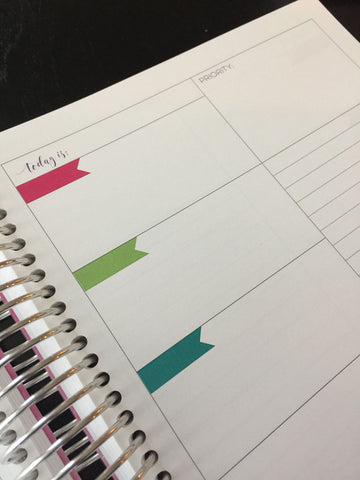
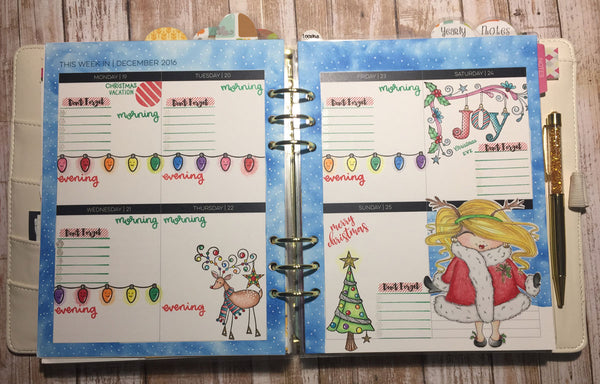
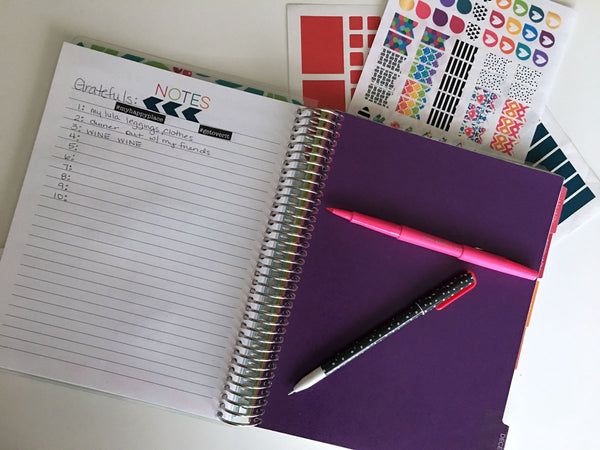
All these things were becoming so blurry to me, until I start keeping GRATEFUL posts in my planner! I have a perfect spot on my weekly layout that I just write a word, or maybe a sentence, or a person. Really anything to remind me BE GRATEFUL BE THANKFUL! It's nice to look back and see why I'm grateful or who made me feel grateful. For instance, one of my good friends was diagnosed with cancer while she was pregnant. I didn't know her then but after diagnosed I heard her story and we talked and it was like I've known her for years. I can't tell you how many times I say I'm grateful she's in remission, I'm grateful for her perfect, healthy baby boy, I'm grateful we met, I'm grateful to call her my friend! I'm grateful for her in every way and as much as I hate CANCER, I'm grateful that it brought her me and me her. I couldn't imagine not having her around. Her strength and smile are so contagious. She's so courageous and I just I am grateful for her.


She is one example of why I keep this journal - it reminds me of who I'm grateful for and why. My soul sister - I'm so grateful for tee ball! I'm grateful I signed up my son and have met amazing families after 4 years. I'm thankful I got pregnant with my oldest when I did, I think about it every day, he made me a better person, he saved me, he was my reason to finish school and get my Bachelors. I wrote one day I was grateful for the rain, I was grateful to enjoy the gloomy day indoors with movies and all day PJs! I've been grateful for COFFEE a lot lately ... with late night editing ... coffee is a MUST.


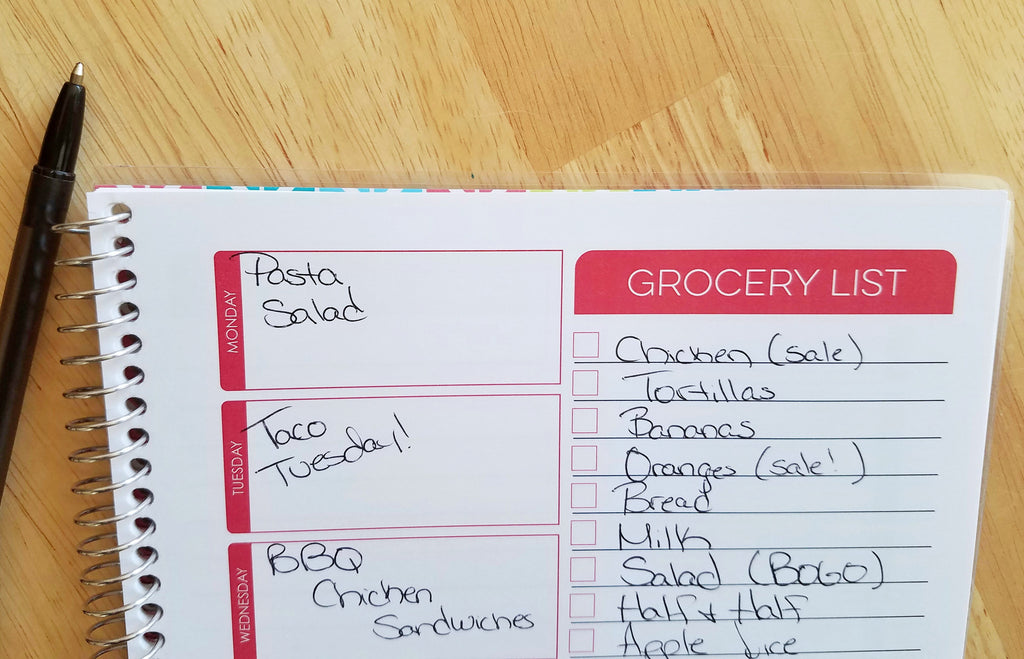
My lists of gratefuls could go on and on. Even though I still might complain this keeps me remembering daily how much there is in this world to be grateful for! Try keeping a list - some great spots for them are in the notes page or on the side of the weekly layout. Or use the bottom of the weekly layout as I do.


Why not start today with what you are grateful for?

So You Think You're a Wedding Planner? Think Again!

By Kristan Kremer
on December 16, 2016

So you think you’re a wedding planner? Think again!

In October of 2015 my beautiful daughter got engaged to a wonderful man. I had dreamed of this magical wedding that she would one day have. She had set the date to be one year later so I kept thinking to myself "yes! We will have plenty of time to plan". Little did I know that with running a Etsy shop and commitments to this and that the time would just fly by so quickly.

I think when you have a year you better get yourself motivated to start right away because before you know it, it is here! We were hoping to try to do it on a budget and by budget that meant doing a lot of  things ourselves that we were able to do and of course not using a wedding planner because I didn't have a $40,000 budget.

Utilizing a planner right away was key to getting everything done. My daughter bought a wedding planner but didn't utilize it really so it was basically my job to stay on top of things. She works a very demanding full time job and I am retired so it made sense for me to become "the planner" and who better to do that than an actual planner lady!

I first mapped out what seemed to be the most critical decisions which were the venue, food, and the photographer. Those were the items I wanted to lock in quickly. We did select a venue pretty easily due to the extreme cost of some venues it was a matter of elimination because of the cost. The venue was going to serve as a place to have the ceremony and reception. We planned on a very casual setting where everyone would be seated at the table they would watch the ceremony from and eat at the same table. We had planned on leaving an open spot in the center of the room to have the ceremony at under the chandeliers.

This venue also did catering and that WOULD have made our lives much easier and later on would find out that would have been the best decision had we gone that direction but after the tasting, we had decided for the cost we were paying that we wanted to pick a caterer that could provide great food as well. So outside caterer it was. So we knew exactly who that would be and locked that in with a deposit. So venue....check.....caterer....check. My daughter had a photographer take pics of her soon to be husband and her a while back and they were excellent so the choice of photographer was an easy one too. So as you see the big decisions came quickly and easily. The rest was the hard part.

Cake tasting was next and dare I say my absolutely favorite thing to have to do! We live in a small town so choices were narrowed down to two main places. Both were equally good so it was a matter of the Benjamins. Cake was then checked off.

I would say the most time consuming and most painful part of the process was planning table decorations. We did a lot of thrift shopping because my daughter was wanting a more vintage/shabby chic style so we just bought and bought and bought and until the day came to set up the tables had no clue how it was going to look! In hindsight, if you can piece together table settings and photograph them so that the day of the wedding you can set them up easily would be a good thing to do but we lacked the space and the time to do that.

I did all the signage and fun decorations since I am also a crafter. I made anything I could which took a lot of prep. My planner was utilized to write down cute signs I had seen on Pinterest that I planned to make, mark where they were to go and also keep track of how many I needed to make. I also made notes along the way of things that needed to be done and checked off as I did them.

Here are some samples of things I made:

This was a glass block that was to be used during the sand ceremony

One of the signs that went on each table for sharing pics

Now a days the traditional guest book is very different! I made this for all the guest to sign with sharpies and it will hang on their wall.

This was going to be sitting on the table next to a vintage small suitcase that was holding vintage hand embroidered hankies and a suitcase for cards etc. It was really hard to write on these vintage books because the pages were old and no longer laid smoothly but it is a cute little way to do something different.

When it came time to create the save the dates my daughter and I sat down and designed them ourselves. Here is the real comical part....we forgot to put the date on the save the dates! Lord who would have thought that the most crucial part of the save the date would be left off! So crafter mom to the rescue. I created a cute sticker to place on them so that it looked planned! Once I created the wedding invitation myself I made sure to look that thing over a hundred times to make sure I left nothing off! So you can see it was a real DIY wedding.

Dress shopping was the best part of the entire planning procedure but the most hurtful to my purse. She picked a beautiful gown with loads of lace and a vintage feel. We found a beautiful belt with loads of pretty crystals etc. on it and it cost a pretty penny but just made the dress even more beautiful. I about fell off my chair when finding out the cost of the gown but also the cost of alterations since it had over 8 different layers of lace and stuff in the dress. A wedding is something every mother dreams of planning with their daughters. But the joy you feel you will have doing it is a myth. It’s a lot of work, it is a lot of stress. But seeing your beautiful daughter in her gown makes it all worth it.

All of the things that I did to stay on top of things I couldn't have done without using my planner. The day went so quickly and the wedding was a blur but it was beautiful. She looked beautiful. We are still waiting for all the photos from photographer but thought I would share this pic of her and her bridesmaids. I love this girl <3


A Creative Christmas Layout

By Kristan Kremer
on December 09, 2016

Hello, Planner Friends! I am so excited to share this Christmas week layout with you. I love Limelife planners for many reasons, and for this blog post, I will be focusing on the amazing paper. Last year I used layout C, which I love because it’s so easy to have sections for each family member. But I wanted to try something new this year, and I went with the new layout L. I am so happy that I went with this layout, it has been so fun to try new things. My planning style is creative but functional. I have to be able to see things easily. I only ever post before-the-pen layouts because the pages are bursting with sloppy handwriting by the end of the week and are not as pretty to look at! So let’s get started and I will explain how I created this layout.


I wanted to do a snowy background and border around my pages, but I didn’t have any washi tape for this. A very easy way to create the snowy background is to use an ink dauber or makeup sponge, and blot all around the border using a dark blue ink. In the above photo, you can see how I masked off the pages so I could quickly ink with my blue pigment ink. Limelife paper is so thick and so smooth, the ink goes on easily, is blendable and does not bleed through. Pigment ink is my favorite to use, but chalk ink and distress ink works well also. I always experiment on my notes pages to make sure I like what I’m going to do before I actually do it.  Make sure you are NOT using dye ink. After doing my border and background, I put my decorative stamp that I had colored and fussy cut out in my notes section. Next, I used a white gel pen to create snow by just making little dots all over the page. Of course, the paper holds up beautifully to this as well.

I love how I can stamp images right on to the Limelife paper and then color them in with colored pencils. The paper is perfect for pencils, it blends easily.

I stamped this “Joy” stamp using VersaFine black onyx ink, and waited about five minutes for it to dry before coloring it with pencils. When coloring on Limelife paper, I have found that I am able to shade really easily by blending out using the blending pencil, so not a lot of time is needed to get a very pretty effect. With the reindeer in the photo below, I colored the whole image light brown, and then colored  dark brown around near the lines of the stamp and then using the blending pencil, blended out giving it added  detail and shading. I am terrible at knowing the ‘correct’ way to shade, but I go with what I like and try not to worry about it too much, and I encourage you to do the same. It’s your planner, have fun, try new things, and do what makes you happy!

The white gel pen is one of my favorite ways of adding those finishing touches to my stamped images, along with glitter pens! As always, the paper does great with gel glitter pens! I went over the colored pencil with glitter pens on the Christmas ornaments to give an extra sparkle and pop.

To complete my layout, I then did my functional stamping. I customized my stamps to this layout by choosing colors that went with my decorative stamping. Layout L is so fun because I can divide up the boxes in fun ways. I used Christmas Lights stamped in the boxes this week to divide up our mornings and evenings. I just feel like I have so much room to play with layout L. Here is the completed weekly layout!

I hope that I have inspired you to try new things in your planner. The holidays can be super busy, and I know it can be hard to find time to plan.  I hope that everyone is able to take a bit over the holiday season and be able to have some planning time and try new things.

Merry Christmas and Happy Holidays to all!

~Lindsay         IG: @glam2plan_pnw


Easy DIY Christmas Gift You can Make with Kids

By Kristan Kremer
on December 02, 2016

Easy DIY Christmas Gift You can Make with Kids

Easy DIY Christmas Gift to make with Kids

DIY gifts can be the cutest, most thoughtful gifts to give. Something made by someone you love is special on so many levels. But what about those of us who aren’t especially gifted in the talent of DIY?  Hi, my name is Candice and my hands won’t do what my brain wants them to when it comes to crafting.  It’s not that I don’t want to craft. I do.  It’s just that, well, my creations usually end up looking like those Pinterest memes – “How it looks on Pinterest [perfect] / How it looks IRL [barely recognizable].”  It’s also difficult to get time alone to focus on a DIY activity with a little one running around.  So, my DIY activities must have the following criteria; be easy-peasy and be something I can make with my son. If you’re in the same boat as I am or if you’re looking for a fun holiday craft to do with your kids, check out the DIY gift below.

Easy DIY Christmas Gift to make with Kids

No-Bake Cinnamon Clay Ornament

Do you remember these?  I made these as a kid and they STILL smell deliciously warm.  There is something so inviting about the scent of cinnamon during this time of year.  These ornaments are easy to make, hard to terribly mess up, and edible (for those little ones who seem to put everything in their mouths).  

Ingredients

  • 1/2 cup of salt
  • 1 cup of flour
  • 3/4 cup of warm water
  • 1/2 cup of cinnamon

Directions

Mix all ingredients together

With dry, clean hands knead the dough until it is completely mixed.  Dust your hands with flour if the dough is sticky

Place the dough on wax paper and roll out using a rolling pin

Use cookie cutters to cut out the ornaments

Poke a hole at the top of each ornament (large enough to string ribbon through)

It takes about 24 hours for the ornaments to dry.  Once that is done you can string the ribbon through, hang on the tree, or give to a friend, family member, or neighbor as a gift.  Easy-Peasy!

Featured Product: Happy Holidays Planner


Limelife Planners Black Friday Sale 2016

By Katie Poppe
on November 25, 2016

Black Friday Bundle!

black friday bundles

Get your Black Friday Bundle featuring new notebook and sticker designs! Each bundle includes a spiral bound notebook, 8x10 inch paper pad, 4 sheets of stickers and a wall calendar. The bundle is worth $65, but we will be selling them for only $50! We have a limited supply so be sure to get shopping early! Bundles will be available at 7am EST on November 25th.

Black Friday Sticker Sale!

Black Friday Sticker Sale

All stickers will be $1 per sheet starting on Black Friday. Seriously. This is your last chance to purchase our current sticker designs, so grab them now.

All Interchangeable Covers: BOGO!

Black Friday Interchangeable Covers Buy One Get One Free

All Interchangeable Covers will be buy one, get one free on Black Friday! We will also be debuting 15 new Interchangeable Cover designs so you'll want to take a look and pick up some of your favorites.

Introducing our new Media & Creative Team!

By Kristan Kremer
on November 01, 2016

We are so proud to announce the new Limelife Media & Creative Team for winter 2016/2017! Back in August, we put out a call for applications, and let me tell you, it was tough to choose!

Ultimately we chose a group of talented ladies that are sure to inspire you. Our team uses a variety of planning styles and products so you can get an idea how our line of customized planners, notebooks, and accessories will fit in with your busy lifestyle.

So without further adieu, please allow me to introduce our new Media & Creative Team members!

Candice

Candice is a wife, mom, and freelance writer living in the beautiful Sunshine State - Florida. She loves all things beauty related and is forever grateful for her crockpot. She also runs a mom/lifestyle blog called Mommy Diaries (Of a Florida Mom) where she covers everything from parenting to beauty to travel.

Follow Candice:

Blog
Instagram @floridamommydiaries
Facebook

Jamie

Jamie is a momma of three, photographer, wife and business owner in chicago, IL. She designs handmade shirts and printables available in her Etsy shop. She also documents her photography and other mommy things on her blog. She enjoys walking, designing, writing, Netflix and wine. She's obsessed with coffee (Starbucks), lists and the color pink.

Follow Jamie:

Blog
Instagram @revealphotogbyjme
Shop

Lindsay

Lindsay is a wife, stay at home mom to two wonderful boys and former therapist who has a passion for all things planner related and creative. Lindsay is also the vice president of the PTA at her children’s school and the Watch DOGS coordinator for the school as well. She was born and raised and continues to live in beautiful, rainy Oregon and loves the overcast skies and that Oregonians have about 100 different ways to describe rain. Lindsay has been part of the planner community for about 2 years now, and started planning with paper when life got so busy that managing it on the phone calendar became impossible.She loves combining functional planning with decorative planning. She a firm believer that it’s not so overwhelming to see the craziness of life when it is stamped out and written down in a beautiful planner!

Follow Lindsay:

Instagram @Glam2Plan_pnw
Pinterest

Debbie

Debbie is a retired business woman, a wife, and mother of one grown daughter. She is very ambitious, creative and a person who loves to help others. She is an avid crafter and makes lots of planner related items and runs an Etsy shop. She loves to travel with her husband and two furbabies. She loves Diet Mountain Dew and anything humorous because she loves to laugh.

Follow Debbie:

Blog
Instagram @craftinchaos
Facebook
Shop

Be sure to follow Candice, Jamie, Lindsay, and Debbie because you don’t want to miss all the amazing things they have in store for you. Plus, they all have referral links that will give new customers $10 off their first purchase at limelifeplanners.com.

How to Organize Your Day + Notebook Sale!

By Kristan Kremer
on October 17, 2016

How to Organize Your Day

The Limelife Planner Daily Notebook has been a game changer for organizing my day, so I thought it’d be fun to give you a peek into how I use it to stay productive. I am currently using the Layout 2 version to keep track of everything I need to do on a daily basis. 

Limelife Planner Daily Notebooks are a great way to organize your daily routine.

My Layout 2 notebook is my lifeline for the day. On the top right of the page, the priority box keeps me on task. It’s important for me because I can easily get lost in all the little tasks that need to get done throughout the day. I feel better about my day when my priority task gets completed, despite how many of my other tasks get done (or not).


Below the priority box, there is a spot for a list. I use this space as a to-do list (though I know some people use it for a grocery list or even notes). On this list, I note daily recurring tasks, such as laundry and dishes, as well as other tasks I might need to get done that day. Sometimes I add subtasks to this list that support the priority task.

Limelife Planner Daily Notebooks are a great way to organize your daily routine.

When I start a task, I check the box. This signifies that something is happening, but the task is not complete yet (for example, laundry is started, but hasn’t been folded and put away). When the task is complete, it gets marked through with a line. If there’s a task that I don’t get to (and there usually is), I highlight it to draw attention for the next day.  

On the left side of the page, there are three boxes with flags. I use the top one to note any events happening that day. I use the next two flag boxes for any other events or errands I have going on that day. Sometimes I put dinner plans in there as well, but to be honest, lately we’ve been relying quite a bit on convenience food while my husband is traveling.

Limelife Planner Daily Notebooks are a great way to organize your daily routine.

The next part is my favorite! Below the flag boxes, there’s one large box. I use this section for bible study. If bible study is not your thing, you could use this space for an inspiring quote or even a doodle of the day.


The great part about this notebook is that it's not dated. If I have a blowoff day where we just sit around and don’t do a thing, I don’t have to waste a page. Same goes for those days where I’m running a mile a minute and don’t have time to stop and write down tasks.

Limelife Planner Daily Notebooks are a great way to organize your daily routine.

And of course, since it’s Limelife, the notebook has room for customization. In addition to choosing from three great layouts, I was able to add a beautiful blue floral cover (Willa) with my name on it.


I hope you enjoyed this peek into how I plan my day with my Limelife Daily Notebook! To make it even sweeter, I wanted to let you know about a great sale - starting today, the Daily Notebook and ALL OTHER notebooks are ON SALE! That's right, 20% off, no coupon code needed. This is an amazing deal, so make sure to scoop up a few!

Shop notebooks here.

Shop specialty notebooks here.

This post was written by Kristan Kremer for the Limelife Planners Media & Creative Team. For more information about Kristan visit her on Instagram @kristankremer. Please share and repost this blog entry with your friends! All we ask is that you give credit to Limelife Planners and the post author.

How To Use a Planner for Blogging - Limelife Planners Layout C

By Kristan Kremer
on October 03, 2016
1 comment

How to use a planner for blogging

A little while ago, I showed you how I use my Limelife Layout C to organize my schedule. If you missed it, you can check it out here. Since I wrote that post, I’ve discovered that Layout C is absolutely perfect for organizing all the tasks that go into blogging. I have been trying to take my blogging game to the next level, so it’s nice to be able to see my blogging week at a glance. There is a lot more that goes into to blogging than one might think, so staying organized is crucial to make sure nothing gets overlooked. Here’s a look at how I am currently using my Layout C for blogging.

how to plan blog posts


Sidebar Area

In my sidebar, I like to keep track of daily habits. It takes less space here to make a little weekly checklist for things I want to do every day. Mostly these tasks are social media related. Limelife Sticker Stamps include the cutest little social media icons that are perfect for adding a little flair to this area.


I also like to have an idea of what is coming up in future weeks because I am usually working on those posts in advance. This saves me from having to flip back and forth. Staying organized and efficient helps me get ahead on my blogging, which helps it stay fun instead of stressful.

how to organize blogging tasks


Categories

Next, I have my six categories. I just hand write them in now, but once I get my Silhouette figured out, I want to make some label stickers to add some personality and save time. Here’s a breakdown of how I’m labeling my categories:


  1. What’s publishing (blog posts or YouTube videos)
  2. Networking (link parties, promo days, events, etc)
  3. Content Creation (outlines, writing, photos)
  4. Social Media (scheduling reminders, comments)
  5. Blogkeeping (behind the scenes blog tasks)
  6. Life + Misc (plans for the day so I have an idea how much time I can work)

Batching

I like how my Layout C lets me batch my tasks. I have found that working on similar tasks all at once helps me be the most productive. As a busy stay at home mom with a couple of businesses to run and a couple of blogs to write for, productivity and efficiency are key to making sure I get the things done I want and need to get done. Each day I spend a certain amount of time working on each category. And for content creation, each day is dedicated to a certain subcategory. For example: When it’s time to work on content, I know exactly what to get started on depending on what day of the week it is. Here’s my breakdown:


  1. Mondays - Brainstorming ideas and writing outlines
  2. Tuesdays - Draft posts from the previous day’s outlines
  3. Wednesdays - Format posts from the previous day’s drafts
  4. Thursdays - Take and edit photos and make images for social media
  5. Fridays - Miscellaneous and catch up


How to plan blogging calendar


I also use my Daily Specialty Notebook (Layout 2) to help me plan my day a little deeper (I include personal and household stuff here too - stay tuned for a post with an in depth look!). So there you have a little sneak peek behind the scenes of how I organize blogging with my Layout C. Do you have a separate planner for your blog, work, or business? Which layout do you love to use for it?

Cart Summary

Your cart is empty

About

Life is better when you're less stressed and more organized. This is at the core of what we do and what we believe. We know that there's no better...

Read more →

/************blog*************/ .article-body p a, .article-body ul a, .article-body ol a { color: #add461; } .article-body p, .article-body ul, .article-body ol { font-size: 16px; } #article-body p a, #article-body ul a, #article-body ol a { color: #add461; } #article-body p, #article-body ul, #article-body ol { font-size: 16px; } .codebox { padding: 10px; border: 1px solid #555555; max-width: 100%; word-wrap: break-word } .typewriter { font-family: "Courier New", Courier, monospace !important; font-size: 12px !important; } .bloglovin { text-align: center; margin-bottom: 20px; } .article-image { display: none; }