FREE SHIPPING on all orders over $75!

DIY Watercolor Planner Stickers

By Katie Poppe on July 25, 2016

Watercolor is having a major moment. Make one pass through the planner community feed on Instagram and it will be obvious! There is a reason for all the love...watercolor paints create beautiful designs.

You don't have to be an artist to get the look, either. One of my favorite things about watercolor is how forgiving these paints are. It is super simple to create effortlessly beautiful works of art. I'm serious, anyone can do it.

You don't need fancy supplies either. My paint set is Artist's Loft from Michael's and I'm certain I bought it on clearance about 3 years ago. I use any brush I can find in my mess (keeping it real, things aren't always as tidy as you see on social media!), but the one in the pictures is a Pentel water brush.

So what are you waiting for? Flex your creative muscles and try watercolors the next time you want to try something different. Here's a fun project to get you started.

DIY Watercolor Planner Stickers

MATERIALS

Limelife Planners Sticker Stamps Sheets:
Watercolor paints
Brush(es)
Water

    Simply pick your favorite colors and get painting!

    To create an ombre effect, start at one side of the with a small amount of paint, and drag your brush across without adding more paint. The color will deposit bold at first and start to fade as you drag your brush. If it doesn’t give you the desired effect, you can paint the whole sticker and then add more paint where you want it darker.

    To create a blended effect, choose two colors and add a small drop of each to your sticker. Lightly combine them using the tip of your brush.

    Allow the stickers to dry completely before using in your planner. You can write or stamp on them too!

    Want the lovely watercolor look without all the work? You're in luck! Grab some beautiful watercolor planner stickers in the Limelife shop!

    This post was written by Kristan Kremer for the Limelife Planners Media & Creative Team. For more information about Kristan visit her on Instagram @kristankremer. Please share and repost this blog entry with your friends! All we ask is that you give credit to Limelife Planners and the post author.

    Staying Focused on Your Health and Fitness Goals

    By Katie Poppe on July 19, 2016

    Making a lifestyle change is hard. It seems like we’re already busy enough with life as we know it, and then we have to change things up to make our health a priority. It takes a lot of planning and getting organized to make positive changes for the long term. Here are some ideas to help you stay motivated and focused on your health and fitness goals.

    Define your Goals

    One of the biggest hurdles to achieving goals is making them too unrealistic. Sure, it’s great to reach for the stars. But how will you get there? Make SMART goals. What are SMART goals you ask? Why, they’re only the best way to stay motivated!

    SMART Goals Are:

    Specific - instead of saying “I want to be healthier”, dig deeper. Be specific. Try “I want to learn yoga” or “I want to drink an adequate amount of water every day”. Specifying what you really want will help make it clear how to get there.

    Measureable - make a goal that you can track. Using the water example above: “I want to drink 80 oz of water every day”. You can literally measure out that water every day to determine if you are on the right track.

    Actionable - can you actually DO SOMETHING to achieve your goal? Using the yoga example, you can learn yoga by taking a class or watching a video.

    Relevant - does it really matter? That sounds harsh, but let me use one of my own desires as an example here. I would love to fit into a size 6 again. But does that really matter to my health? No. But doing things like taking up running and starting a weightlifting routine might help me fit into that size 6 one day. So I have reframed my goal to “register for and run a half marathon”. Will my jeans size make me healthier? No. But running will.

    Time-Bound - Have you heard the saying “A goal is a dream with a deadline”? Napoleon Hill said that (worth Googling if you are into reading about success and positive thinking). Give yourself a deadline. If you don’t have a due date, how long will you continue? A deadline will help you stay motivated.

    Track goals in your planner

    There are so many ways to track your goals in your planner. I love using functional stickers and stamps that I can fill in with my progress. This keeps me so motivated!


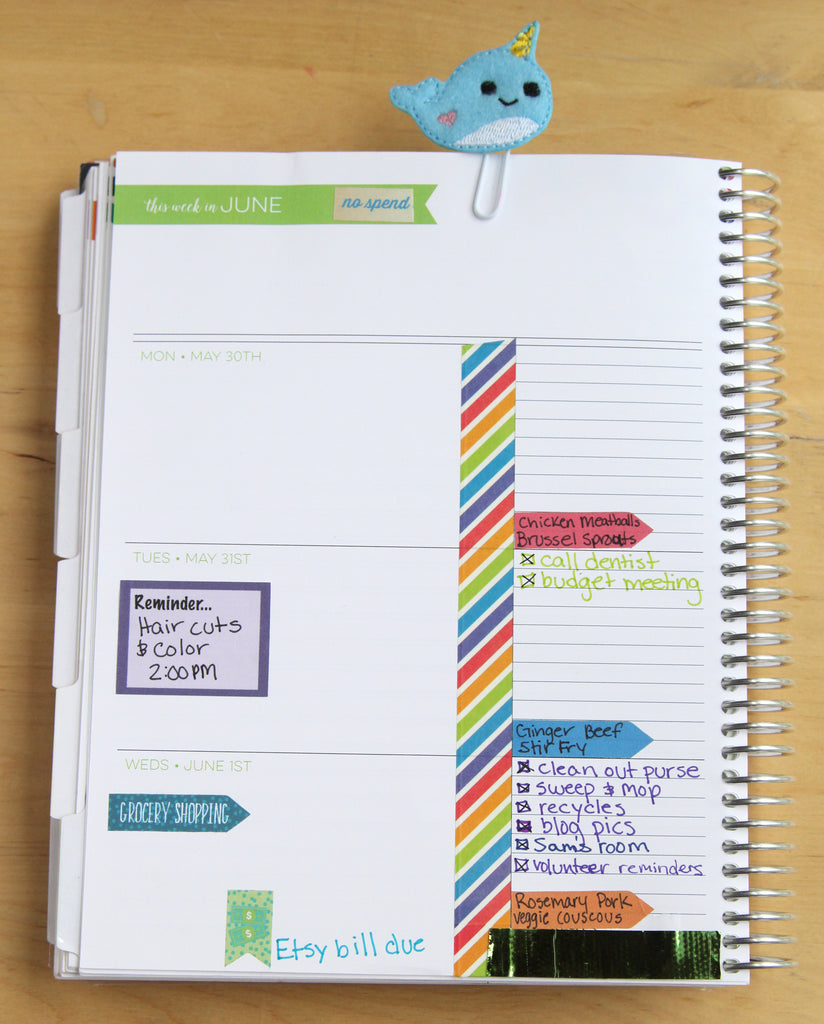
    In my Layout C weekly planner, I use one of the rows just to plan out fitness routine. I usually lift weights on Monday, Wednesday, and Friday, and run on Tuesday, Thursday, and Saturday. I have been playing with some stickers to keep track of everything I do.

    You can track water intake with the water droplet stamp from the Limelife Sticker Stamps Set #1. I like to ink it up, then stamp it once on scratch paper, then stamp it in my planner so that I get a “ghosted” image that I can then color in as I drink my water. One droplet = one glass of water!

    Another way to track your progress is to log your food intake. Many people already make notes about their dinner menus in their planner already. Take it a step further and plan out all of your daily meals ahead of time to stick to your nutrition plan. The Limelife Little Bit of Everything Stamp Set includes the most adorable fork and spoon stamp that is sure to make this task more enjoyable.

    Have you seen the Limelife Fitness Add-On? It’s got everything you need to help you track your progress and reach your goals. You can add it to your planner or a notebook. I’m going to order a pretty notebook to journal about my fitness journey and add the Fitness Add-On to it. The lined pages of the notebook will be perfect for documenting my progress for weightlifting and running.

    Don’t be shy

    Health can be a touchy subject. Everyone has different ideas about what is healthy. It can also be nerve wracking to make it publicly known that you want to lose weight, or that you need to develop better habits. But connecting with other people helps to keep you interested, motivated, and focused. Having a support system is helpful for those times when you feel frustrated or discouraged. And it also comes in handy when it’s time to celebrate those goals you’ve achieved. You can go big or keep it intimate. Some people start blogs or Instagram accounts to chronicle their health and fitness journey. Others just text a friend when they need to borrow some will power. So grab a friend or two or a hundred social media followers. Share your journey and keep the motivation coming. You never know who you’ll inspire with your story.


    How do you stay focused on your health and fitness goals?

    This post was written by Kristan Kremer for the Limelife Planners Media & Creative Team. For more information about Kristan visit her on Instagram @kristankremer. Please share and repost this blog entry with your friends! All we ask is that you give credit to Limelife Planners and the post author.

    Interchangeable Cover Storage

    By Katie Poppe on July 18, 2016

    Greetings, Limelifers! I'm on my second Limelife Planner and every time I shop, be it for a planner or a notebook, I'm tempted by all of the gorgeous interchangeable cover designs in the shop. There are five new ones since Friday and with the birthday sale that ends TODAY, you can get three free covers when you spend $55 with the code IC3FORFREE. Exciting!

    So, what to do with your covers when they aren't on your planner? I wanted to share a simple storage solution. I have a spare coil that I snap them on so they all stay together. Limelife Planners sells extra coils in the Planner Add-Ons section of their shop. 

    Each coil bound planner and notebook comes with a permanent cover, so the interchangeable ones just snap on over it. I've taken a close up picture to show you the difference, because a lot of people have asked.

    The permanent cover design goes all the way to the edge, while the interchangeable covers stop before the edge, so that the lamination lasts over many snaps. Because of this, when an interchangeable cover is on, you can see a little bit of the edge underneath, but it doesn't bother me. If you'd like to turn your permanent cover into an interchangeable one, just snip the edges and pop it off.  Remember, Limelife is great about making custom changes, so you can get any cover design on any spiral bound order - just leave a note at checkout. As you can see, I've personalized some of the quotations on mine.  

    What designs do you have? Leave me a comment and let me know your favorites!

    This guest blog post was written by Amanda Cahill, mom, friend, and Limelife Planners blog contributorPlease share and repost this blog entry with your friends! All we ask is that you give credit to Limelife Planners and the post author.

    A Quote A Day

    By Katie Poppe on July 08, 2016

    Part of planning for me includes the few moments of 'zen' I can give myself, each and every day.  Everyone has a different thing they do for themselves - whether it's a cup of coffee, a long bubble bath, some 'me' time... Planner girls, though, seem to lean into their daily planners for those brief moments of reflection and self-inspiration.  For me, it's been my daily "quote of the day" space in my Layout C.  Layout C is the best for me because I have so much going on, and like to have a box for meals, and for school - but my last remaining box is all mine.

    The quotes I choose vary depending on the day I know I'm going to have, or the day I've already had.  I find myself writing the quotes in a different times throughout the day - but always when I need a little boost, or a moment of reflection.  Lots of my quotes tend to be motivational, in whatever way speaks to me. A lot of the time I use them to light a fire under my own butt.  

    Sometimes, though, they're little reminders for me to hold on, take a deep breath, and remember that everything is cool. J* and I are officially house-hunting right now, and it's been an incredibly stressful couple of months.  Also, in classic 'English teacher nerd' spirit, some of my quotes find their way from my favorite literature - in this case, two days of this recent week in my planner have been two parts of the same quote from Lord of the Rings.

    Seeing the quote in there daily as I referenced my planner helped to keep me on track. It'll be fine - you'll find a place to call yours, and not all who wander are lost!

    In talking to some of my favorite planner ladies on Facebook - shoutout to the We Love Limelife Group and my New England Planner Girls!! - I was asking them what kinds of things they did daily for motivation, using their planners or Bullet Journals!  We came up with a great list together :) 

    VARIATIONS ON DAILY DEVOTIONS IN YOUR PLANNER:

    1. Choose a quote a day to inspire you!
    2. Save your Fortune Cookie fortunes and write them down! (Krystani)
    3. A bible verse a night! (Christa)
    4. "I have a notebook that I started recently as an inspirational/motivational catch-all! Lettering, special phrases and pictures, etc." (Sara)
    5. A "daily gratitude" entry in the sidebar. (Nicole)
    6. "My friend cuts clippings from magazines that inspire her and glues them to a board. Could easily put them on a notes page!" (Leslie! <3)

    How do you use your planner for daily inspiration? Share with me in the comments!

    This blog post was written by Keri Thivierge for the Limelife Planners Media & Creative Team. For more information about Keri visit her on Instagram @steviedplans. Please share and repost this blog entry with your friends! All we ask is that you give credit to Limelife Planners and the post author.

    How To Organize Your Planning Supplies

    By Katie Poppe on July 06, 2016

    We have all drooled over the beautiful crafting and planning spaces that we see on social media. Gorgeous desktops display a plethora of thoughtfully arranged planning supplies. A bounty of different planners neatly grouped on bookshelves. Have you ever thought about setting up a space like that? It can be overwhelming to get everything in the right place, but in this post I’ll share some organizing techniques for planner supplies that will have you drooling over your own pretty planning place.

    Caddies

    Use caddies and organizers to keep your items in line. The obvious choice for the task would be the desktop caddies found in the office section. I’m using this one to organize my stamping supplies and in view so I remember to use them. The drawers hold the things I don’t use as often, such as extra planner bands and paper clips.

    Get creative when searching for something that will work. Here I used an old silverware drawer organizer to keep my pens together in a drawer, but separated so I don’t have to dig for just the right one.

    I’ve also used a makeup counter organizer to keep pens, washi, and sticky notes within reach on my desktop. And this little guy is a business card holder, but it has found new life as a sticky note holder since it is the perfect size for the Target Dollar Spot sticky notes.

    Baskets

    These shallow baskets are just the right size to hold most sticker sheets inside my drawer. I have two, one for functional stickers, and one for fun stickers with others that I don’t use as often below. They’re great because they are small and portable, so I can take them out of the drawer if I want to plan on the patio.

    Dishes

    If you’re anything like me you have an attraction to cute dishes. There always seems to be a cute bowl in the clearance section. Currently I’m using some of my milk glass collection (I think they might be candy dishes, but I’m not sure) to hold my washi on my desktop. I used to keep the washi in the silverware drawer caddy with my pens, but I like it so much better on display. I also use a vintage milk glass loaf pan to keep note cards and stationery organized.

    I hope some of these ideas were helpful. Getting your space organized and ready for planning will help keep your creative juices flowing. What is your favorite organizing tip for planner supplies?

    This post was written by Kristan Kremer for the Limelife Planners Media & Creative Team. For more information about Kristan visit her on Instagram @kristankremer. Please share and repost this blog entry with your friends! All we ask is that you give credit to Limelife Planners and the post author.

    Meal Planning Made Easy

    By Katie Poppe on July 05, 2016
    2 comments

    Good news! Meal planning is a lot simpler than most people think and it requires just a little time and effort. What’s the best way to start meal planning? Just start! There’s no right or wrong way to do it. The best method is the one that works for you. With a few simple systems in place, you’ll be all set for success!

    Here are 3 reasons I meal plan:

    1. It saves me time.


    I grocery shop once per week and I can usually be in and out in 20-30 minutes. As someone who grocery shops with a toddler, this is amazing. Even if you don’t grocery shop with a tiny “helper,” who doesn’t want extra time for the things you really want to do?

    I know exactly what I need so I don’t spend hours wandering the aisles and I don’t have to try to figure out meals on the fly. I save time at home as well because I know what’s for dinner. No digging in the fridge and pantry trying to throw something together. Prep work (chopping veggies, marinating meat) can be done ahead of time, like in the morning or on the weekends, to save extra time in the evenings when things are more hectic.

    2. We eat much healthier.

    Before meal planning, it would be 4:00 pm and I still didn’t know what we were having for dinner. I usually had food in the house, but the meat might not be thawed or I might have just bought things willy nilly while I was at the grocery and not actually have the ingredients for any meals. There were a lot of drive thrus, a lot of pizza nights and a lot of cereal for dinner. Planning healthy meals ahead of time keeps our family on track with our goals for healthy living.

    3. It saves us money.

    Impulse buys can be super easy if you step foot in a grocery store without a plan and a list. The stores are actually designed to make us buy things we don’t really need.  I take my notebook with my Meal Planning Add-On Pages to the store with me and I stick to my shopping list. Please keep in mind the pictures I'm sharing in this post are of the older version of the add-on, you can see the new design if you click here.

    I usually meal plan on Sunday and use store circulars to plan our meals around what’s on sale. This way, I can get the most bang for our buck. Besides the savings in the actual grocery, it eliminates the cost of those emergency drive thru or pizza trips I mentioned before.

    *****


    While I’ve been meal planning for quite some time, I started using the Limelife Planners Meal Planning Add-On Pages about six months ago. It has totally streamlined the process and made it even easier!  I love having my meal plan and my grocery list all in one place. I also really like having a place to write my grocery budget for the week as well as another space to write how much I actually spent.


    The boxes for each day are plenty big enough to plan main dishes and sides. I use it exclusively for planning dinners because our breakfasts and lunches are a rotation of very simple choices. If you wanted to plan all of your meals and snacks, there’s plenty of room for that, too!

    Another great feature of the add-on is the Family Favorites pages. If I get stuck during my weekly meal plan session, I can refer to these for instant inspiration. My pages are color coded by type of protein (chicken, beef, pork, vegetarian, seafood) and I used a separate color to designate crock pot meals. I also use these colors when I meal plan to make sure we have a good variety. If we have an on-the-go day coming up, I can quickly and easily pick out a crock pot meal. If we try a new recipe that we love, I add it to the Family Favorites pages so I can be sure to make it again.

    We’d love to see the ways you’re using your Limelife Planner and planner add-on to meal plan! Share your pics on social media and tag them with the hashtags #lovemylimelife and #limelifeplanners.

    This blog post was written by Katie Clark for the Limelife Planners Media & Creative Team. For more information about Katie visit her on Instagram @katiedidproductions. Please share and repost this blog entry with your friends! All we ask is that you give credit to Limelife Planners and the post author.

    Launch Day + New Ordering Process

    By Katie Poppe on July 01, 2016

    Big, exciting changes have happened on the website!  To streamline ordering with our new product line, the website has had a facelift.  Planners can be customized using a “Build Your Planner” walk through that will look like this:

    Choose A Size > Choose Monthly or Weekly > Choose Design

    Notebooks, teacher planners, accessories, and other items will remain in their own collections so that purchasing experience will be the same as it is now.  Planner Add-Ons will also be on their own so you will have the chance to add those to your planner after it is built.

    Limelife uses the notes section at checkout extensively, so if you have a custom request, feel free to leave it there.  Remember to be as specific as possible, and if you want to geek out with font names and colors for your cover, go for it!  As always, there is no charge for a personalized cover with your name or favorite quotation. 

    Here is a table of the "Build Your Planner" options that are now available!

    Limelife recommends no more than three add-ons (except direct sales, that one is limited to one since that is by far the biggest) in a weekly planner and four in a monthly planner.  If you don’t like the feel of a bulky planner, consider getting an add-on as part of a notebook.

    I’ve seen a lot of people ask about daily pages.  Undated daily sheets are available in three daily layouts: 1, 2, and 3. They will be available in all sizes, but for traditionally coiled planners (8.5x11 and 7x9) they would be too bulky with our luxurious paper in a regular planner.  These can be purchased separately in a notebook, or you can organize a binder system to make an ultra-custom planner to suit your needs.

    A few last minute reminders…

    To try weekly layouts before you buy, click HERE.

    There are also a lot of free digital downloads, to see those, click HERE.

    There is a Facebook Group called “We Love Limelife Planners” that is not administered or officially sponsored by Limelife, but it is a great resource if you’re looking for like-minded planner friends or a specific question to be answered.  I am a frequent poster in the group as well as current and former members of the Limelife Media & Creative Team.

    Happy Planning!

    This guest blog post was written by Amanda Cahill, mom, friend, and Limelife Planners supporterPlease share and repost this blog entry with your friends! All we ask is that you give credit to Limelife Planners and the post author.

    You're Invited, and Twitter Party 101!

    By Katie Poppe on June 24, 2016

    In the spirit of Limelife’s upcoming launch – July 1st is just around the corner!! – we’re happy to announce that we’re hosting a Twitter Party Chat!  #soexcited #lovemylimelife #hashtagsareawesomeright?

    Limelife Media & Creative Team Member Kristan made the cutest announcement graphics for the chat, which you can check out just above. :) We’re hoping to get some Twitter Chat veterans, as well as some planner-loving newbies involved! 

    For those planner friends who have never participated in a Twitter Party/Twitter Chat, I’ve put together a ‘quick-start’ guide to get you rolling! The teacher in me is very, very happy with this, I have to admit. ;)  So sit down, take out your pencils and notebooks kids, because it’s time for a quick intro to Twitter Party 101!

    What is a Twitter Party / Twitter Chat?

    • A Twitter party is a live chat - using (surprise!) Twitter – about a topic!
    • A moderator develops a set of questions for the chat, usually 5-10 depending on time, and they assign a hashtag to the chat. Our hashtag for our party will be #lovemylimelife! The hashtag always connects to the topic of the party/chat.

    Why participate in one?

    • Twitter Chats are very easy ways to connect to like-minded people across the world! Social media is a beautiful thing.
    • You can increase your followers, and find other awesome people to follow!
    • Often, you learn lots of new things about people, brands – you name it! It’s incredible the things you can learn from people who participate in Twitter Parties. 
    • You can share images, too! ~ CRUCIAL for a planner-based Twitter Party, I think ;)

    How do I participate? – This is the important one!

    • Be at your computer, or your phone, at the time and date listed on the graphic above! That’s the easy step! :)
    • Keep an eye out for the hashtag the chat is using – again, ours will be #lovemylimelife. You can search for this hashtag in the Twitter search bar, and keep refreshing – OR use something like TweetDeck, which I’ll explain in a bit!
    • Wait for questions! During the party, the host(s) will ask questions about the topics.

    Questions will be formatted like this: 

    ~ Q1: What’s your favorite Limelife weekly layout? #lovemylimelife

    Participants in the chat will answer like this:

    ~ A1: Layout C! #lovemylimelife

    It’s CRUCIAL that you include the hashtag in every answer!

    That’s how everyone will see your responses!

    Any other tips for a fun time?

    • Get comfy, get a drink, settle in and get ready to go!
    • Introduce yourself when the moderator(s) ask for a check in!
    • Search the chat hashtag & refresh your search every minute! It can be tricky keeping up.
    • OR: TweetDeck is a free Twitter platform you can use to keep track of your chat hashtag. You can make a column JUST for your hashtag, and it will automatically update as questions are posted!  (But, refreshing the search works, too.)

    Hope to see you at our Twitter Party on June 30th!  Check out the invitation at the top for local times! Be sure to follow Limelife Planners on Twitter @LimelifePlans, and hosts @katiedidpro, @kristankremer, and me, @steviedplans.


    This blog post was written by Keri Thivierge for the Limelife Planners Media & Creative Team. For more information about Keri visit her on Instagram @steviedplans. Please share and repost this blog entry with your friends! All we ask is that you give credit to Limelife Planners and the post author.

    Organized Party Planning

    By Katie Poppe on June 23, 2016

    My only child graduated high school this May. We worked really hard to throw him a big graduation party with lots of friends and family in attendance. We booked a venue, got a caterer, and I spent months on DIYing the decorations. With a party of this scale it’s easy to lose your head and get overwhelmed. Being the planner girl that I am, I knew I’d have to utilize my planner to keep my head on straight! 

    I grabbed my Filofax with my Limelife A5 inserts and setup the perfect party planner. I pulled out several sheets of my note paper from the A5 inserts and created a section in the back of my planner for this project. The first thing I did was create a timeline of events and tasks that needed completed along the party planning process. I decorated it with graduation themed washi tape and a few stickers.  

    I knew I’d need a place to keep all the venue and caterer details. The venue we chose had specific requests to contact them 2 weeks prior to the party and 1 week prior to the party. Little notes and reminders were all jotted down on this page. I also created a section on the page with payment info. This way it doesn’t slip my mind who I paid what to where.

    You can’t plan a party without having a go-to contact list!  Once again I grabbed a page from my Limelife A5 inserts. This time I took a Contacts page. Here I kept all the addresses and phone numbers I would need. You could argue that I could’ve just put the venue and caterer contact information on the page designated to them, but I wanted all phone numbers in one easy location. What you don’t see in this photo is also the names, phone numbers, and addresses to the guests.  

    In the back of my party planning section I put a clear insert sleeve pocket. In this sleeve I put pages I printed out from Instagram for decoration ideas and a copy of the invitation. I also printed out the product pages from Party City with prices so I knew exactly what I wanted and how many so when I went to Party City to purchase the items, it would be a quick trip in and out. The party went on without a hitch I’m proud to say! However, I’m NOT proud to say that in the hustle bustle of the party I completely forgot to take ANY PICTURES! Maybe I should have written that reminder down in my planner…Haha!

    Have you used your planner for party planning? Tell me in the comments below how you organized your party planning in your planner!

    This blog post was written by Emilee Adams for the Limelife Planners Media & Creative Team. For more information about Emilee visit her blog at www.emileespeaks.com. Please share and repost this blog entry with your friends! All we ask is that you give credit to Limelife Planners and the post author.

    What To Bring To A Planner Meetup

    By Katie Poppe on June 22, 2016
    3 comments

    Meetups of planner ladies are becoming exponentially more popular thanks to Facebook. Pretty much every country/region/state/city has one, and what fun would it be if you didn't meet up with the locals for coffee and lots of planning?

    You shouldn't be afraid to go to your first planner meetup, even if you are going by yourself and you don't know anyone. All the ladies there have something in common, a love for planners and planner goodies. The way to make the most out of a planner meetup is to be prepared.

    But what do I bring? I highly suggest against bringing all 200 rolls of washi tape and your five sticker binders, but that is up to you. In all honesty, you may or may not be doing a whole lot of planning at the meetup, it may be more of a bonding event with 15-30 minutes allotted for group planning.

    But if you want to bring supplies, common things to make sure to have in your "planner bag" are...

    • your planner: You wouldn't want to go to a planner meetup without this. Whether you bring it to show off or publicly decorate, ladies will want to see it. Plus, you want to contribute to the awesome planner stack photo at the end of the day.
    • some washi: Washi samples are great for traveling planners (check out the Miss Engineer Designs Etsy shop for $1 washi samples). They are also nice to trade, so be sure to bring empty gift cards or something to wrap them around!
    • some stickers: Like I mentioned, you probably don't need to be carrying all five of your sticker binders around, but for planning time purposes, some stickers are nice to have. You can also share with other ladies at your table.
    • sticker remover: Not a complete necessity, but I always keep Un-Du in my planner bag.
    • pens: I always bring a ton of pens, even though I'm not going to use them all. At least no one will be asking to borrow mine. If you want to be super fancy, bring them in your Kipling 100-Pen Case.
    • an open mind: Be open for anything. No one wants drama at a planner meetup, so be prepared to make friends with strangers and have a great time.
    • swap items: Occasionally, a gift swap will be coordinated on social media before the meetup. It might be "Secret Santa"-style or completely random. You are not forced to participate in the swap, but you will only get a gift if you bring one.
    • destash items: Most meetups will also arrange a little area for anyone to drop off anything they don't want anymore (used or new condition). These items are free for all to pick at and take what they want, perfect for the thrifty planner. 
    • money: Whether you are getting coffee with local planners or prepared to buy something from someone, you don't want to be without your money. 
    • not your children or husband: I hate being honest (ok, no I don't) but I really don't like when people bring their children to "adult" functions. Also, your husband probably doesn't want to be there either. Take these couple hours with your new friends and have a mini mommy vacation.

    Now, I have seen people bring suitcases filled with planner supplies (shout out to the Central Ohio Planner Addicts Meetup in March 2015). I have also seen ladies just bring a purse and one planner. When packing your bag, just remember that there is a high possibility that you might be going home with more stuff than you came with, so be prepared for that. 

    Have you been to a local/regional/national planner meetup? What was your experience like? I'd love to hear about it in the comments.

    This blog post was written by Victoria Lee Werth for the Limelife Planners Media & Creative Team. For more information about Victoria visit her on Instagram @ohmissengineer. Please share and repost this blog entry with your friends! All we ask is that you give credit to Limelife Planners and the post author.