FREE SHIPPING on all orders over $75!

How To Add Temporary Tabs To Your Limelife Planner

By Katie Poppe on April 11, 2016

I am loving my new Limelife Planner in Layout C for organizing my days. As a mom that also runs a business, I’m so happy that I added on the Social Media Add-On Pages pack! Running a business means keeping track of lots of social media accounts and this add-on is perfect for that.

I find that I’m flipping through it constantly, so I thought I would add some tabs to save some time. Every second counts you know! 

SOCIAL MEDIA ADD ONThe Social Media Add-On has four sections in addition to the goals pages. I flip between the Instagram and Facebook planners constantly to check dates and mark things as posted.

I like to have easy access to the tracker page for the month because I like to add notes when something happens that might affect my stats. 

I didn’t want to add a bunch of bookmarks to add bulk. I also tried paper clips but they kept slipping off. So I got the idea to add some tabs. However, I wanted them to be removable since I would be using a new page each month. I tried stickers, but they were too permanent and didn’t remove cleanly from the page. (You can see my first try at adding sticker tabs in the photos above.)

HOW TO ADD TEMPORARY TABS

Then I remembered something we all probably have an ample supply of. Sticky notes! I have some long and skinny sticky notes that are full sticky on the back. Mine are made by Post-It, but I have seen Target Brand as well. They’re perfect size for folding “hot dog style” over the edge of the page. One snip down the center makes them the right width, and then I can get two tabs from one note. 

So simple and now I can move them to the next page when it’s time for a new month.

What about you? What is your favorite way to access a page quickly? Tabs, bookmarks, clips? Tell me!

This post was written by Kristan Kremer for the Limelife Planners Media & Creative Team. For more information about Kristan visit her on Instagram @pinkrosecompany. Please share and repost this blog entry with your friends! All we ask is that you give credit to Limelife Planners and the post author

Fun Spring Break Activities

By Katie Poppe on March 23, 2016

Wahoo! It's finally spring, which means spring break! As a stay at home mom, I'm sure I can relate to a lot of other moms by saying spring break isn't always a treat when you do not have plans to go on vacation. In Chicago, where I'm from, it will probably be cold and might even snow! As a momma of three, I will not be taking a vacation this spring break, but I have planned out a week of things to do to keep the kids busy and me sane! Depending on your location you could have a long list of possibilities to keep the family busy while the kids are on break so you do not loose your mind! I've compiled a list of activities for the home, outside the home, and even some crafts.

Places To Go

Local Libraries: We have a lot of great libraries by us and they have awesome kids areas.

Museums: A lot of museums have special free days and discounts during breaks!

Indoor Waterpark or Beach: Depending on where you live these could be an option, you may even start looking on groupon.com to see what discounts are available!

Pottery/Painting/Art Places: We have this fabulous place by us called Clay Monet! We just go in, pick out a clay piece and sit and paint. You are allowed to bring food and drinks of your own. This is fun as a family or even as a group! Again, Groupon is how I discovered this place.

Zoo: This is a favorite and go to for my family. If you have a pass, take advantage, get some fresh air and enjoy!

Bowling: We recently went with a group of friends from my son's school and had a blast! Afterwards, smoothies are definitely in order!

Indoor/Outdoor Parks or Play Places:

Like I said, we will be cold here in the northwest but even for some with younger children a play place is great because most are enclosed areas, moms and dads can sit and enjoy a cup of java and let the kids burn off energy! One place to look into if there's one in your area is Legoland! It's a little pricey but worth it! We are planning on spending the day there for sure during spring break. I found coupons at our local mall for buy one adult get a child free. Check out legoland.com. Pump It Ups and Jumpzones are other great places to go to, my kids love inflatables and again they do specials during days off school.

Movies: A good daytime (or nighttime) movie is always fun! If you look around at smaller theaters, you can get a ticket for $1 - $5, it may not be playing new movies but my kids love just going to the theatre. It's probably the popcorn that excites them the most!

Forest Preserve/Nature Walk: As a photographer, this is a great way for me to get out and look for new locations, and snap candids of my babes. My kids love to collect things out in nature. I usually give them a large ziplock bag and a list. Then when they get home they like to look at everything they collected and glue it to paper or make a craft.

One Night Overnight at a Hotel: Again Groupon or livingsocial.com have great deals.

Day of Service: Now, you might be looking for something to do that will allow you to give back to the community, We are doing a day at Feed My Starving Children: http://fmsc.org/. I like to do something to give back and teach my kids about giving back. This organization is fun and local for us. Some others to look into are food pantries, volunteering at animal shelters, or even helping a neighbor out.

Things To Do At Home

Make Slime:

My kids love slime, what's better than making it?! It's simple and fast and three ingredients! This is the recipe I use: Glitter Glue 1/4 cup of water 1/4 cup liquid starch Mix and hand toss until stretchy

Make A Garden (indoor or outdoor): A cute idea is to save an egg carton and grab some dirt and seeds and label using Popsicle sticks. This way when it's warm enough it's easy to transfer.

Otherwise, the dollar store and Walmart have small pots to plant in, to make each kid's garden unique and allow them to paint or draw/decorate their flower pot. The dollar section at Target also had some available that were cute.

Make A Bird Feeder: This is a great DIY bird feeder that I've used in the past. It is super easy and the birds can eat all of it. Check out the tutorial here: http://raisinglittlesuperheroes.com/homemadebirdfeeder/ Toast, peanut butter and bird seed is all you need.

Bow Tie Butterflies: Using pasta, paint and glue you can make bow tie butterflies!

My kiddos love to play with their food so why not, right? http://www.craftymorning.com/bow-tie-noodle-butterfly-craft-for-kids/

Make An Indoor Fort: Get some blankets, chairs, pillows and start building! If you want a fort that lasts longer you can do what we did. We ordered a color/build your own rocket by Melissa and Doug! They have houses and boats, too. Amazon.com has the best deals!

I am a pinning queen so I would highly recommend you go on Pinterest and check out spring crafts! I hope this lists gives you some ideas of things to do if you're staying close to home this spring break. Happy spring!

This guest blog post was written by Jamie Lee, mother, entrepreneur and photographer at Reveal Photography. Please share and repost this blog entry with your friends! All we ask is that you give credit to Limelife Planners and the post author.

New A5 Dashboards and More!

By Katie Poppe on March 04, 2016
1 comment

New A5 Dashboards and More!

We have some great news. Many of our customers have been requesting A5 Dashboards to go along with their A5 Inserts and we are excited to announce they are now available for your purchasing pleasure! We have a lot of designs to choose from that you can mix and match with your inserts. You also get to choose how many holes you want punched so they fit your binder of choice.


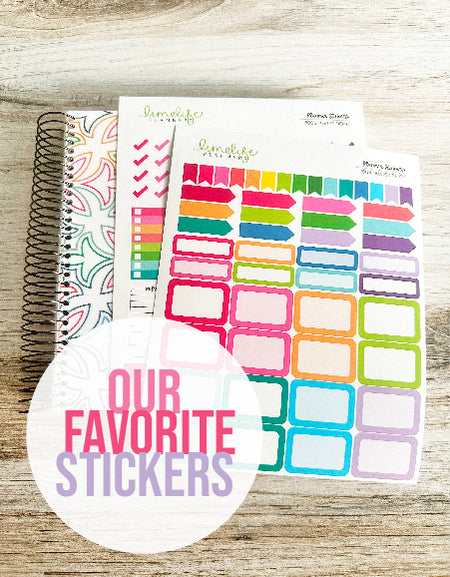
Coinciding with the launch of our website back in January, we launched some new products and some redesigns. Some of the most popular have been our new stickers. Limelife fans have been loving the Bright and Bold Stickers (and so have I!).

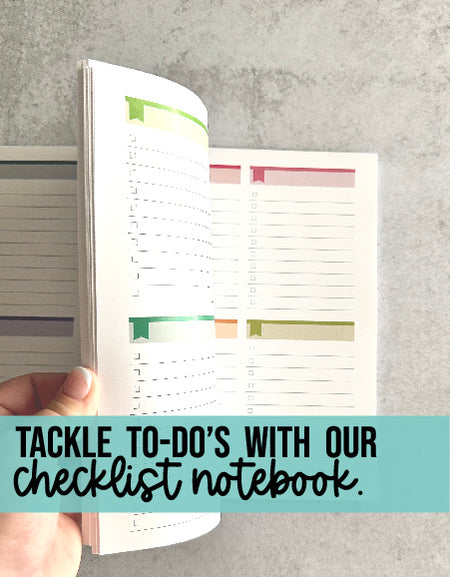
We also have some fantastic new add-ons, and we're especially proud of the redesign of our Checklist Add-On. Those of you who love lists, checking off your to-dos, or bullet journaling will love these. They're also available as a digital download so you can print your own out as many times as you like.


We have more new products to come, including our anticipated Teacher Planners this spring. What new products are you most excited for? Are there products you wish we offered that aren't currently in our shop? Let us know in the comments.


Write Stress Away

By Katie Poppe on March 01, 2016

Life is stressful and that’s just a fact of life. Stress levels rise dramatically due to things that are sometimes out of your control, regardless of how carefully you plan things. There is just so much to deal with: family, friends, shopping, meal preparations, job/career, seasonal changes, and inclement weather… The list just goes on and on. The unresolved issues fester and before you know it, you are tossing and turning at night.

There are many ways to alleviate stress, but an easy technique involves WRITING. Studies show that writing down your stressors and your emotions help because 1) you’re acknowledging your feelings and 2) you’re organizing your thoughts in a calm and peaceful manner, almost like meditating. An important caveat is that this technique may not be successful if you are dealing with Clinical Depression or other mental health issues. For such cases, please consult mental health professionals.   

Here’s how to get started.

Step 1 Find a cute notebook and a pretty pen. Forget decorating and the hoopla if you don’t have the time for it. The most important thing is to dedicate 10 minutes to writing at the end of your day.

Step 2 Create an environment that is conducive for writing. This sounds more complicated than it really is. Before you sit down to write, make sure you are free from distractions. Turn off the T.V. Put the technology away. Turn down the volume of your music, or if music is too distracting, turn it off. Light a calming candle. Get yourself situated in a comfortable writing position.

Step 3 Now, the hard part: the actual writing. There are three forms of writing that are particularly helpful when it comes to writing the stress away: Stream of thought, webbing, and listing. 

Stream of Thought

In this form you are writing a narrative in which you express your thoughts and feelings as they pass through your mind. Just like your mind wanders, your writing here will jump from thought to thought. You might start writing about your day and jump to writing about someone that angered you last week. Write about whatever comes to your mind. Focus on the things that are stressing you out. Focus on your emotions. Are you angry? Hurt? Disappointed?

Webbing

This is a brainstorming method, often taught in schools, for structuring ideas and facts. This form is helpful for getting your thoughts organized about an upcoming event. For example, a family dinner or party would be in the center bubble. There are so many moving parts to such an event. Those moving parts would be the spokes. Webbing is a great way to get your thoughts down on paper in the pre-planning stage.


Listing

The name gives it all away. Listing is an entry in a list or catalog form. When there is a lot going on, an easy way to organize your thoughts is to make a list. Listing is particularly helpful for to-dos, shopping and wishes. If you are using this form during “me time,” make a list of things you want for yourself. Maybe you need new shoes to replace those worn-out ones. Maybe there is a particular planner you want. (How you will work those purchases into budget comes later). The point here is to acknowledge your wants.

You may find that one of these forms is more suitable for the topic you want to write about. Don’t worry about which form you are using.

Step 4 Commit to writing. Of course it may not be possible to do this every day, but try every other day. Build it into your “Me Time.” This is for you. Don’t worry about your handwriting. Be honest. This is for your eyes only. No one is publishing this as a part of your memoir. If you are stuck, start by summarizing your day. Did something happen that stressed you out? You can focus on something that is worrying you. Maybe you had a good day. Write about that. Being thankful while writing about other problems is completely acceptable.


Ignoring the stressors in your life doesn’t make them go away. Writing is an easy way to acknowledge them and it doesn’t require too much exertion on your part. Sometimes your writing will surprise you; you might not have realized your true, underlying feelings about a specific person, an event, or even, yourself.

This post was written by Sadia Chowdhury for the Limelife Planners Media & Creative Team. For more information about Sadia visit her on Instagram @sadias_ruminations. Please share and repost this blog entry with your friends! All we ask is that you give credit to Limelife Planners and the post author

Media & Creative Team Call

By Katie Poppe on February 22, 2016

Media & Creative Team Call

Here we are, already seeking new talent for our third Media & Creative Team! Time has really flown this time around with the creation of our new website and introduction of new designs and products. We are so proud of what our team has shared (and continues to share!) and we are excited to see what some new talent will bring to our followers and customers.

Who We Want

We want passionate planners. We want the people that keep it simple in their planners, and the people that get creative. We want anyone who is passionate about productivity, goals, and the power of writing it down.

Stand out applicants will have:

Beautiful Photography

A lot of what we ask from you is pretty images. We love sharing your pictures of Limelife products on Instagram and we want to see your planning in all it's HD glory.

Creativity

By creativity we don't mean you have to be the next Michelangelo. What we really want is for you to have a creative mind so you can write about topics that you would want to read about. A big part of the M&CT job is writing blog posts. We want you to come to the team full of ideas on what you want to write and what images you want to share with our readers.

Passion

We want folks who are passionate about Limelife Planners. We are proud of being a small business. We are proud to create products that help people achieve their goals. We want our Media & Creative Team members to feel the same way.

How It Works

In exchange for us sending you Limelife Planners goodies, you will write blog posts and share Instagram images of your Limelife "stuff."

Responsibilities

  • Write three planner/organization/crafty related blog posts per month (dates will vary and can be set up to accommodate your schedule. We will also work with you to come up with blog topics if needed). 
  • Share at least 4 of your own images per month on your personal Instagram account, and tag #lovemylimelife, #limelifeplanners, #limelifeplanner. Most of the time we will be "re-gramming" these images on our Instagram (@limelifeplanners).
  • Email Katie with a headshot of yourself that will be used for our website and the footer of your blog posts (media@limelifeplanners.com). 

In return, you'll get a FREE Limelife Planner of you choice as well as an advance sample of new products that we release during your time on our Media and Creative Team.

Media and Creative Team members are hired for 5 month contracts.

How to Apply

Email your application to media@limelifeplanners.com.

Include the following:

  • Name
  • Email Address
  • Social Links (Instagram, Pinterest, Blog, etc.)
  • Attach 3 of your best product images to the email.
  • Statement of Interest (tell us why you want to be on our team)

We will be choosing members by March 7th, and we are asking that you apply no later than March 4th at midnight. Good luck!

How to Plan a Busy Day

By Katie Poppe on February 16, 2016

You’ve been there before. Task Anticipation Paralysis—aka T.A.P.ped out. It’s when you have so much on your plate that you just…can’t. Before you toss your planner to the side and hop back in bed overwhelmed, try this manageable planning method. It’ll help you feel a litte more in control of that mountain of a todo list.

First, list all of your tasks for the day. This day-on-a-page planning page is available in the FREE! section of our website. Break big tasks into smaller chunks. “Clean kitchen” might sound like a ridiculous feat if you had a wild party the night before. “Wipe off counters, sweep floor, load dishwasher” is a group of more manageable tasks.

Second, estimate about how much time each sub-task will take. Write that down beside each task.

Next, schedule out your day into chunks. If you anticipate that your kitchen tasks will take 60 minutes, allot extra time for breathing room and a break in between tasks.

Decide what’s most important. If nothing else gets done today, what are the things that are absolute must do’s? Use a sticker, highlight, or stamp next to it-- like this Limelife “IMPORTANT” stamp.

Can’t fit it all into the day’s plan? That should be your clue that you’re putting too much on your plate. Migrate some items to tomorrow or completely take them off your schedule.

The important thing when tackling an overwhelming day is to be realistic. Know exactly what you can accomplish in the time you have, allow yourself some break time, and be aware of what’s most important. With a realistic schedule in front of you, you’ll move through your day feeling like you got this

This blog post was written by Meka Allen for the Limelife Planners Media & Creative Team. For more information about Meka visit her on Instagram @yespleaseplanning. Please share and repost this blog entry with your friends! All we ask is that you give credit to Limelife Planners and the post author.

Oh No! It’s Dinner Time! Meal Planning to the Rescue

By Katie Poppe on February 08, 2016

Has this ever happened to you? You get so caught up with your work that you completely lose track of time. You look at the clock and what do you know, it’s time for dinner. You quickly come up with an idea but when you check your refrigerator, you are out of some of the ingredients. Not a good start to dinnertime. 

Make stressful food preparations and mealtimes a thing of the past by giving meal planning a try. Limelife Planners has an amazing and easy-to-use Meal Planning Add-on 

The first few pages are dedicated to Family Favorites. Here I like to write down all the foods I like to make. I usually dedicate each column on a page to a specific type of cuisine. There’s a column for Italian dishes, another for Mexican and of course one dedicated to South Asian dishes. If I need in-depth instructions for a dish on this page, I will go pull it out of my recipe box. (I picked up these cards from AC Moore).   

I like to make to sure that I get in my recommended servings of fruits, vegetable, proteins and grains every day or almost everyday, if I’m being honest. To make it easier, I like to include information about the food groups that make up the meal on the Family Favorites page.  

Next to the name of cuisine, I include the nutritional information with color-coded dots. The light blue is for carbohydrates, magenta for proteins, green for vegetables, purple for fruits and orange for fats. For example, Baked Mac and Cheese with Broccoli, includes carbohydrates (the pasta), protein (the low-fat cheese) and vegetables (the broccoli). On the Family Favorites list, next to Baked Mac and Cheese with Broccoli listing, you will find a green dot, a magenta dot and a light blue dot.  

This may seem tedious but it makes life easier for me. When it comes time to plan out the meals for the week, I use the color-coded information to make sure my meals for the week don’t include too many servings of one food group and not enough of another.  

On Friday night or Saturday morning, I like to plan out the meals for the upcoming week. This works for me because I usually go grocery shopping on the weekends.  

Included in the Meal Planning Add-On, you will also find weekly meal planning pages that start on Sunday and end on Saturday. There’s also a handy grocery list column on the same page. I use the Family Favorites to come up with ideas when I’m stuck or if I want to change things up a bit. It’s such an amazing and easy reference tool. 

Once I plan out the meals for the week, I quickly go through the recipe to make sure I have all the ingredients. If I can’t remember the exact recipe for certain dishes, I usually pull out the cards at this point and clip them to the book for easy reference during that week. If I am missing something, I add it to the grocery list.   

Once the grocery shopping is done, I’m ready to go for the week. 

Meal planning is a great way to minimize your stress. It might be difficult to plan out the whole week, so start with a couple of days at a time. If you are grocery shopping on Wednesday, try planning out the meals for Thursday and Friday. You can pick up those missing ingredients during your trip.  

Not only does meal planning minimize your stress, but it also helps you eat healthier. When you plan out your meals for each day, you are less likely to overindulge on calorie-rich foods. I didn’t believe this until I started recollecting at night, what I had eaten that day. I realized I was eating way too many servings of carbohydrates without consciously realizing it. I was eating a bagel for breakfast, followed by pasta at lunch, and then rice and chicken for dinner. Talk about carbo-loading. Once I slowly started meal planning, I was eating better-balanced meals throughout the week.  

Give meal planning a try. It may seem daunting at first, but take those baby steps. You’ll minimize some of the stress and you’ll be improving your health. That’s a win-win.   

This blog post was written by Sadia Chowdhury for the Limelife Planners Media & Creative Team. For more information about Sadia visit her on Instagram @sadias_ruminations. Please share and repost this blog entry with your friends! All we ask is that you give credit to Limelife Planners and the post author.

One Simple Productivity Tip: The Timer Method

By Katie Poppe on January 27, 2016

You have a mile-long to-do list, a full day to get it all done, and a thousand distractions keeping you from being productive. This simple technique will get you checking off those tasks and feeling accomplished by the end of your day.

Use a timer.

Set it for 20 minutes and COMMIT to only working on that ONE TASK for that period of time. Feeling too antsy today? If 20 minutes sounds like an eternity, then set it for 5 minutes… or even just one.  If you are committed to ignoring all frivolous distractions for that short period, you’ll be surprised at how much you get done.

As an added bonus, you’ll probably feel a little phenomenon called “momentum.” Once the timer sounds you might just be so deep in your groove that you’ll actually want to keep going.

So go for it. Dust off that timer. You’ll be checking off your list left and right, boosting your sense of accomplishment, and motivated to go for it again for even longer stretches of time.

* Need a daily planner page to get on track? Download the 7am-9pm Paper Pad freebie on our Free! page.

This blog post was written by Meka Allen for the Limelife Planners Media & Creative Team. For more information about Meka visit her on Instagram @yespleaseplanning. Please share and repost this blog entry with your friends! All we ask is that you give credit to Limelife Planners and the post author.

Planning My Way to a Healthier Lifestyle

By Katie Poppe on January 24, 2016
1 comment

The New Year is here and with it, comes new hopes, dreams, and of course, those fitness and health-related resolutions. Every year, thousands upon thousands vow that this year will be the year that they finally get in shape. Most start strong. By week two or three, the momentum is gone. I’ll admit that I have been guilty of this practice in the past. Luckily this year will be different because I am approaching things differently. Before you roll your eyes, let me tell you that I actually started testing this method out at the end of September 2015 and so far, I have stuck to it.

For me, it all started with a planner and some pretty fitness and health-related stickers.

This year, I will be continuing to use my Limelife Planner in Layout C and some stickers I picked up from Libbie and Co. and The Planner Junkie.

At the beginning of my fitness journey for 2016, I started with a page dedicated to my vision for this year. Well, my vision in regards to my health and fitness. Weight loss, though an important part, is not the sole focus. I want to be stronger, not just thinner. I want to have more energy and combat my depression. For me, it’s about making lifelong, lifestyle changes.

At the top of the page, I list my goals and underneath, I list some specific changes I will make to accomplish those large goals. Think of these specifics as an action plan. 

In the notes pages before the monthly calendar, I keep track of my progress for that month. Since I am trying to get to a healthier weight, I am keeping track of my weight, along with other measurements because those, non-scale related, victories are important.

At the end of the month, I like to reflect on my progress. I record my successes and this section is not about numbers. It’s about the habits I changed. Maybe I worked out more than 15 days out of the month. Maybe I consumed at least one serving of fruit everyday. In the “Work on Next Month” section, I like to take some time to reset for the upcoming month. For January, there were many nights that I had an unhealthy late night snack and this is something I would like to decrease in February. I find that by doing this reflection, I start each month with a clearer focus and new motivation.

Now, for the day to day, I am able to keep track of my workouts and meals with layout C.

Here’s where the stickers come in handy. I like to alternate between cardio and strength training workouts, so I use the sneaker stickers to mark the days I will be on the elliptical. I keep track of my water intake and my servings of fruits, vegetable, protein and carbohydrates for each day based off of the 21-Day Fix program. In the meal tracker section, I write down the specifics of what I ate and also where I sometimes note the meals for the next day.

I also remind myself of when I need to take measurements with the scale stickers or the heart stickers. I usually place these in the monthly calendar view at the start of the month and on the specific day in the weekly spread ahead of time. Once the sticker is down, there’s no way to change the date for measurements. I found that by doing this, I know the day is coming up and hold myself accountable to take the measurements on that day. No more “forgetting.” 

All this may sound strict and undoable, but it doesn’t have to. I don’t workout everyday. I aim for at least 4 workouts per week. I try to change up my workouts so I don’t get bored. I find Pinterest really helpful for new workout ideas. If you need some ideas, check out my “Workout Ideas” board. I also have a sweet tooth and each week I allow myself a “treat,” which I mark with the cupcake sticker. No way am I giving up my Starbucks lattes or Milano cookies. I don’t believe in setting unrealistic restrictions. I do find that meal planning helps me ensure that I eat well-balanced meals throughout the week. Keep an eye out for my upcoming blog post dedicated to this topic on the Limelife Planners blog.

It is never too late to get started on living a healthier and more active lifestyle. I hope that you picked up some ideas from my process. Everyone has different approaches to fitness and health, so give yourself some time to figure out what works best for you. If you need more inspiration or details on my journey, check out my Instagram (@sadias_ruminations). I leave you with this final piece of advice I found on Pinterest: Fall in love with taking care of yourself. Mind. Body. Spirit.

This blog post was written by Sadia Chowdhury for the Limelife Planners Media & Creative Team. For more information about Sadia visit her on Instagram @sadias_ruminations. Please share and repost this blog entry with your friends! All we ask is that you give credit to Limelife Planners and the post author.

Pretty Up Your Planner: Truly Simple Planners Shop Review

By Katie Poppe on January 18, 2016

Now that you have your perfect Limelife planner, it’s time to show it some extra love with some fun and functional planner accessories! There are tons of big name shops you can browse, but why not try out a smaller, yet still well-established shop? Truly Simple Planners is just that. They offer a variety of goodies to add even more personality and function to your planner. Check out these lovelies!

Truly Simple Planners offers several types of laminated coil clip bookmarks that will slip write onto the coils of your Limelife planner. They range from mini to full dashboard size.  Use them to mark your place, to attach sticky notes, or even to write on. I used a Sharpie to write out a durable shopping list that I can pop out to go shopping, and then snap it right back into my spiral. With a little bit of rubbing alcohol, it’s easy to clean off and start fresh each week.

Other TSP page markers include magnetic bookmarks and paper clips. Magnetic bookmarks hold four to five Limelife planner pages together without making a dent in your pages like paper clips sometimes do. There were so many fun designs to choose from! There’s also a fun selection of decorative paper clips, like this adorable little bird. It certainly adds a sweet touch to your page.

The elastic planner bands are an absolute star in the TSP shop. They come in two varieties- simple band, and pen holder. The shop has an assortment of colors and styles to match your mood or your planner cover. Use them to hold your planner closed, or to band together a selection of pages as a bookmark. They’re very well made and are a must-have for on-the-go planner use.

Your planner page layouts have lots of décor options with TSP, too!  Pre-cut washi strips are a super convenient way to pretty up special events on your days. They come in coordinated sets, which takes the guesswork out of which washi designs to pair together on one layout.  Printable stickers like these yoga, coffee, and phone cuties are available through TSP’s sister shop, TS Planner Printables. The files are easy to download and cut out. Use a paper punch, cutter, or fussy cut around the contours for an inexpensive planner sticker option.

Truly Simple Planners is definitely worth checking out. You’ll love their variety of planner goodies, fast and friendly service, handmade-with-care quality, and affordable prices and shipping rates (hello flat-rate shipping!).

Now before you trot off to go show your planner some love, make sure you take down your special discount code! The owner of Truly Simple Planners has offered Limelife Planners readers a code of our own! When checking out at TSP, use code LIMELIFE to save 20% on your planner goodies. Now that’s planner love!

This blog post was written by Meka Allen for the Limelife Planners Media & Creative Team. For more information about Meka visit her on Instagram @yespleaseplanning. Please share and repost this blog entry with your friends! All we ask is that you give credit to Limelife Planners and the post author.