
A Glimpse Inside My Bullet Journal Notebook
By Leslie Sleesman
on April 30, 2018
![]() What is your planning style? Do you like to use lots of stickers and washi? Or are you happy with just a pen or two? Browsing through all the wonderful planner community photos on Instagram, it’s so easy to get overwhelmed with the idea that every space needs to be filled in.
What is your planning style? Do you like to use lots of stickers and washi? Or are you happy with just a pen or two? Browsing through all the wonderful planner community photos on Instagram, it’s so easy to get overwhelmed with the idea that every space needs to be filled in.
As an organizer that loves to help busy moms feel productive and less busy, I want to challenge the idea that every square inch of your planner needs to be filled.
![]()
I know, I know, you love to fill it in. And maybe you really are busy enough that you need to fill in all those lines and boxes. That is why you use a planner after all!
What I really want to challenge is adding things to your schedule for the sole purpose of filling up blank space. Savor those days when you’re not so busy!
Here are some ideas on how to fill in that white space in your planner that don’t include adding to your already busy schedule:
![]()
15 WAYS TO FILL IN BLANK SPACE IN YOUR PLANNER
![]() I mostly leave my empty boxes blank. Sometimes I use a sticker. I’m obsessed with cute emoji stickers, so I can usually fill in a space or two if I think it’s looking a little too sparse. I’ve also been loving all the fun and inspiring quotes people post on Instagram, and sometimes I practice my lettering with those quotes.
I mostly leave my empty boxes blank. Sometimes I use a sticker. I’m obsessed with cute emoji stickers, so I can usually fill in a space or two if I think it’s looking a little too sparse. I’ve also been loving all the fun and inspiring quotes people post on Instagram, and sometimes I practice my lettering with those quotes.
Do you mind having blank space in your planner? What is your favorite way to fill in those empty boxes?

This post was written by Kristan Kremer for the Limelife Planners Media & Creative Team. For more information about Kristan visit her on Instagram @pinkrosecompany. Please share and repost this blog entry with your friends! All we ask is that you give credit to Limelife Planners and the post author.
If you’re relatively new to the wonderful-world-of-planning, the Internet can be a scary place. Facebook? A nightmare. Twitter? Night-terror fodder.
Instagram? Forget it.
Our planner/planning community can be a magical place, but I liken it to being a kid in a candy store. At first, everything looks great. And then, you know you need to hone in on something, but you can’t pick just one. …And then…the sensory overload starts to take over, and before you know it you’re sitting on the floor and crying your eyes out.
Okay, maybe not – but you get my point! Looking for “planner inspiration” on Instagram or Pinterest can be a combination of inspirational and overwhelming, which can be either good, or bad. So many ladies – and even some gentlemen! – have achieved what many of us like to call “planner zen.” They know what works for them and run with it - and then some - often filling pages of their planners in sticker after sticker, after sticker – or stamps, colored in with colored pencils or Copic markers, and handwriting that looks like it’s straight out of a calligraphy text book. It all looks incredible – until you realize that you have yet to even put pencil to paper in your planner, and you suddenly are overwhelmed all over again, and self-conscious.
Your handwriting isn’t that neat. You don’t know how to hand-letter. You have a small stack of planner stickers you’ve borrowed from friends and your three standard colors of pen are Bic blue, Bic red and Bic green.
What even is a fine-point gel pen that erases from the heat of the eraser?! Those exist?!
And washi tape?! Is that… like masking tape? Duct tape? Is it a fancy word for tape that cleans? (Sorry. Bad, terrible pun..)
It’s easy to get lost in the wide-world of planning, and freeze right up. It can become too much, all at once… And sometimes, it seems like it’s easier to abandon it, than stick with it and figure out what works for you. 
See this? Definitely not the place to start. Too much, all at once. Just don’t do it.
So you’re a newbie – where should you start to ensure you stick with it? First, focus on the essential tools of the trade – and don’t go crazy. This is coming from me, someone who lives a life surrounded by every color of pen, pencil, marker and Sharpie around – even I had to start somewhere!

The Essentials ~
The Process ~
Step One: Before you can use any of your pretty colors, or stickers, you have to decide what kind of planning layout works for you. That’s the key to ‘simplifying’ planner zen. It’s also a whole separate issue, so in light of keeping this ‘simple’ – see what I did there? I’m going to show you a couple different layouts. You can also check out fellow teammate Victoria's recent post on choosing a layout. You have to decide which ones you like!
Step Two: Make a list of what and who you need to plan for. Are you single? Or are you a mom with a family of six? That makes a big difference! Using your sheet of paper – or notes page from your planner – make your list of everything you want/need to include in your plans. I usually do this in pencil, which you’ll see below!
Step Three?: Color code! I know it seems a little ‘planner crazy’ to have so many colors, but color coding is a magical thing. You can keep a key of your chosen colors somewhere in your planner and reference it each time you sit down to plan. Make color your visual best friend. Choose a color for each person, place, and thing you intend to plan for and mark it on your sheet. (You can fix this up nice later for a ‘final’ copy.)

Step Four: Get down to planning! Right about here is where I rely heavily on that sharp pencil and my monthly spread. I’m a ‘weekly spread’ decorator, but there’s not a single color that touches my monthly. Everything goes in pencil, in case it changes, or is canceled. I reference my monthly each week when I sit to do my monthly spread! When you’re ready to plan in your weekly spread, just do what feels right. If your son’s soccer games are supposed to be in red, fill them in where it seems appropriate.
Here are some examples of ‘simple’ layouts. No frills, no crazy decorations – just functional stickers that serve one purpose: to be functional. Is it pay day? Mark it. Is there a bill due? Mark it. Do you need to be reminded of something when you go to your planning happy place at 9:37 am Thursday morning? Mark it. Just make it work for you!


Don’t worry about how it ‘looks’ or if it’s ‘pretty’ – planning is your relaxing time. Not someone else’s joy; going out of your way for Instagram <3’s might not always bring you peace. Remember that! Once you figure out what works for you, you can go back to Instagram for inspiration and start to experiment with stickers, colors, etc.
But, for now? Take it slow and think about you. You’re most important, and your happiness is why you plan. The rest will come.

This blog post was written by Keri Thivierge for the Limelife Planners Media & Creative Team. For more information about Keri visit her on Instagram @steviedplans. Please share and repost this blog entry with your friends! All we ask is that you give credit to Limelife Planners and the post author.

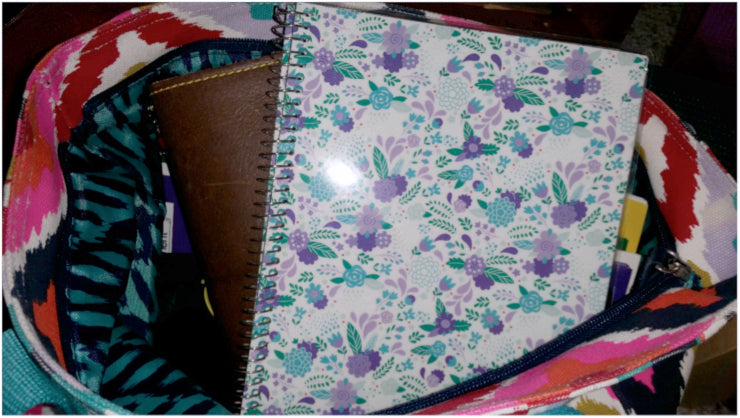
I’ve always been a spiral planner girl, but this year I’m trying out the binder system. You can’t beat the customizing options and organizing capabilities of ring-bound planners. Let me tell you, my Limelife A5 planner inserts have me seriously approaching planner peace! Limelife designs are vibrant, their layouts are straightforward, and everyone knows their quality is top-notch! Here’s how I’ve set up my binder system so far.
GETTING STARTED
My approach has been pretty slow and steady. My creative heart wants to deck my planner out with cute clips and page markers, stuff the pockets with more pretty page flags than I can ever use, dangle fluffy and shiny charms from the strap, and line the page edges with all things adorable. But I have other planners for that! My yellow Kikki K is strictly (okay, mostly) for getting things done and keeping my life in order. I need to be able to focus on my tasks and access information without getting distracted by shiny things. I’m using a few extra planner accessories, but my Limelife inserts provide a good fix of decor so that I won’t feel bored with my simple set-up.

FRONT POCKETS
NON-DASHBOARD
Dashboards are pretty popular in the planner community. A typical dashboard is a sort of title page that houses sticky notes, inspirational quotes, or photos. I decided a dashboard would be redundant since my pockets have all of that. Instead, my first page is always my right-now planning page, usually a daily planning insert. It’s front and center, with no searching or section flipping to distract me. I use several different inserts depending on my needs. This Checklist Add-On insert is perfect for me, since I naturally tend to categorize my to-do lists. The add-on comes with 30 pages in two colorways. Check the Limelife site out for other layouts that might also work for you, and for the digital version of the checklists.
CALENDAR

I’m using Limelife A5 weekly planner inserts with the Elizabeth design. My weekly layout is a classic horizontal week-on-two-page format. Limelife has tons of designs from floral to stripe to watercolor, and several different layouts to choose from. This set is more than just calendar inserts. Here’s a rundown of what’s included:

One of the best features of Limelife is that ALL of their planners (A5 and spiral), are customized with your choice of start months. So, if you’re ordering in March, you get your money’s worth with no wasted months. I only include a couple of months at a time in order to minimize binder bulk. My “Calendar” section houses my monthly overview, and the monthly tabs house the weekly spreads.

SECTION TABS
The Decorative A5 Planner Tab dividers come unlabeled for you to use how you choose. I adhered clear labels from my label printer to the front of each of my tabs. Since I no longer need my past months, I’m borrowing the January divider from my calendar inserts. A strip of thin washi hides the original wording so I can re-purpose it.
I use an oversized divider to block off the rest of the sections that I access less frequently. Onto coordinating yellow cardstock, I traced around one of the original dividers that came with the planner and added a little extra width. This cuts down on the visual clutter to minimize distraction.
MY SECTIONS
I allowed myself a few weeks to use a temporary setup to really figure out my organizing needs. Hand-labeled mini page flags were a great solution for that. I stuck them onto my unlabeled tabbed dividers until I knew what I wanted to label them. I ultimately determined the following sections would work for me:
SUBSECTIONS – When I accumulate several pages of the same topic, I like to create subsections. Narrow page flags are great temporary tabs. They can be hidden behind the main section tab to reduce the visual clutter—see the little blue subsections under the red Notes tab?

THE PEN!
I’d be remiss if I didn’t tell you about my pen! My favorite pen to use on Limelife paper is a black Staedtler Triplus Fineliner. It writes on Limelife paper with no bleeding and dries instantly.
Limelife A5 Planner Inserts, coupled with their Decorative Tab dividers have been a huge factor in helping me develop a planner system that works. My binder setup is still a work in progress, but I’m sure planner peace is just around the corner.

This blog post was written by Meka Allen for the Limelife Planners Media & Creative Team. For more information about Meka visit her on Instagram @yespleaseplanning. Please share and repost this blog entry with your friends! All we ask is that you give credit to Limelife Planners and the post author.
I am loving my new Limelife Planner in Layout C for organizing my days. As a mom that also runs a business, I’m so happy that I added on the Social Media Add-On Pages pack! Running a business means keeping track of lots of social media accounts and this add-on is perfect for that.
I find that I’m flipping through it constantly, so I thought I would add some tabs to save some time. Every second counts you know!
SOCIAL MEDIA ADD ON The Social Media Add-On has four sections in addition to the goals pages. I flip between the Instagram and Facebook planners constantly to check dates and mark things as posted.

 I like to have easy access to the tracker page for the month because I like to add notes when something happens that might affect my stats.
I didn’t want to add a bunch of bookmarks to add bulk. I also tried paper clips but they kept slipping off. So I got the idea to add some tabs. However, I wanted them to be removable since I would be using a new page each month. I tried stickers, but they were too permanent and didn’t remove cleanly from the page. (You can see my first try at adding sticker tabs in the photos above.)
HOW TO ADD TEMPORARY TABS
Then I remembered something we all probably have an ample supply of. Sticky notes! I have some long and skinny sticky notes that are full sticky on the back. Mine are made by Post-It, but I have seen Target Brand as well. They’re perfect size for folding “hot dog style” over the edge of the page. One snip down the center makes them the right width, and then I can get two tabs from one note. 
So simple and now I can move them to the next page when it’s time for a new month.
What about you? What is your favorite way to access a page quickly? Tabs, bookmarks, clips? Tell me!

This post was written by Kristan Kremer for the Limelife Planners Media & Creative Team. For more information about Kristan visit her on Instagram @pinkrosecompany. Please share and repost this blog entry with your friends! All we ask is that you give credit to Limelife Planners and the post author

