FREE SHIPPING on all orders over $75!

Fall Bucket List: 20 Things To Do in the Fall

By Kristan Kremer on September 26, 2016

Fall Bucket List: 20 Things To Do in the Fall

The leaves are changing colors and the days are getting shorter! There's a crisp cool breeze that's cooling off the hotness of summer and that means one thing: pumpkin spice lattes, comfy sweaters, football, and boots! (Okay, so that was more than one thing!)
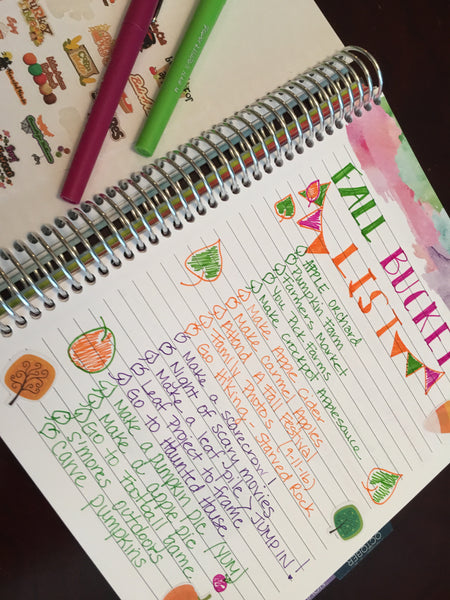
Fall Bucket List | 20 Things to do This Fall

Fall Bucket List

Fall is quickly approaching, lucky for me it's my favorite season! Fall weather brings fall activities and lots of fall festivities to write in my planner!

20 Things to do this Fall. Writing these in my planner now!


I have 3 kids and we love doing outdoor activities in fall. Some as simple as walking or going and visiting new parks. Others include October festivals for Halloween and, of course, the apple orchard and the zoo. Here's my list of things that are a must for fall:

20 Things To Do in the Fall


1. Apple Orchard
2. Pumpkin Farm (we like to check out two different ones, we do the big one and find usually a small town one to support as well.)
3. Farmers Market
4. You Pick Farmers Market is always fun as well - make sure to wear boots (gets muddy) and nothing too fancy! You will definitely be getting a little dirt under your nails.
5. Make crockpot applesauce with the apples you picked at the apple orchard. Here's a great, easy recipe to follow.
6. Make apple cider. Here's one of my favorite recipes.
7. Make caramel apples, my personal favorite! We like to use Reese's pieces, M&M's, crushed candy bars and sprinkles. The  toppings list can go on, there are endless possibilities!
8. Attend a fall festival - one of our favorites is at a local amusement park. They have a dress up for Halloween and go trick or treating the whole month of October.
9. Family Photos!! If you want the most beautiful shots you can dream of, the October sun and backdrop is unimaginably perfect! Book now most photographers fill up early.
10. Go hiking! Some of the most amazing things you can do in fall are free and beautiful! We have a beautiful state park that is a couple of hours away from us in Illinois! Starved Rock State Park is beautiful, full of waterfalls and in the fall, the colors of all the trees are just perfect!
11. Make a scarecrow! I'm all about DIY! Go to the thrift store, get a flannel, some overalls, a hat, and grab some hay (most craft stores, Home Depot and Menards have this in stock during the fall). Get to stuffing! Put him (or her) on the porch or in the yard!
12. Make it a night in of SCARY MOVIES (or kid-friendly scary movies!) Some of our favorites are : Hotel Transylvania, The Nightmare Before Christmas, Hocus Pocus, Coraline, The Legends of Sleepy Hallow, Beetle Juice, Corpse Bride and Harry Potter to name a few! For the adults, definitely Halloween movies and Saw, throw in some Freddy with that too! FREAKY!!
13. Rake leaves and jump in them! Collect some different colorful ones for an art project!

Check out this fall bucket list with 20 things to do in the fall with your kids. I need to write some of these down now so I don't forget!

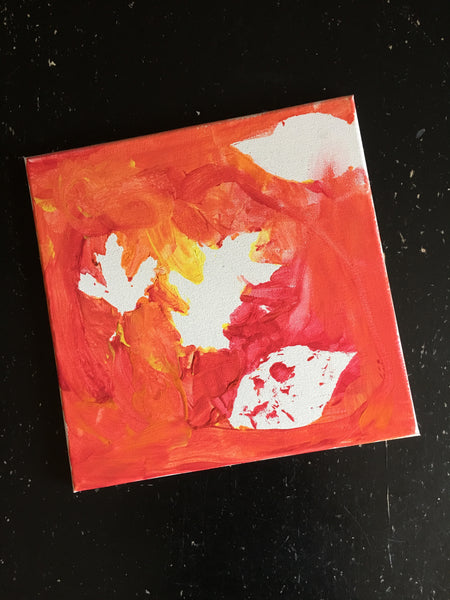
14. Make a colorful art project and frame it! For kids, something simple as a leaf wreath or a hand tree with leaves is an adorable keepsake. Here are some great ideas. 
15. Go to a haunted house!!!
16. Make an apple pie or pumpkin pie! (YUMMM) Here's a classic recipe for an apple pie.
17. Go to a football game! Whether it be a high school team, college game or NFL! Go out for a fun day of tailgating with some family or friends! GO TEAM GO! 🏉
18. Roast s'mores, grab some blankets and sit out and enjoy the chill of the fall with a good roasting.
19. My personal favorite is to carve or decorate pumpkins! I like to decorate the whole house in pumpkins - real and fake!
20. Go trick or treating. If your kids are grown, go with grandkids, neighbor kids, whoever! Whether it's cold, soggy, wet or even snowing. Bundle up, grab a Pumpkin Spice Latte and get to walking! Have fun!

Happy Fall Y'all!

Fall Bucket List | 20 Things to do This Fall...Gotta write these down in my planner. My kids will love these!


This guest blog post was written by Jamie Lee, mother, entrepreneur and photographer at Reveal Photography. Please share and repost this blog entry with your friends! All we ask is that you give credit to Limelife Planners and the post author.

15 Ideas For Using Blank Space In Your Planner

By Katie Poppe on May 04, 2016

What is your planning style? Do you like to use lots of stickers and washi? Or are you happy with just a pen or two? Browsing through all the wonderful planner community photos on Instagram, it’s so easy to get overwhelmed with the idea that every space needs to be filled in.

As an organizer that loves to help busy moms feel productive and less busy, I want to challenge the idea that every square inch of your planner needs to be filled.

I know, I know, you love to fill it in. And maybe you really are busy enough that you need to fill in all those lines and boxes. That is why you use a planner after all!

What I really want to challenge is adding things to your schedule for the sole purpose of filling up blank space. Savor those days when you’re not so busy!

Here are some ideas on how to fill in that white space in your planner that don’t include adding to your already busy schedule:

15 WAYS TO FILL IN BLANK SPACE IN YOUR PLANNER

  1. Doodle a picture
  2. Practice lettering
  3. Write your favorite bible verse
  4. Make a list of books you’d like to read
  5. Fill in a meaningful quote
  6. Decorate with non-functional stickers
  7. Write a short poem or haiku
  8. Paste in a photo
  9. Record a memory from the day
  10. Color in a design
  11. Write out that funny thing your kid said
  12. Fill in something you’re grateful for
  13. Make a wish list
  14. Record that crazy dream you had last night
  15. Write lyrics to your favorite song

I mostly leave my empty boxes blank. Sometimes I use a sticker. I’m obsessed with cute emoji stickers, so I can usually fill in a space or two if I think it’s looking a little too sparse. I’ve also been loving all the fun and inspiring quotes people post on Instagram, and sometimes I practice my lettering with those quotes.

Do you mind having blank space in your planner? What is your favorite way to fill in those empty boxes?

This post was written by Kristan Kremer for the Limelife Planners Media & Creative Team. For more information about Kristan visit her on Instagram @pinkrosecompany. Please share and repost this blog entry with your friends! All we ask is that you give credit to Limelife Planners and the post author.

Taming the Planner Crazy

By Katie Poppe on April 25, 2016
1 comment

If you’re relatively new to the wonderful-world-of-planning, the Internet can be a scary place. Facebook? A nightmare. Twitter? Night-terror fodder.

Instagram? Forget it.

Our planner/planning community can be a magical place, but I liken it to being a kid in a candy store. At first, everything looks great. And then, you know you need to hone in on something, but you can’t pick just one.  …And then…the sensory overload starts to take over, and before you know it you’re sitting on the floor and crying your eyes out.

Okay, maybe not – but you get my point! Looking for “planner inspiration” on Instagram or Pinterest can be a combination of inspirational and overwhelming, which can be either good, or bad. So many ladies – and even some gentlemen! – have achieved what many of us like to call “planner zen.” They know what works for them and run with it - and then some - often filling pages of their planners in sticker after sticker, after sticker – or stamps, colored in with colored pencils or Copic markers, and handwriting that looks like it’s straight out of a calligraphy text book. It all looks incredible – until you realize that you have yet to even put pencil to paper in your planner, and you suddenly are overwhelmed all over again, and self-conscious.

Your handwriting isn’t that neat. You don’t know how to hand-letter. You have a small stack of planner stickers you’ve borrowed from friends and your three standard colors of pen are Bic blue, Bic red and Bic green. 

What even is a fine-point gel pen that erases from the heat of the eraser?! Those exist?! 

And washi tape?!  Is that… like masking tape? Duct tape?  Is it a fancy word for tape that cleans? (Sorry. Bad, terrible pun..)

It’s easy to get lost in the wide-world of planning, and freeze right up. It can become too much, all at once… And sometimes, it seems like it’s easier to abandon it, than stick with it and figure out what works for you.  

See this? Definitely not the place to start. Too much, all at once. Just don’t do it.

So you’re a newbie – where should you start to ensure you stick with it? First, focus on the essential tools of the trade – and don’t go crazy. This is coming from me, someone who lives a life surrounded by every color of pen, pencil, marker and Sharpie around – even I had to start somewhere! 

The Essentials ~

  • A piece of paper
  • A sharp pencil
  • A ruler
  • Some functional stickers (If you have any – they really aren’t necessary)
  • A few pens of different colors. Just use whatever pens you like- there’ll be plenty of time to experiment with pen brands later!

The Process ~

Step One: Before you can use any of your pretty colors, or stickers, you have to decide what kind of planning layout works for you. That’s the key to ‘simplifying’ planner zen. It’s also a whole separate issue, so in light of keeping this ‘simple’ – see what I did there? I’m going to show you a couple different layouts. You can also check out fellow teammate Victoria's recent post on choosing a layout. You have to decide which ones you like! 

Step Two:  Make a list of what and who you need to plan for. Are you single? Or are you a mom with a family of six? That makes a big difference!  Using your sheet of paper – or notes page from your planner – make your list of everything you want/need to include in your plans. I usually do this in pencil, which you’ll see below!

Step Three?: Color code! I know it seems a little ‘planner crazy’ to have so many colors, but color coding is a magical thing. You can keep a key of your chosen colors somewhere in your planner and reference it each time you sit down to plan.  Make color your visual best friend. Choose a color for each person, place, and thing you intend to plan for and mark it on your sheet. (You can fix this up nice later for a ‘final’ copy.)


Step Four: Get down to planning! Right about here is where I rely heavily on that sharp pencil and my monthly spread. I’m a ‘weekly spread’ decorator, but there’s not a single color that touches my monthly. Everything goes in pencil, in case it changes, or is canceled. I reference my monthly each week when I sit to do my monthly spread! When you’re ready to plan in your weekly spread, just do what feels right. If your son’s soccer games are supposed to be in red, fill them in where it seems appropriate.

Here are some examples of ‘simple’ layouts. No frills, no crazy decorations – just functional stickers that serve one purpose: to be functional. Is it pay day? Mark it. Is there a bill due? Mark it. Do you need to be reminded of something when you go to your planning happy place at 9:37 am Thursday morning? Mark it. Just make it work for you!


Don’t worry about how it ‘looks’ or if it’s ‘pretty’ – planning is your relaxing time. Not someone else’s joy; going out of your way for Instagram <3’s might not always bring you peace. Remember that! Once you figure out what works for you, you can go back to Instagram for inspiration and start to experiment with stickers, colors, etc.

But, for now? Take it slow and think about you. You’re most important, and your happiness is why you plan. The rest will come.


This blog post was written by Keri Thivierge for the Limelife Planners Media & Creative Team. For more information about Keri visit her on Instagram @steviedplans. Please share and repost this blog entry with your friends! All we ask is that you give credit to Limelife Planners and the post author.