FREE SHIPPING on all orders over $75!

The Magic of Masking in Your Planner Layout

By Katie Poppe on March 31, 2017

Hello Planner Friends! I am so, so excited to share with you how I created this layout with you. Masking is a great way to combine creative with function in our planners. We can use bigger, decorative stamps in our layouts, without taking up all our planning space. This stamp set I used in my decorating is a space theme, and I wanted to be able to use lots of the planets, but not take up all my room for all our real life stuff that needs to go in there. I also wanted to “paint on” ink using a sponge to get a whimsical outer space look. So let”s jump in!


First I laid the foundation of the layout by choosing a darker purple ink and used a sponge to blot and smear ink the ink around the edges of the pages and in my notes section. There are two main ways I mask in my layouts. The first is to stamp an image on a scrap piece of paper and fussy cut it out. I then stamp then use that to cover up an image I don’t want to get ink on. That’s what i did in the following photo for the rocket ship.

The second is to use post it notes to block off sections that I don’t want to stamp on or ink or to partially stamp an image on the paper.


To really give this layout an outer space look, I used a white gel pen to add stars. Gel pens can be temperamental, so to get the ink flowing I always do small circular motions on my thumb, and then  I don’t have any problems with a good ink flow on the paper, especially when using it on pigment ink. It’s important to vary the size of the dots, otherwise it will end up looking like snow!


I also stamped some images on sticker paper to color and use in my Notes section. Colored pencils are my go to, and the blending pencil is amazing for blending colors together. For example, I colored one planet a light pink color all over, and then went over the pink in sections with a purple pencil using medium pressure. I then took the blending pencil and used soft circular motions to blend the purple out giving the planet a more interesting and dimensional look. The nice thing about stamping decorative images on sticker paper is that I can move them all around before I decide on where to stick them in my layout.


I saved my planner stamping for the end of this layout. Since I went pretty heavy on the decorative stamping this week, I needed to make sure I could still fit my lined boxes. That’s the great thing about stamps! You can see perfectly how they will fit, and you can easily mask off to make a box smaller if you need to! I wanted to keep with the outer space theme, so I used star check boxes and a star header box, and chose an ink that would compliment my stars and sky.


Thank you for stopping by and checking out my blog post. Have fun with your planner, try new things, and I hope that I have made planner stamping a little less intimidating.


Lindsay              IG: @glam2plan_pnw


Planner Stamp and Sticker Organization

By Kristan Kremer on March 03, 2017

I am a self confessed planner stamp & sticker hoarder  addict. But I was finding I was doing more "collecting" than using and I felt like most of that was due to the fact it was so complicated to dig through my drawers and collect all the things I needed plus since my stamps and stickers were just very disorganized in my storage I decided I need to take some time to organize them and have all my goodies in a manageable place and thus I would get to use them more. 

I love Ikea but unfortunately for me I do not live close to one. So anytime we go on vacation the first thing I do is see if one is close by and fortunately I took a vacation in January and was able to get to one close by. I had wanted to purchase the Raskog cart for a long time and finally I was able too. 


Top Shelf holds my most used planners, some pencil cases, Mambi sticker books and then my favorite washi tubes and single washi's in the smaller photo cases. 


 2ND shelf I have larger stamp sets that do not fit in the photo containers and I didn't want to take out of the original packaging. I am weird like that. I also have baby wipes for cleaning my stamps, my levenger punch and some colored pencils on that shelf. 


Prior to leaving on vacation I had purchased some storage items so that I could take some things on my trip and keep everything tidy. I went to Joann's and I purchased the following products:


Photo Keeper that has 5 internal photo boxes in it that hold 5 x 7 photos and fit the planner stamps perfectly. 


As you can see the stamps fit in the large 5 x 7 photo boxes well and I fit several in each.


I also bought a few singles of the photo boxes in a smaller size 4 x 6 to hold some washi tape you can see above. I couldn't find the link online, I purchased at the store itself. They are made by IRIS


I also bought the one shown also above that was an Artbin Essentials and it is great cause I fit at least 36 of the dew drops in it. All of these were found in the store and are not always available online from Joann's but I am sure you could find at other online sources. 


Here are some items to make a quick simple sticker book:


Binding discs or use a ring binder

Paper punch

sheets of cardstock

Adhesive for attaching your sticker sheets to paper


I started out making my sticker book by sorting my stickers by shops. Just put some adhesive on the back on the sticker sheets and lay down on your paper and you are done.  I think it would be great in the future if I set it up with tabs and sorted it as well but this time I just didn't take the time. But now I have a system that all my stickers are right next to me when I plan and I can easily find the right sticker and utilize them now. here are some pics of the sticker books I have made. 


I can't tell you how much more efficient organizing these things can make you. I hope this helps some of you get your planner groove back by getting organized!

Notes Pages

By Kristan Kremer on February 17, 2017

Hello Planner Friends! Let’s talk about the note pages in our Limelife Planners! One of the many wonderful things about our beloved Limelife Planners is the amount of note pages we have! We have so many note pages, that we can get crazy creative with them. Today’s blog post was inspired by all the amazing bullet journalers out there and the super creative layouts they do, but using our note pages and incorporating them into our planners. I have learned bullet journaling is not my strength. I am terrible at measuring, drawing straight lines and making sure everything is equal and same sized. I’m sure if I practiced I would get better, but I really appreciate how bullet journalers are able to create their layouts. So this is very loosely inspired by bullet journaling, and I will go as far to say, is in no way even near actual bullet journaling. But I think that this is one of the best parts about using planners and sharing our ideas. We see something that inspires us and catches our eye, and we figure out how to make it work for our lives, we put our twist on it.


For this project I used two note pages to create a chore/cleaning chart with daily, weekly and monthly sections. I wanted to use copic glitter pens to color my cleaning icons, and those will bleed through paper, including cardstock, so that is why I used two note pages here. I started out by choosing mermaid themed washi tapes to decorate my pages and stamped out my headers.You could also hand write your headers in if you don’t have stamps. I love beautiful lettering, but that is still a work in progress for me so I went with stamps.


Next I used pencil to write in my sections and measure and mark off where I wanted to make my lines. I used a stencil from the office supply store as my straight edge and black pen to draw in my lines.

After my boxes were drawn in, I used cute cleaning icon stamps to label my sections and left lots of room for additional notes I might want to write in when needed.

I love to color and typically use soft core colored pencils. I have copic glitter pens that I use to accent and add detail with, but only use them on sticker paper because they bleed through everything! But here I used them to color my icons since I am not worried about what shows up on the back of my pages (I will show you why in a bit). I did use my pencils to color my lettering because I wanted a watery look and needed to be able to blend the colors to make them soft.


After coloring I wrote in labels and days of the week in the boxes and added washi tape to the edges of my pages. Next I put the pages back to back so I could laminate them, which means this project is reusable! This is also why I didn’t care about my pens bleeding through the paper. Using a wet erase marker, I can check things off, write notes in, and a cleaning supply shopping list, and only a damp paper towel is needed to to clean the marker off and it’s like brand new again. That’s why I went all out with making it cute and decorating and coloring it. This will have a permanent home in my planner to keep me on track with what I need to get done around the house and I won’t have to clog up my weekly pages with cleaning lists.


I marked holes in my laminated cleaning schedule with a wet erase marker and hole punched it and then added an adhesive tab to the edge of the page so this will be easy to find in my planner and just flip to quickly. A helpful tip for using wet erase marker in our planners….it can rub off on pages. So if you do plan to use something like this in your planner, find a home for it where a little smudged ink transfer won’t make a huge difference. Mine is going in the back of my planner between a divider for my notes section and old notes pages from a previous planner. I hope that you enjoyed this planner project and I was able to provide you with some ideas about how to use our note pages. I know I have a running list of projects I want to try out with them! Thank you for stopping by and checking out the blog! See you soon!


~Lindsay

IG @glam2plan_pnw

So You Think You're a Wedding Planner? Think Again!

By Kristan Kremer on December 16, 2016

So you think you’re a wedding planner? Think again!

In October of 2015 my beautiful daughter got engaged to a wonderful man. I had dreamed of this magical wedding that she would one day have. She had set the date to be one year later so I kept thinking to myself "yes! We will have plenty of time to plan". Little did I know that with running a Etsy shop and commitments to this and that the time would just fly by so quickly.

I think when you have a year you better get yourself motivated to start right away because before you know it, it is here! We were hoping to try to do it on a budget and by budget that meant doing a lot of  things ourselves that we were able to do and of course not using a wedding planner because I didn't have a $40,000 budget.

Utilizing a planner right away was key to getting everything done. My daughter bought a wedding planner but didn't utilize it really so it was basically my job to stay on top of things. She works a very demanding full time job and I am retired so it made sense for me to become "the planner" and who better to do that than an actual planner lady!

I first mapped out what seemed to be the most critical decisions which were the venue, food, and the photographer. Those were the items I wanted to lock in quickly. We did select a venue pretty easily due to the extreme cost of some venues it was a matter of elimination because of the cost. The venue was going to serve as a place to have the ceremony and reception. We planned on a very casual setting where everyone would be seated at the table they would watch the ceremony from and eat at the same table. We had planned on leaving an open spot in the center of the room to have the ceremony at under the chandeliers.

This venue also did catering and that WOULD have made our lives much easier and later on would find out that would have been the best decision had we gone that direction but after the tasting, we had decided for the cost we were paying that we wanted to pick a caterer that could provide great food as well. So outside caterer it was. So we knew exactly who that would be and locked that in with a deposit. So venue....check.....caterer....check. My daughter had a photographer take pics of her soon to be husband and her a while back and they were excellent so the choice of photographer was an easy one too. So as you see the big decisions came quickly and easily. The rest was the hard part.

Cake tasting was next and dare I say my absolutely favorite thing to have to do! We live in a small town so choices were narrowed down to two main places. Both were equally good so it was a matter of the Benjamins. Cake was then checked off.

I would say the most time consuming and most painful part of the process was planning table decorations. We did a lot of thrift shopping because my daughter was wanting a more vintage/shabby chic style so we just bought and bought and bought and until the day came to set up the tables had no clue how it was going to look! In hindsight, if you can piece together table settings and photograph them so that the day of the wedding you can set them up easily would be a good thing to do but we lacked the space and the time to do that.

I did all the signage and fun decorations since I am also a crafter. I made anything I could which took a lot of prep. My planner was utilized to write down cute signs I had seen on Pinterest that I planned to make, mark where they were to go and also keep track of how many I needed to make. I also made notes along the way of things that needed to be done and checked off as I did them.

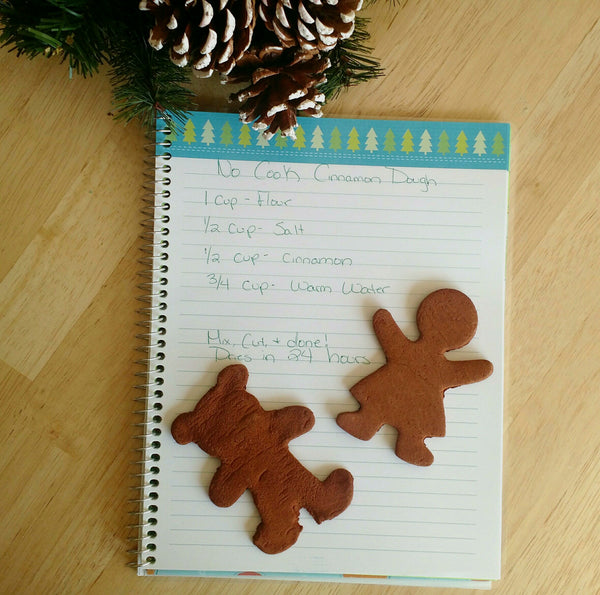
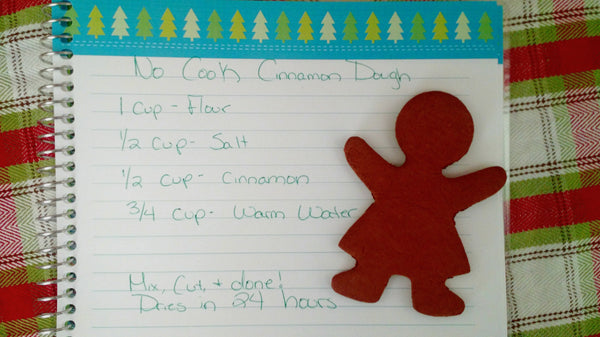
Here are some samples of things I made:

This was a glass block that was to be used during the sand ceremony

One of the signs that went on each table for sharing pics

Now a days the traditional guest book is very different! I made this for all the guest to sign with sharpies and it will hang on their wall.

This was going to be sitting on the table next to a vintage small suitcase that was holding vintage hand embroidered hankies and a suitcase for cards etc. It was really hard to write on these vintage books because the pages were old and no longer laid smoothly but it is a cute little way to do something different.

When it came time to create the save the dates my daughter and I sat down and designed them ourselves. Here is the real comical part....we forgot to put the date on the save the dates! Lord who would have thought that the most crucial part of the save the date would be left off! So crafter mom to the rescue. I created a cute sticker to place on them so that it looked planned! Once I created the wedding invitation myself I made sure to look that thing over a hundred times to make sure I left nothing off! So you can see it was a real DIY wedding.

Dress shopping was the best part of the entire planning procedure but the most hurtful to my purse. She picked a beautiful gown with loads of lace and a vintage feel. We found a beautiful belt with loads of pretty crystals etc. on it and it cost a pretty penny but just made the dress even more beautiful. I about fell off my chair when finding out the cost of the gown but also the cost of alterations since it had over 8 different layers of lace and stuff in the dress. A wedding is something every mother dreams of planning with their daughters. But the joy you feel you will have doing it is a myth. It’s a lot of work, it is a lot of stress. But seeing your beautiful daughter in her gown makes it all worth it.

All of the things that I did to stay on top of things I couldn't have done without using my planner. The day went so quickly and the wedding was a blur but it was beautiful. She looked beautiful. We are still waiting for all the photos from photographer but thought I would share this pic of her and her bridesmaids. I love this girl <3


Easy DIY Christmas Gift You can Make with Kids

By Kristan Kremer on December 02, 2016

Easy DIY Christmas Gift You can Make with Kids

Easy DIY Christmas Gift to make with Kids

DIY gifts can be the cutest, most thoughtful gifts to give. Something made by someone you love is special on so many levels. But what about those of us who aren’t especially gifted in the talent of DIY?  Hi, my name is Candice and my hands won’t do what my brain wants them to when it comes to crafting.  It’s not that I don’t want to craft. I do.  It’s just that, well, my creations usually end up looking like those Pinterest memes – “How it looks on Pinterest [perfect] / How it looks IRL [barely recognizable].”  It’s also difficult to get time alone to focus on a DIY activity with a little one running around.  So, my DIY activities must have the following criteria; be easy-peasy and be something I can make with my son. If you’re in the same boat as I am or if you’re looking for a fun holiday craft to do with your kids, check out the DIY gift below.

Easy DIY Christmas Gift to make with Kids

No-Bake Cinnamon Clay Ornament

Do you remember these?  I made these as a kid and they STILL smell deliciously warm.  There is something so inviting about the scent of cinnamon during this time of year.  These ornaments are easy to make, hard to terribly mess up, and edible (for those little ones who seem to put everything in their mouths).  

Ingredients

  • 1/2 cup of salt
  • 1 cup of flour
  • 3/4 cup of warm water
  • 1/2 cup of cinnamon

Directions

Mix all ingredients together

With dry, clean hands knead the dough until it is completely mixed.  Dust your hands with flour if the dough is sticky

Place the dough on wax paper and roll out using a rolling pin

Use cookie cutters to cut out the ornaments

Poke a hole at the top of each ornament (large enough to string ribbon through)

It takes about 24 hours for the ornaments to dry.  Once that is done you can string the ribbon through, hang on the tree, or give to a friend, family member, or neighbor as a gift.  Easy-Peasy!

Featured Product: Happy Holidays Planner


How To Add Temporary Tabs To Your Limelife Planner

By Katie Poppe on April 11, 2016

I am loving my new Limelife Planner in Layout C for organizing my days. As a mom that also runs a business, I’m so happy that I added on the Social Media Add-On Pages pack! Running a business means keeping track of lots of social media accounts and this add-on is perfect for that.

I find that I’m flipping through it constantly, so I thought I would add some tabs to save some time. Every second counts you know! 

SOCIAL MEDIA ADD ONThe Social Media Add-On has four sections in addition to the goals pages. I flip between the Instagram and Facebook planners constantly to check dates and mark things as posted.

I like to have easy access to the tracker page for the month because I like to add notes when something happens that might affect my stats. 

I didn’t want to add a bunch of bookmarks to add bulk. I also tried paper clips but they kept slipping off. So I got the idea to add some tabs. However, I wanted them to be removable since I would be using a new page each month. I tried stickers, but they were too permanent and didn’t remove cleanly from the page. (You can see my first try at adding sticker tabs in the photos above.)

HOW TO ADD TEMPORARY TABS

Then I remembered something we all probably have an ample supply of. Sticky notes! I have some long and skinny sticky notes that are full sticky on the back. Mine are made by Post-It, but I have seen Target Brand as well. They’re perfect size for folding “hot dog style” over the edge of the page. One snip down the center makes them the right width, and then I can get two tabs from one note. 

So simple and now I can move them to the next page when it’s time for a new month.

What about you? What is your favorite way to access a page quickly? Tabs, bookmarks, clips? Tell me!

This post was written by Kristan Kremer for the Limelife Planners Media & Creative Team. For more information about Kristan visit her on Instagram @pinkrosecompany. Please share and repost this blog entry with your friends! All we ask is that you give credit to Limelife Planners and the post author