Staying Organized While Traveling
Traveling can mean fun, adventure, and relaxation. It can also mean stress, lack of routine, and difficulty staying organized. If you love planners, chances are you love to be on top of things and plan ahead, right? For us planner-lovers, being away from home can make planning, organizing, and feeling “completely together” difficult.
With spring and summer breaks coming up, I figured now is the perfect time to share a few of my tips for staying organized while traveling.

Last summer my family and I drove for two days to reach our vacation destination. Our car was packed. And I mean packed. We stuffed our car with snacks, waters, and the essentials needed to keep our preschooler entertained during our long car ride. (Yeah...that's a lot of “essentials.”) We had so little room left that I decided to leave my planner at home. “I'll be fine for a week without it,” I thought.
Was I “fine?” Sure. But there were times when I longed for my planner to help me feel less stressed and more “on top of things.” Not being able to write things down and keep track of our plans left me relying solely on my memory. (Which isn't a good thing when you suffer from mom brain.)
So here is tip one.

Bring a Travel Planner
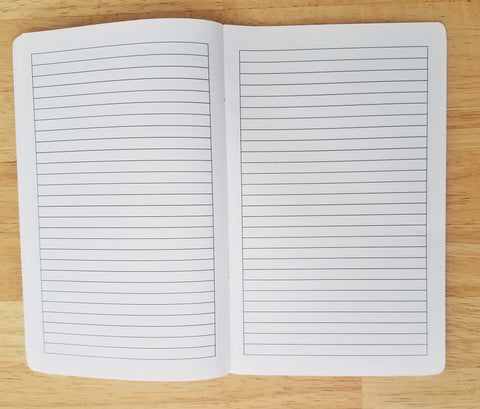
Whether it’s a small, pocket-sized option or something you've concocted, if you use a planner in your day-to-day life, using it while on vacation or while traveling will be second nature to you. I’m planning on using the new Cahier Traveler’s Notebooks during our vacations this year. Our trip this spring will only be for a few days so I'm bringing the Weekly Layout E notebook with me. But if we take a longer trip this summer, I will probably switch it up and use the Monthly Traveler’s notebook. There are a few reasons why I chose the Cahier Traveler’s Notebooks instead of a smaller planner. Firstly, they're small while still maintaining a good amount of space for writing (big handwriting over here). Secondly, they don't have coil bindings so they are easy to slip in and out of a bag or purse. And lastly, I like that the months and dates aren't already printed in the notebook. This means I can write in the dates myself and use every single page of the notebook. Instead of just using the pages of the months I'm traveling.

Bag Choice
The bag you'll be carrying day-to-day should allow for easy, on-the-go organization and the inevitable wrappers/napkins-in-the-bag scenario. (Hey, it's better than littering.) So a good size bag (spending time stuffing a small bag with items is no fun) with pockets/compartments is must. I also recommend zippers instead of snap or magnet closures. There's nothing like not being able to find your phone or wallet and panicking that it may have fallen out of your bag during your travels to throw your entire schedule off course.
Allow for Free Time
Those of us that like to plan may or may not be guilty of finding comfort in planning out every minute of our travel/vacation. My advice? Allow for some free unscheduled time. Chances are, something unplanned will happen during your time away. Whether it's an unforeseen rainstorm slowing down your travel time or an amusement park shutting down it's rides until the risk of lightning passes, having unscheduled time will allow time in your schedule for the “uh-oh’s” and last minute changes.


Using Month at a Glance
Hello again planner friends! I often get asked what I do with my month at a glance layout. Do I really use it? Do I decorate? How do I decorate it and still have it be usable? How do you fit everything into those boxes? For me, the month at a glance is the heart of my planner. I keep the entire year worth of month at a glances in my planner at all times, usually covered in sticky notes. That’s the secret. Sticky notes. Since things change so much, I can make sure I know what is going on months out, and not worry about having to erase, cover up, or move things around, I just put it all on sticky notes and change as needed. About two weeks before the new month starts, I sit down and do my monthly layout for the upcoming month. Monthly layouts are one of my favorite things to do because Limelife always has the same amount of boxes on the month no matter what, meaning, there is usually empty space to get creative or add a little extra decoration. Right now I am slightly obsessed with mermaids. After the winter we have had here, I think I am really ready for warmer weather, so I decided to do an ocean/mermaid spread for this month. March is also be a month of multiple sports for both our boys, so there is a CRAZY amount of information that I need to cram into this layout, that’s why I thought this would be a good month to share with you all how I do my monthly layouts.

Let's get started! First I wanted to stamp out my decorative background which I will color later. This is not a pretty picture that I am sharing, this is a real life picture. Stamping large stamps can be difficult, so I wanted to show what I use to make it a little easier. I always stamp on a hard surface, and to make sure that when I apply pressure that it disperses evenly, I stamp on a board that a friend cut for me. I use a large block and walk my fingers back and forth on it to try to make sure the entire stamp gets down on the paper. I also use old scraps of paper for any overhang from a stamp so it doesn’t get on my table or board.

Next, it’s washi time. I have some amazing mermaid themed washi that I have been excited to use in a layout. Washi can really be the ‘tie it all together’ element of a layout, so I picked three washi tapes to allow myself some freedom with color choices for ink.

This next part is what makes the crazy busy life possible to fit in a monthly layout….stamps, small stamps, color coding inks, and minimal handwriting. I have big handwriting, and so if I tried to fit this all into the boxes by just writing, I would miss stuff because of how messy it would end up being. The “barely holding it together mom” would emerge more often than not if my month at a glances weren’t usable and holding life together for us.
With the important information down, all the functional stamping done, it is time to do the creative stuff! Prismacolor soft core colored pencils work amazingly well on Limelife paper! It’s so easy to blend the colors. For example, for the little fish in the photo, I layed yellow down first as the all over base color. I added some blue and blended it out into the tropical green color. I added a little orange next by outlining the face and blended out to create the sherbert color for the face. Between the pencils, the paper, and the blending pencil, the colors can become so vibrant and look like pens. I also used glitter gel pens to add little accent details. Just by adding little details like that can be a game changer for your layouts and decorations. The fish becomes more interesting, the mermaid jumps off the page more.

Amidsts all the craziness, our planning can keep us grounded and feeling a little less overwhelmed, and more confident in handling life. I hope I was able to provide some inspiration on how to use your monthly layout and get everything down on those pages that you need!
Thanks for stopping by the blog and see you soon!
~Lindsay

Planner Stamp and Sticker Organization
I am a self confessed planner stamp & sticker hoarder addict. But I was finding I was doing more "collecting" than using and I felt like most of that was due to the fact it was so complicated to dig through my drawers and collect all the things I needed plus since my stamps and stickers were just very disorganized in my storage I decided I need to take some time to organize them and have all my goodies in a manageable place and thus I would get to use them more.

I love Ikea but unfortunately for me I do not live close to one. So anytime we go on vacation the first thing I do is see if one is close by and fortunately I took a vacation in January and was able to get to one close by. I had wanted to purchase the Raskog cart for a long time and finally I was able too.

Top Shelf holds my most used planners, some pencil cases, Mambi sticker books and then my favorite washi tubes and single washi's in the smaller photo cases.


2ND shelf I have larger stamp sets that do not fit in the photo containers and I didn't want to take out of the original packaging. I am weird like that. I also have baby wipes for cleaning my stamps, my levenger punch and some colored pencils on that shelf.

Prior to leaving on vacation I had purchased some storage items so that I could take some things on my trip and keep everything tidy. I went to Joann's and I purchased the following products:
Photo Keeper that has 5 internal photo boxes in it that hold 5 x 7 photos and fit the planner stamps perfectly.


As you can see the stamps fit in the large 5 x 7 photo boxes well and I fit several in each.

I also bought a few singles of the photo boxes in a smaller size 4 x 6 to hold some washi tape you can see above. I couldn't find the link online, I purchased at the store itself. They are made by IRIS

I also bought the one shown also above that was an Artbin Essentials and it is great cause I fit at least 36 of the dew drops in it. All of these were found in the store and are not always available online from Joann's but I am sure you could find at other online sources.

Here are some items to make a quick simple sticker book:

Binding discs or use a ring binder
Paper punch
sheets of cardstock
Adhesive for attaching your sticker sheets to paper
I started out making my sticker book by sorting my stickers by shops. Just put some adhesive on the back on the sticker sheets and lay down on your paper and you are done. I think it would be great in the future if I set it up with tabs and sorted it as well but this time I just didn't take the time. But now I have a system that all my stickers are right next to me when I plan and I can easily find the right sticker and utilize them now. here are some pics of the sticker books I have made.


I can't tell you how much more efficient organizing these things can make you. I hope this helps some of you get your planner groove back by getting organized!

Cleaning Schedule

In order to keep my house somewhat clean and tidy, I have a cleaning schedule. I want to point out that I use the term “schedule” loosely here. Very, very loosely! If something doesn’t get done the day it’s supposed to get done, that’s okay. It doesn’t usually get done until its allotted day the next week. Mostly I just like this schedule because it reminds me what needs to get done if I want the house to look the way I like it.
Daily Things
In order for this system to work, I have a list of things I try to complete daily. Again, if something doesn’t get done, well it just doesn’t. But if I can get most of the things done most of the days, then things are going pretty well around here.
- Make beds
- Bathroom (swish the toilet, spray the shower, and wipe counters)
- Laundry (one load)
- Dishes
- Wipe down counters and sweep kitchen
- Pick up and put away random stuff

Weekly Things
I assign a category to each day of the week. Cleaning is not my first priority unless the house is just an awful disaster. But on days when I have a few minutes or an hour to spare, I try to use that time to get one of my weekly tasks done.
- Monday - Bathrooms (deeper cleaning like tubs and mirrors)
- Tuesday - Dusting and vacuum floors upstairs
- Wednesday - Kitchen (clean microwave, stove top, and empty fridge for trash day)
- Thursday - Dusting and sweep and mop floors downstairs
- Friday - Monthly task (see below)
- Saturday - Yard work (okay let’s be real, my husband does most of this)
- Sunday - Meal prepping for the upcoming week, planning

Monthly Things
On Fridays, if I have time, I rotate out a list of tasks that should be completed monthly. I don’t ever get to all of them. But it’s nice to have a checklist!
- Week 1 - Change air filters, backup data and devices, vacuum under furniture, car wash and vacuum
- Week 2 - Quick declutter (any room, wherever it needs it) and donate, shred papers
- Week 3 - Deep clean kitchen (pantry, fridge)
- Week 4 - Quick declutter (any room, wherever it needs it) and donate, shred papers
- Week 5 - Usually happens quarterly so this is mainly for seasonal stuff like decor or winterizing

Of course, I use my Limelife Daily Specialty Notebook to remind me of these tasks. It is so satisfying to check them off as I complete them! Love cleaning schedules?

Grab the one on the Limelife freebie page! It’s not the same schedule as mine here, but it’s way more colorful. Happy cleaning!

This post was written by Kristan Kremer for the Limelife Planners Media & Creative Team. For more information about Kristan visit her on Instagram @kristankremer. Don't forget to share this blog entry with your friends!
How To Organize Your Planning Supplies

We have all drooled over the beautiful crafting and planning spaces that we see on social media. Gorgeous desktops display a plethora of thoughtfully arranged planning supplies. A bounty of different planners neatly grouped on bookshelves. Have you ever thought about setting up a space like that? It can be overwhelming to get everything in the right place, but in this post I’ll share some organizing techniques for planner supplies that will have you drooling over your own pretty planning place.

Caddies
Use caddies and organizers to keep your items in line. The obvious choice for the task would be the desktop caddies found in the office section. I’m using this one to organize my stamping supplies and in view so I remember to use them. The drawers hold the things I don’t use as often, such as extra planner bands and paper clips.

Get creative when searching for something that will work. Here I used an old silverware drawer organizer to keep my pens together in a drawer, but separated so I don’t have to dig for just the right one.

I’ve also used a makeup counter organizer to keep pens, washi, and sticky notes within reach on my desktop. And this little guy is a business card holder, but it has found new life as a sticky note holder since it is the perfect size for the Target Dollar Spot sticky notes.

Baskets
These shallow baskets are just the right size to hold most sticker sheets inside my drawer. I have two, one for functional stickers, and one for fun stickers with others that I don’t use as often below. They’re great because they are small and portable, so I can take them out of the drawer if I want to plan on the patio.

Dishes
If you’re anything like me you have an attraction to cute dishes. There always seems to be a cute bowl in the clearance section. Currently I’m using some of my milk glass collection (I think they might be candy dishes, but I’m not sure) to hold my washi on my desktop. I used to keep the washi in the silverware drawer caddy with my pens, but I like it so much better on display. I also use a vintage milk glass loaf pan to keep note cards and stationery organized.

I hope some of these ideas were helpful. Getting your space organized and ready for planning will help keep your creative juices flowing. What is your favorite organizing tip for planner supplies?

This post was written by Kristan Kremer for the Limelife Planners Media & Creative Team. For more information about Kristan visit her on Instagram @kristankremer. Please share and repost this blog entry with your friends! All we ask is that you give credit to Limelife Planners and the post author.
