

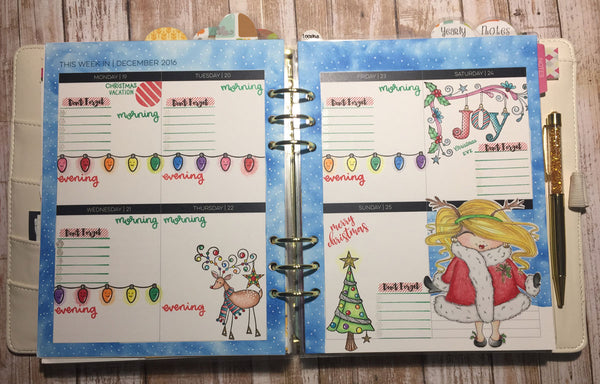
Hello, Planner Friends! I am so excited to share this Christmas week layout with you. I love Limelife planners for many reasons, and for this blog post, I will be focusing on the amazing paper. Last year I used layout C, which I love because it’s so easy to have sections for each family member. But I wanted to try something new this year, and I went with the new layout L. I am so happy that I went with this layout, it has been so fun to try new things. My planning style is creative but functional. I have to be able to see things easily. I only ever post before-the-pen layouts because the pages are bursting with sloppy handwriting by the end of the week and are not as pretty to look at! So let’s get started and I will explain how I created this layout.

I wanted to do a snowy background and border around my pages, but I didn’t have any washi tape for this. A very easy way to create the snowy background is to use an ink dauber or makeup sponge, and blot all around the border using a dark blue ink. In the above photo, you can see how I masked off the pages so I could quickly ink with my blue pigment ink. Limelife paper is so thick and so smooth, the ink goes on easily, is blendable and does not bleed through. Pigment ink is my favorite to use, but chalk ink and distress ink works well also. I always experiment on my notes pages to make sure I like what I’m going to do before I actually do it. Make sure you are NOT using dye ink. After doing my border and background, I put my decorative stamp that I had colored and fussy cut out in my notes section. Next, I used a white gel pen to create snow by just making little dots all over the page. Of course, the paper holds up beautifully to this as well.

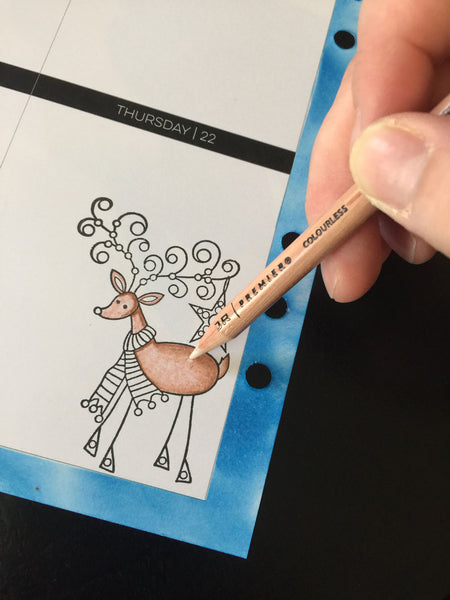
I love how I can stamp images right on to the Limelife paper and then color them in with colored pencils. The paper is perfect for pencils, it blends easily.
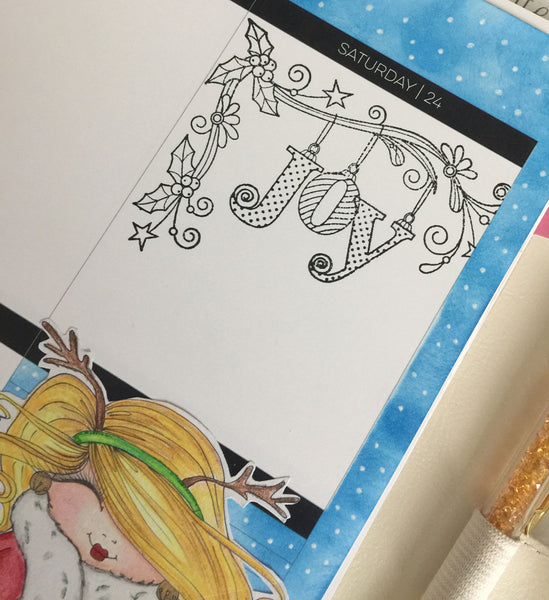
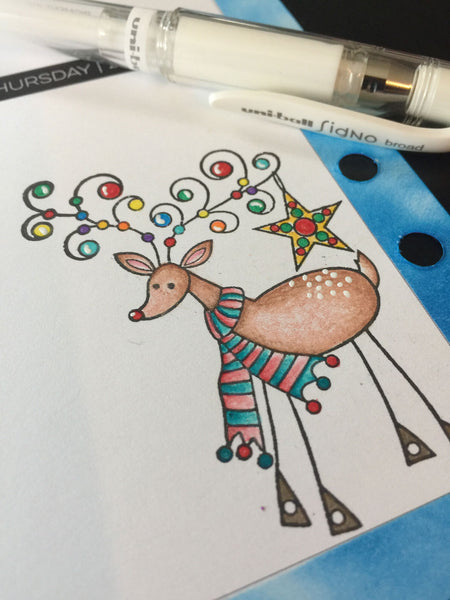
I stamped this “Joy” stamp using VersaFine black onyx ink, and waited about five minutes for it to dry before coloring it with pencils. When coloring on Limelife paper, I have found that I am able to shade really easily by blending out using the blending pencil, so not a lot of time is needed to get a very pretty effect. With the reindeer in the photo below, I colored the whole image light brown, and then colored dark brown around near the lines of the stamp and then using the blending pencil, blended out giving it added detail and shading. I am terrible at knowing the ‘correct’ way to shade, but I go with what I like and try not to worry about it too much, and I encourage you to do the same. It’s your planner, have fun, try new things, and do what makes you happy!
The white gel pen is one of my favorite ways of adding those finishing touches to my stamped images, along with glitter pens! As always, the paper does great with gel glitter pens! I went over the colored pencil with glitter pens on the Christmas ornaments to give an extra sparkle and pop.
To complete my layout, I then did my functional stamping. I customized my stamps to this layout by choosing colors that went with my decorative stamping. Layout L is so fun because I can divide up the boxes in fun ways. I used Christmas Lights stamped in the boxes this week to divide up our mornings and evenings. I just feel like I have so much room to play with layout L. Here is the completed weekly layout!
I hope that I have inspired you to try new things in your planner. The holidays can be super busy, and I know it can be hard to find time to plan. I hope that everyone is able to take a bit over the holiday season and be able to have some planning time and try new things.
Merry Christmas and Happy Holidays to all!
~Lindsay IG: @glam2plan_pnw


Comments