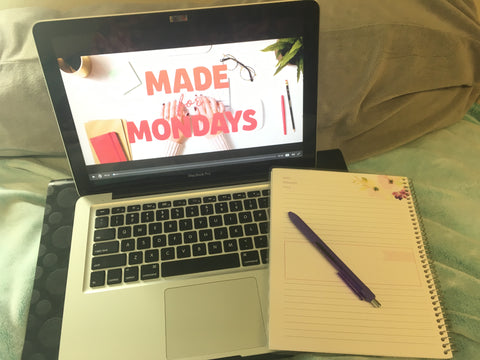
It’s the start of a brand new year and like many people this month, you might be considering creating a vision board. If so, you’ll love this post! I happen to think that integrating a vision board into your daily planner routine can be a transformative strategy for achieving your goals.
A vision board is simply a visual representation of your desires and goals. It’s essentially a collage of images, words, and phrases that inspire and motivate you.
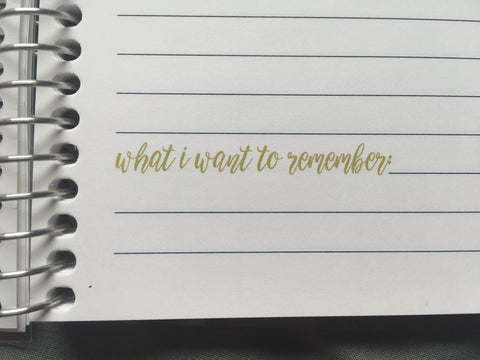
When used with your planner, it serves as a daily reminder of your larger aspirations while you manage the day-to-day tasks that will lead you towards achieving them.
Understanding how to effectively combine these tools starts with recognizing the complementary relationship between them:
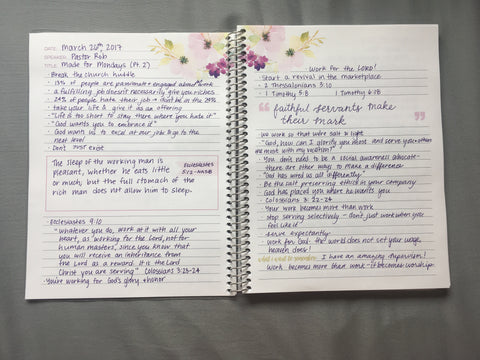
By using a vision board with your daily planner, you create a powerful synergy that continuously steers your focus back to the bigger picture. As you cross off each task in your planner, your vision board is there to remind you of why you're doing it, keeping you motivated and centered on your journey toward success.
When I first began creating vision boards, I simply used them as a way to get myself motivated to work on my goals. I would create my vision board at the beginning of the year, marvel at how beautiful it was, and forget about it for the remainder of the year. Honestly, it was not the best way to use this amazing tool.
In time, I realized that a vision board could and should be used for so much more! Here are two big benefits of creating a vision board:
The first benefit is that a vision board helps to better define your goals. It serves as a representation of your aspirations and desired outcomes in life. By selecting imagery and words that resonate with your ambitions, you create a collaged display that serves as a constant reminder of where you want to go.
This tangible representation helps crystallize your objectives. It makes abstract goals feel more concrete and achievable. For instance, pictures of a dream home or snippets of a travel magazine can pinpoint your target lifestyle.
The next benefit is that it helps in the act of visualizing success which can significantly impact your journey to achieving your goals. A vision board operates on the principle that what you see daily influences your thoughts, mood, and motivation.
Picture yourself succeeding in your endeavors; this mental image, combined with the visual stimuli from your vision board, reinforces a positive pathway in your brain, aiding in keeping you focused and inspired.
For example, if your vision board includes images of tranquility and balance, it will serve as a daily cue to work towards a calmer and more centered life.
Utilizing a vision board as part of your daily planning routine ensures that your long-term goals are aligned with your everyday actions. Here are tangible steps you can take for success:
Make visualization a daily or weekly habit. Allocate a specific time in your planner for daily or weekly reflection on your vision board. This could be first thing in the morning or during a quiet evening moment. Consistency is key; even five minutes can help cement your goals in your mind.
To ensure your daily tasks are contributing to your larger vision, match them with the goals displayed on your vision board.
Integrating a vision board with your daily planner creates a dynamic tool that guides your daily actions towards your long-term aspirations.
To effectively track progress, you must routinely check your planner against the goals depicted on your vision board. This could include a weekly review where you mark off completed tasks and evaluate how each contributes toward the broader goals.
It’s beneficial to have a structured way to note achievements, such as:
Your vision board should not be static; it needs to evolve as you grow and as circumstances change. Make it a habit to adjust your plans and vision by:
Use these strategies as a roadmap to steer your daily productivity in alignment with your ultimate goals.
Hopefully, this post has inspired you to create a vision board to use along with your daily planner! Remember, when you hit your goals, no matter how small, don’t forget to celebrate your success!
Continue to reflect and adjust your goals/strategies as needed to stay on track. With persistence and dedication, your vision board and planner can become invaluable tools in bringing your goals and dreams to life!
Limelife has created a vision board printable to help you get started! Print the sheets then cut out the elements you think would benefit you on your own vision board. Click here to download.
Author’s Bio:
Kari is the founder of GorgeousMindset.com. She's a firm believer that small, consistent changes to your mindset can lead to a life of more fulfillment, success, and happiness. She currently lives in South Carolina with her husband and two sons.
Including gratitude and reflection in your daily planner can help you cultivate a positive mindset, increase your self-awareness, and improve your overall well-being.
In this post, we’ll take a closer look at how you can easily add gratitude and reflection to your daily planner use and reap the benefits.
Understanding the Importance of Gratitude and Reflection
For me, gratitude is having an appreciation of what is valuable and meaningful in your life. It can help cultivate positive emotions, improve relationships, and increase life satisfaction.
Reflection is the act of looking back on past experiences and considering their impact. By focusing on gratitude and reflection, you can develop a habit of appreciating the positive aspects of your life and become more aware of the benefits of having gratitude practice.
Research has found that practicing gratitude has significant positive effects on our physical and mental wellbeing. It can help:
Reduce anxiety
Improve sleep quality
Bolsters your immune system
In my own personal life, I’ve found that by focusing on the benefits of gratitude, I’m able to cultivate a more positive outlook on my life and this just generally makes me a happier person.
Incorporating Gratitude and Reflection into Your Daily Planner
So, what can you do to incorporate gratitude and reflection into your daily routine? Here are some tips on how to make the most out of your Limelife Planner and include gratitude and reflection in your daily planning.
Choosing the Right Planner Layout
If you happen to be new to the world of planners, here’s a good tip: When choosing a planner, it's important to pick one that best fits your needs and preferences.
Look for a planner that has enough space for you to write down your tasks, activities, and experiences. Consider the layout of the planner, including the pages, dates, and monthly/weekly calendar, to ensure that it works for you. (Check out Limelife’s weekly layouts here.)
Structuring Your Planner
Once you have chosen your planner layout, it's time to structure it in a way that allows you to incorporate gratitude and reflection into your daily routine.
One way to do this is to create a separate section in your planner for gratitude and reflection. Limelife offers a great Gratitude Planner Add-On. You can use this section to write down things you are grateful for, reflect on your experiences, and set intentions for the day.
Balancing Tasks and Reflection
While it's important to stay on top of your tasks and appointments, it's equally important to take time for reflection and gratitude. One way to balance these is to include a to-do list for the day, but also leave space for reflection and gratitude.
For example, you can include a section for gratitude at the beginning or end of each day, or use a bullet journal-style layout to combine tasks and reflection.
Creative Ideas for a Unique Planner Experience
Your daily planner can be a powerful tool for reflection, gratitude, and creativity. Here are some creative ideas to help you make the most of your planner:
Customize Your Pages
Use colorful writing pens, stickers, images, and more to add some personality and positivity to your planner pages. Limelife’s inspired planner stickers are an easy add-on.
Use Gratitude Writing Prompts
One of the easiest ways to incorporate gratitude with your planner pages is to use prompts. These are simple questions or statements that encourage you to reflect on what you're thankful for. Some examples of gratitude prompts include:
What are three things you're grateful for today?
Who is someone you appreciate and why?
What is something you accomplished recently that you're proud of?
Using prompts can help you focus on specific things you're grateful for and this makes creating a gratitude habit easier.
Use Gratitude Quotes
Incorporating quotes into your planner pages can be a great way to inspire and motivate yourself. Look for quotes that resonate with you and make you feel thankful. Write them down in your planner and reflect on how they apply to your life.
Here are some examples of gratitude quotes to get you started:
"Gratitude unlocks the fullness of life. It turns what we have into enough, and more." - Melody Beattie
"Gratitude is not only the greatest of virtues, but the parent of all others." - Marcus Tullius Cicero
"When we focus on our gratitude, the tide of disappointment goes out and the tide of love rushes in." - Kristin Armstrong
Try Gratitude Affirmations
Gratitude affirmations are intentional statements that help you to express appreciation in your daily life. Using affirmations of gratitude help you to focus your intentions and create more positive thoughts and a happier mindset.
Here are a few affirmation you can add to your planner pages:
No matter how dark the night, I am grateful that joy comes in the morning.
Even on my bad days, I am grateful for the opportunity to experience life.
I’m thankful for the money that flows into my life easily, frequently, and abundantly.
I am so grateful for supportive friends and a loving family.
Consider Gratitude Journaling
I’m a big fan of journaling. Gratitude journaling specifically is a powerful tool for cultivating a positive mindset. The Daily Gratitude Journal is a simple and effective way to practice gratitude each day.
To get the most out of your gratitude journaling practice, it's important to make it a habit. Set aside a specific time each day to write in your journal. This could be first thing in the morning, before bed, or during a break at work.
Start small and aim to write just a few sentences each day. Over time, you can increase the amount of time you spend journaling and the depth of your reflections.
Remember, like using your Limelife Planner, gratitude journaling is a form of self-care. Treat it as a priority and make it a regular part of your daily routine.
The Impact of Gratitude and Reflection
After reading this post, I hope you walk away knowing that including gratitude and reflection in your daily planner can have a major positive impact on your life.
Practicing gratitude can help you cultivate a positive mindset. When you focus on the positive aspects of your life, you are more likely to experience positive emotions such as joy, contentment, and bliss.
Reflection is also essential. Taking time to reflect on your experiences and emotions can help you process them and gain a better understanding of yourself.
Adding gratitude and reflection to your daily planner can also boost your productivity. By taking time to reflect on your accomplishments and what you are grateful for, you are more likely to feel motivated and energized to tackle your to-do list.
So are you ready to add a sprinkle of gratitude to your planner pages? Give it a try! You won’t regret it!
Author’s Bio:
Kari is the founder of GorgeousMindset.com. She's a firm believer that small, consistent changes to your mindset can lead to a life of more fulfillment, success, and happiness. She currently lives in South Carolina with her husband and two sons.
Ready for some juicy gossip? OK, here’s the story of what happened:
Leslie was ready to start a new chapter in her career, but then she fell into a serendipitous partnership with me, Jacquie. This was not the plan for either one of us, but we just “clicked” and it seemed meant to be.
I had been a loyal customer for many years, and I loved watching Leslie grow the business and create so many beautiful designs. She really loved that part of the business, but over time, she got so busy with the operational aspects and it became too demanding. That is where I come in :-)
To give Leslie the time and space to design and dream up new ideas, we moved production “down south” to Georgia. Now I am taking on most of the production and operational responsibilities. If you love what you do, it isn’t work – and being creative isn’t work for Leslie.
Now, a little about me… I am a wife, mother to 4 kids and 2 dogs, manager, coach, troop leader – and whatever else my children, employees, and husband need. Our family and work calendars are always slammed, and I cannot imagine where I would be without all my Limelife Planners over the years!
I am thrilled to be Leslie’s partner and create this exciting new chapter of Limelife Planners. Thank you for being so inviting. I look forward to making gorgeous planners and notebooks for all of you.
Jacquie
]]>I am often asked how to plan and/or what the "secret" is to planning.
My advice might surprise you. People make assumptions that I'm a very Type-A person who is an obsessive planner (not a crazy assumption given that I own a planner company), but I'm much more relaxed about planning than all that. Planning should be a fun, helpful way to make life a little easier -- not stressful and complicated!
First off, there is no secret to planning. A planner is not a magic bullet. It's not going to make your life more organized or make you crush all your goals, and anyone that tells you a planner WILL do that is lying to you.
If you want to be successful you need to put in the work. Not surprisingly, like most everything else in life, this is about consistency. A planner can be a great tool to help you navigate life and goals when used consistently. It's as simple and as complicated as that. However! I do have a few helpful tips I've learned over the years that can help you use this tool more effectively.
I find that one of the biggest struggles people have with using a planner is just getting into the rhythm of actually writing in it. It can take weeks or even months in order for you to be able to form the habit of using a planner if you haven't used one before. So my first helpful tip is to keep your planner visible. The old adage "out of sight, out of mind" is really true. Until you're used to reaching for your planner, keep it out on the counter, on your desk, or on your bedside table. Eventually it will become second nature to grab it.
My second helpful tip is one that surprise people. Don't be afraid to use technology as a companion to your planner. I will often look at my planner in the morning or at the beginning of the week and set phone alarms to help me with meeting reminders, appointments, etc. There's no doubt that using a paper planner has some pretty big advantages (which I will get into in a bit), but a planner is a tool and your phone is a tool -- make the most of both and use them together when it makes sense. A quick word of caution. If you're a person who is easily distracted when you pick up your phone, and that's not a behavior that you want to encourage then using phone alarms might not be a good fit for you. Know yourself and do what best aligns with your needs and goals.
Okay, taking a little sidebar here to tell you why paper planners are great. There's been research done that found that when we write something down on paper, we are much more likely to remember it than when we type the very same thing into our phones or into a digital calendar. Even if you never look at the phone or the planner again, just the simple act of writing it out means you're better able to remember it. Simply put: our brains are wired for paper planners.
If you're a person who has dipped your pinky toe into the online planner community, you might see planner pages beautifully adorned with stickers and washi tape, and other fun elements. While I love the look of stickers in a planner, it's not necessary in order to use your planner effectively. My third helpful tip is to keep it simple -- or, better yet, keep it simple if simple is what you need. Do not feel the need to turn your planner into something that doesn't suit you. If the thought of decorating stresses you out, by all means do not decorate! If what works for you is using a regular #2 pencil and not color-coded pens and coordinating highlighters, use a #2 pencil. Your planner. Your rules.
Finally, my last helpful tip is to try to keep it all together. If you're trying to accomplish multiple goals or tasks, consider using your planner to track as many of those things as possible. We sell lots of add-ons in addition to just the basic weekly or monthly planner. Having one "go-to" place for everything makes things easier. Instead of keeping track of grocery lists in one place, bills due in another, and notes in yet another, your planner can be home to all of that.
If you've gotten to the end of this post and you're excited to jump in to your planner, great! If you don't yet have a planner and want to get one, please try out all of our printable test pages from our website. You can view them right here.
At the end of the day, the best and most effective planner is the one you use. This is at the heart of why we sell so many different sizes of planners and why we have so many different layouts and add-ons and covers. We want you to find a planner that fits your life so you use it. We wholeheartedly believe that a planner is an amazing tool to help you untangle some of life's complications and get things in order.
There are a lot of different options for travel planning out there, in the ‘planner world.’ I’ve seen whole planners for trips, pre-printed traveler’s notebook inserts, printable inserts, and more. But, nothing out there really struck me as the perfect solution. So, staying in line with my “use Limelife dot grid notebooks for all the things” philosophy of late, I decided to make my own!
My gorgeous ‘Siren’ design TN from Imperfectly Perfekt was just waiting for my B6 dot-grid. This one has the cover in the Naomi colorway, and I double-sided-taped a photo I took last year in Provincetown to the top. J* and I go every year since we got married, so we’ve got the big details of the trip down.
What I needed, however, was something for the little details, combined with journaling:
Enter the dot grid! I broke it into one or two-page spreads, depending on my needs. I used stencils for a good amount of the lettering, for the sake of consistency! I wanted it to look neat, but also purposeful. (Full disclosure: I used marker pens with the stencils and I pressed super hard, so you’ll see some shadowing on my pages: that wouldn’t happen with a regular marker, colored pencils, or a lighter hand!)
I started on the first page with where we were going, when we were going, and any of the little details we needed before the trip. I also decided to keep track of deposits, because J* and I decided to break it up over several payments. We’re making our next deposit this week, so I can fill that in soon, and what we’ll owe in the end! [ For decorating, I used stickers from an Etsy shop (The Planner and Paper Co), and Michael’s. ]
Next was the packing list – J* and I are over-packers, and I figured I’d need the extra space of a full spread This is especially true because I am a Crazy-Dog-Mom™ and need to pack for our pooch, this year. He normally doesn’t come with us, but our usual house/dog-sitter is unavailable… so it’s sure to be an adventure! I’ll likely use the boxes as check-boxes, and split these pages up into several columns
J* and I are fortunate enough to have a great relationship with the ladies who own the cottages where we stay in P*Town – they make sure we get in there every year! We’re also lucky enough to get to stay somewhere that has a fully functioning kitchen. Eating out every night is a: expensive, and b: tough on the diet! We want to enjoy ourselves, but also like the flexibility of cooking when we want to. There’s a Stop and Shop right in town, so we can stop there for everything we need. I marked spots for lunch and dinner – breakfast, we usually have in, or grab a bagel/muffin at the coffee shop down the street.
I never leave the cape without gifts for family, friends, and the kiddos in my life who call me “auntie.” I like having a space to plan ahead for those, because I already know the shops pretty well, and where I can get appropriate things. I can check it when we get there, and not get overwhelmed. The spending log will also help keep me on some type of a budget. (But really, it’s vacation.. ;) )
J* and I have our favorite restaurants, and our favorite activities, but always try to find some new things to do, and new places to get food. I’ve already started pre-planning this in pencil, and made a spot to write our “top three” to reference for next year. Always planning ahead!
Last, but not least, is one of my “memory keeping” spreads. I wanted a place to document each day we’re there, and plan to decorate seven spreads for the seven full days we’ll spend on the beach. My plan for this year is to invest in a mini-photo printer, so I can put a picture or two in the spreads and write about the day(s). I had just enough pages left in the TN insert for those seven days, and one last spread at the end for anything to remember for next year!
Are there any spreads you think I missed? What would you add? Drop them for me in the comments! Hopefully you’ll have a vacation to take, soon, and got some good ideas. xo
LINKS
Save $10 on your next Limelife Purchase: http://rwrd.io/156n6h3
SIREN TN: https://www.etsy.com/shop/imperfectlyperfekt/
MERMAID POSTCARD ART: https://sugarbones.net/
MERMAID STICKER KIT: https://www.etsy.com/shop/PlannerandPaperCo
MISC MERMAID STICKERS: http://www.michaels.com
STENCILS: https://www.etsy.com/shop/JournalThis
]]>
Of course, your TN wouldn’t be complete with your favorite Limelife Inserts:
(See all the fun we have 😊)
When I first decided to make this list, I started writing down on a piece of printer paper everything I could think of that we needed for camping. It soon became clear that I was missing A LOT and this was not the most efficient way to go about this. I needed to wait a few weeks until we actually went on a camping trip. I had recently bought large foot lockers to store the majority of our camping gear in, but they were mostly just a jumble of items that we packed where they fit. There was some organization but I needed more! So, we went camping and when we came home I took over the living room with ALL of the camping gear. I jotted down what we kept in the foot lockers, things we needed to pack each time, and things that we needed to buy. As I went through these lists I thought about how to pack each thing efficiently so it made sense once we got to the campsite too! You can see my messy thought process but it was an essential step to getting my final master camping list together.
I ended up deciding there would be a few different categories in my notebook. I wrote these on the first page so that I could quickly and easily find them. Camping year after year means that now we don’t generally need to buy anything, but things like batteries need to be checked regularly! I also found that the 3 foot lockers weren’t enough and we needed a few other totes to keep gear in. We bring the actual foot lockers camping with us but these extra totes have soft items that just get thrown in the car when we leave!
Each foot locker has its own list and they are numbered up in the attic (just in case we are searching for an item off-season). Most of the items stay in there all the time but a few things get added right before. These are things like cooking utensils- since I just bring my regular ones that I use all the time. A few things have moved as well and so I’ve made a few changes as we used the list. At the end of the notebook I keep a wish list and a to-do list. Things on the wish list I keep my eye out for sales over the winter or I hint at around the holidays to my husband! Lastly, I keep a brief log of each camping trip and the fun things we do!
I hope this list helps you create a vacation notebook! Whether you are camping or staying in a 5-star hotel staying organized makes packing quick and efficient. Creating my own list was much more personalized than traveling lists that you can buy pre-made, although it took a bit of work to get set up. Follow me on Instagram @BMooreLuvn to see pictures from my family’s camping adventures!
]]>Limelife Planners has more than just planners, and the past few months, I’ve been using my Limelife notebook for lists, habit tracking, and a variety of other notes for grad school and things I’ve needed to have with me on the go.
The dot grid is absolutely fantastic because I can feel a little more freedom when I write. If I want to write lists in straight lines, I can use the dot grid like I would use normal lined paper, but it gives me the freedom to jot things down horizontally or across multiple lines without feeling like I’m wasting paper the way I would with a traditional notebook.
I have lupus, and I always have a lot of medical tracking (symptoms, triggers, migraines, appointments, etc.) that I need to do. Before, I would do it in my planner, but I felt like it wasn’t organized enough for my needs, and I didn’t like the thought of people looking at my planner and seeing all my medical things. For this, my Limelife notebooks have been absolutely perfect. I’ve been able to create a bullet journal-style habit tracking spread that is 100% catered to my symptoms and needs, and I can easily make changes for the next month if something didn’t work out the way I had originally hoped.
For February, I used some washi tape I had in my planning supplies and leftover stickers from some kits I had lying around. The right side of the two page spread is for monthly to do’s and goals I had (like getting into grad school), and the left side is for my mood, pain, and symptom tracking. I made sure to add the dates and space for writing prior to adding the washi tape and stickers so that I wouldn’t wind up having miscounted or running out of room; February already has only 28 days, definitely didn’t want to accidentally only give it 25!
In the top section of the tracker, I made a graph tracker for mood (from bad to good) and pain levels (from good to bad) on a rough scale of 1-10, which could easily be changed to fit someone else’s needs -- or to be a little more specific on levels. I just used a smiley face scale that I could easily reference to show my doctor the fluctuations throughout the month. Underneath the graphs, I sectioned off potential triggers and symptoms that I wanted to track. I still had some extra space on the end that I could have used to track more things, but I wound up using the section to mark questions and physical therapy appointments because that was most useful for me during the month.
In March, I changed a few things up with layout and how things worked best for me, and that’s the best thing about working in a Limelife dot grid notebook -- it’s so easy to change things! Each month, I can adjust how and what I’m tracking with ease, and I love the freedom to do so. Symptoms aren’t always the same; it’s great to be able to add or change what I need to without feeling like I’m wasting space on the page.
In between my habit tracking pages, I’ve had lists ranging from grad school application reminders to a packing list for my weekend in Wisconsin. I love having all of my lists in one place, and it’s a great addition to my planner to just toss in my purse and have with me wherever I go.
What are some things you could use as reminders or to keep track of in a Limelife Planners notebook? Tag Limelife Planners and I in your photos on Instagram to show off your notebook spreads: @JennS_90, and if you’re wanting to make your first purchase, use this link to get an added discount before you checkout! http://rwrd.io/ntr61cf
]]>
( Quote by Lin Manuel Miranda <3 )
I know, I know.. the school year isn’t even over, and I’m already talking teacher planner. BUT: you need time to meet it, fall in love with it, and make it yours! The Limelife team recently updated their teacher planner, so why not take a little walk through it with me? I’ll give you some tips and tricks along the way, and suggestions for ordering yours when we get to the end. (Though if you prefer a video flip-through, go check out my Live Video flip on the Official Limelife Facebook Page! <3)
I chose this cover for my planner, but you can pick out any of the covers offered when you order – check them out here! As with any other planners, you can request simple changes: different fonts, different colors, quotes you do or don’t want. As long as it’s a simple change, they’ll be happy to do it for you – anything else might require an email and some conversation about custom work. When in doubt, reach out to customer service!
The first couple of pages are basic teacher pages – Your daily schedule, log-ins and passwords, and teacher expenses. That last one is key for keeping track of what you buy for your classroom: get that tax credit, people!
Two pages after the expenses tracker – front and back – have lined boxes; one for each month. How you use this space is totally personal preference: some teachers use it to keep track of class birthdays, others meetings. I use it for curriculum planning – I give myself brief notes of what I need/want to accomplish in each month. (I also have ~90 kids: I’m not tracking birthdays ;) )
After the months-at-a-glance, you have your tabbed months: each month gets its own color tab, which coordinates with the colors on your monthly view: Light blue September tab, light blue September colors. Each month has the monthly spread at the beginning, and then your weeks afterwards in whatever layout you chose. Although I’m a secondary teacher – 6th grade ELA – I chose a layout that lends itself, 9 times out of 10, more towards the Elementary model.
I have four English preps – and an extra every other day – and my four classes are rarely ever in the same place at the end of the day. I get them for 55 minutes a day, and I was finding I needed a planner JUST to keep track of what I did with each group, each day. My 2018-2019 layout will do that, as well as quickly track the topics we covered so I can look back the following year for what I did each week, and how long certain activities took. My A5 Layout D will be my ‘every day carry’ for school (My 8.5x11 will stay at school on my desk), and will be a more-lengthy planner for lessons, etc.
Don’t forget – you can try out all the available 8.5x11 layouts on the Limelife page! Print samples and experiment before you decide to order. (Click here to try them!)
The last two sections of MY teacher planner are my gradebook add-on sections – and my notes. This is where you have flexibility in ordering your planner! After your monthly/weekly spreads, you can choose three of the following (note: some of these are for homeschoolers!):
I chose to have all gradebook spreads, as I have four sections of kids, and need space for all four classes, for all four quarters, plus a homeroom checklist! You can have any combination your little heart desires.
Special shout-out to Leslie & Becky, too, for offering the gradebook spreads in different sizes ~ The photo above shows the 8.5x11 AND the cahier travelers insert gradebook option. I asked for it to be hole-punched for my A5, but you don’t have to have that.
The end of the teacher planner will always be note pages, but you have options here, too. I like dot grids, which are good for mind mapping and brain-dumps, so I requested that all of my note pages – the ones that come with the planner and the add-on I also purchased - be turned into dot grid pages. Limelife offers you SO MUCH customization!
Gone through all of this, tested layouts, and decided that 8.5x11 isn’t for you? The teacher-planner add-ons are available in 7x9 size, too! If you can live without the pages at the beginning, and like one of the 7x9 layouts (which you can print from the link above or below!), you can get teacher add-ons for the end!
So: what will your planner look like for next school year? Let me know in the comments! xo
LINKS
Save $10 on your next Limelife Purchase: http://rwrd.io/156n6h3
Cover Designs -- https://www.limelifeplanners.com/collections/cover_design_gallery
Try all the 8.5x11 layouts! -- https://www.limelifeplanners.com/pages/weeklylayouts
]]>
I started by creating a cover page, table of contents, and future log. I have NOT been using the table of contents and haven’t really needed to search for something so I may omit that on my next notebook. The future log I set up with bills (so that I could mark them off as I paid them) and major events. One little trick that really helps me was that I counted the boxes across and down the entire page and jotted those numbers down on the back of my cover page. I look back at this frequently when I’m setting up my week.
Next I jumped right into planning for March. I created a March cover page using blue and green colors. I didn’t make a monthly view because I already have one in my TN so next I created a page of important to-dos. The most useful part of planning for me is a weekly view- it’s a place to put every little thing that is happening with my family as well as keeping to-do items and other notes. I change my weekly layout week by week, finding a lot of inspiration on Instagram. Instagram can be intimidating but I try to keep in mind that my planner is MINE. It doesn’t need to be the prettiest or most “Instagram worthy” for it to work for me. Often I start out Sunday making a real effort (and enjoying the crafty time!) but by Monday afternoon life takes over and I’m writing quickly in pencil as things come up! I know this now and I’m ok with it, as long as it’s functional for me. My husband often reminds me of this too, he keeps a bullet journal at work and will often admire mine on Sunday nights. His is bare bones, essentially a to-do list and a to-go list. But it’s what works for him and keeps his work organized!
My bullet journal is always evolving and I’m finding different things that work for me. Sometimes I set up a week that doesn’t really help me at all, sometimes I use stickers and washi to make things pretty, sometimes it’s just a black pen and a bit of lettering. Follow me on Instagram @BMooreLuvn to see how it changes each week!
]]>For some people, the “coil life” is planner peace. Everything is together in one, pretty package, with a set layout each week, calendars and note pages following – rinse and repeat each month. I, on the other hand, have tried to love the coil and have failed. So many times. The last time I swore I’d stick to it, and I had a gorgeous 7x9 Layout A planner, and I made it from July, to October… and then abandoned it.
But, by then I had already fallen in love with traveler’s notebooks, and I couldn’t turn back! Although there are several different inserts to choose from – even some weekly layouts, which you should check out here – the most versatile type of insert is the dot grid.
( This is my B6 size dot grid insert, with the Lauren cover! )
I love stickers, but sometimes even I don’t want to lay stickers every single week, and have my layouts look identical week upon week upon week. So, in my own version of a little “March Madness,” I planned out four weeks of March in my dot grid book, each unique in their own way, to show you just how versatile dot grid books can be! I have one week of all stickers, two weeks of “bujo” style, and one week that’s a gorgeous hybrid of both.
* WEEK ONE: No white-space planning, vertical layout *
It was a little challenging getting the alignment of the stickers down, for this spread (link to kit shop at the end!) – but once I had the spacing how I wanted it, it was easy to re-create a simple vertical-style layout for a week of stickers! My suggestion is to complete one, whole day - top to bottom in the book - and use it as your guide.
It was smooth sailing from here. I mimicked a layout which I, admittedly, use pretty frequently when I want something quick and easy – stacking my weekends because I tend to lay low on Saturdays and Sundays, and needed less space. The dot grid allows you lots of flexibility – you could do shorter weekdays and stack them all on the left side, and have two long Sat/Sun columns on the right, if you tend to be busy on weekends! See my picture below for the completed week. I’m pretty much in love!
[ The completed week! So pretty, right? ]
* WEEKS TWO AND THREE: Bujo Style *
If you’re more of a “bujo” (Bullet Journal) person, the dot grid insert is made for you. With a ruler, a pencil, a black pen and some stickers – if that’s your thing – the layout options are endless. These are two of my favorites!
THE NEUTRAL LOOK: Color isn’t for everybody, so I went with an easy black and white spread, using some of my favorite stickers with the days of the week printed on them from one of my favorite sticker shops – See my links below J -- These are transparent, so you can see the dots below. (See my links below for the shop!) I picked a calendar sticker and a drop-box sticker, mixed with some easy charts and hand-drawn trackers.
THE COLOR BLOCK LOOK: For the sake of some color and some whimsy, I went with this layout and decorated it with a purple marker. Similar trackers, but a totally different layout and a more ‘messy’ vibe! Full disclosure: I wasn’t loving the messy lines, but the more I looked at it the more I decided to embrace it. Planning doesn’t have to be perfect!
* WEEK FOUR: Bujo Meets Stickers *
For the last week, I thought it would be fun to take a sticker kit and do a blend of bujo, and stickers – I actually ended up really loving this, because I have been doing no-white-space for so long! I set up the top the same way, and then drew boxes wherever I felt I wanted them, spacing out my days and my trackers.
If you don’t like being tied down to the same layout every single week, definitely grab a dot grid traveler’s notebook in your favorite side, and experiment!
Do you have a layout you know you love? Or, do you have any awesome ideas for other layouts that you could try in your dot grid? Share them with us in the comments below!
LINKS
Save $10 on your next Limelife Purchase: http://rwrd.io/156n6h3
BUJO STICKERS SHOP: Sunshine Sticker Co: http://sunshinestickerco.com
GALAXY KIT SHOP: https://www.etsy.com/shop/rosecoloreddaze
FLORAL KIT SHOP: https://www.etsy.com/shop/sweetbellaxoxo
]]>Starting out in the planner world can be overwhelming, especially if you got drawn into it by an over-excited friend, or found yourself knee-deep in it by accident! However you got here, I want you to stay! :)
So, I put together an infographic with some beginner “do’s” and “don’ts” – Hopefully, they’ll give you a little inspiration to work with what you’ve got, and stick around in this special little community of ours.
Are there any other “Do’s and Don’ts” that you can think of for new – or even veteran – planner girls? Drop them below in the comments and let’s get a conversation going! Can’t wait to see your ideas! Xo
LINKS
Save $10 on your next Limelife Purchase: http://rwrd.io/156n6h3
Try out all the Limelife Layouts!: https://www.limelifeplanners.com/pages/weeklylayouts
Infographic made with Canva: https://www.canva.com/
]]>We all know that at some point we're going to buy a home, most of us that is. Buying a home, renovating a home, or anything that has to do with such a big step such as homeowning can be stressful and being the planner that I am, like to make sure that I have everything I need along the way in one place.
In my business, notebooks are essential for me to track print lists, inventory, product designs, and more. When it comes to buying our first home, it is no different. As we work towards closing in April, I'm keeping track of house specs and design elements with the Limelife Planners Dot Grid & Lined Notebooks.
I love the design choices that you have when customizing your notebooks at Limelife - the "Lauren" and "Fannie" covers work great as home notebooks! Now you can get personalization on the covers, but I'm more of a minimalistic kind of gal with certain designs. I've been binge watching Fixer Upper, so the "Fannie" cover couldn't have been the more perfect design with the palm wreath and shiplap.
Some of the things that I'm currently keeping note of in my notebooks are what my house amenities are. This is a 175-year-old home with a lot of history for its location! We want to keep the decor and design elements as close to the timeframe as possible with a few geeky nods. This house is enormous so we have to plan out where everything is going to go when we move.
I'm also working on the layout for my office, which will be moving from the first floor in my current home to the second floor of the new home. Before moving all my machines, desks, inventory, etc. I need to go in and make a few upgrades. The dot grid notebook comes in handy as I can re-create the floorplan to figure out the best placement for my new office space.
Another plus to the dot grid notebooks is that it is perfect for storing paint swatches, creating mood boards for the space, and even helping me keep track of the decor elements I want to add to my office. I'm going to be adding more pages in as we get closer to our move-in date for decor items that need to go in the other rooms in the house. Thankfully a lot of the house does not need any repainting or major remodeling. Sometimes when you purchase an older home you can run into issues which require a lot of overhauls. I know I will be using the FREE Home Improvement printable from Limelife Planners in conjunction with these notebooks to make this new house the home my husband and I want it to be.
I'm hoping to document more on the journey to being a homeowner and bringing a lot of life into this historic home. If you think these notebooks might be a great fit for your next project, be sure to click here for a $10 off $25 purchase at Limelife Planners.
As always, if you liked this blog and want to follow along with my planner journey please be sure to follow me on Wordpress or you can find me on Bloglovin'. You can also find me on Instagram @thesassymal_plans as well.
]]>PR Teams and Creative Teams — Lots of planner companies and sticker/accessory shops have them, but — what are they? How do I get on one? And - why would I want to?
A PR team — a public relations team — in terms of the planner world is 99% of the time a group of ladies (though I’ve seen a gentleman or two take on the female-dominated planner world!) who could be considered “brand-fanatics.” They are super-passionate about the brand that is looking for a team, likely having already purchased several things from that business or shop, with more on the way. Their social media accounts are also probably plastered with photos of that shop’s products.
And, when those PR Team applications come out (which is how 99% of teams are chosen), the excited sounds those ladies make likely break the sound barrier.
But - knowing, of course, that a PR/Creative team will become one of the major “faces” of a company on social media - there are still several questions that often go unanswered, unless you already are a shop owner, or already are on a PR team.
So, here are 5 tips, tricks and secrets from the mouths of some of my favorite shop owners, themselves — including Limelife’s own Miss Leslie and Media Team Member Heather, Owner of “The Sassy Mal” on Etsy! - about PR teams: what they look for to put a team together, what they expect from their team, and more.
1 - Be excited, be a good customer, and be loyal!
Not just the ‘I bought a couple times, and like their stuff, so why not?’ kind of loyalty, but the ‘This is my ride or die shop for xyz’ kind of loyalty. If four out of five of the planner pictures you’re taking have that shop’s product(s) in them - you’re a loyal customer. Your purchases, and obvious excitement about them in your social media profiles when they arrive make you a great contender for a PR team! If you’re looking to get on a PR team for a sticker shop, use their stickers - a lot. If it’s for a planner shop, use their planner(s) — a lot. And show them off.
2 - Social-Media Interaction.
Make yourself a presence in any of the social media profiles or groups that the brand might have. Interact with other customers! If they have a question you know the answer to, offer it — and if you don’t know, do the research to help them out! Know the brand and offer help when it’s appropriate. Get to know the shop/biz owner, too, as best you can, as well as anyone else involved with them and the brand. What’s a constant from all the shop/business owners I asked is the incredible friendships that they’ve built in the planner community. Reach out, make a friend, and see what happens. [ I can speak to this first-hand; I wouldn’t have some of my greatest friends right now, were it not for the planner community, and the Limelife team! ♡ ]
I’m using the Limelife A5 Dot Grid Page Add-on as a tracker for the shops I PR for J They’re sitting pretty in a Keelindori A5 binder! (Links below)
3 - Social-Media Presence.
It’s all well-and-good to interact with people on Instagram, or in a Facebook group, but you also need to have your own profiles that show off your style, your personality, and how you’re using Brand X’s products. Take killer pictures — look up some tutorials or blog posts on the best ways to photograph stationary / stickers / etc. and practice.
I can’t stress that enough - practice. When I look back at the first pictures I took of my planner, to now, I’m both appalled (because, real talk: they’re terrible...) and proud, because I’ve learned, and studied others! Show off the things you’ve bought from Brand X, and make your excitement about their products ring out loud and clear. Shop owners want you to spread that love and excitement with your followers, and get other people interested — especially people they might not reach.
I think Leslie put it best: “In the days of social media platforms changing their algorithms 80 times a month, and exposure for business accounts not being ‘great,’ unless you’re spending a lot of money, PR teams can be ‘a huge blessing for small business.’ You’re getting the product out there for the business and reaching YOUR circle. Multiply that by a team of five, and that’s five potentially different circles, exposed to Brand X.
4 - Avoid the “Planner Famous” Trap.
You don’t have to have 50,000 followers to make a difference. It’s pretty clear by looking at someone’s profiles whether they’re in the PR game for the “free stuff,” or they genuinely love and want to support a brand. The person with 50k followers might do the bare minimum, where the person with 400 might go above and beyond. The person who’s considered “planner famous” might be all around terrible — and the person who has 400 followers might be the nicest person you’ve ever met! Enthusiasm and niceness will mean everything to a small business. Which leads me to--
5 - Have and be fun.
One of the best things I heard when I reached out to shop owners for their input was “Nobody likes Debbie Downer.” You don’t have to be “fake,” either, because life isn’t all sunshine, unicorns and rainbows - but a genuine excitement and joy in regards to Brand X’s ‘pretties’ will come through when you let them shine. The planner community is one of the most supportive and fun communities I’ve ever been involved in. We can encourage others in their creativity, their interests, and their small business ventures! If you get that opportunity and score a spot on a PR team, treat it with reverence and do it, and the shop that believes in you, justice — and don’t be afraid to enjoy the ride!
Are you looking to win a spot on a PR team? Do you still have questions about PR teams from the shop owner’s perspective? Drop them in the comments!
I’ll be writing another blog, soon, on PR teams from the PR Girl’s perspective ~ What’s it like on our side of the Instagram profile?
Can’t wait to hear from you soon! Xo
LINKS
Save $10 on your next Limelife Purchase: http://rwrd.io/156n6h3
Sunshine Sticker Co: http://sunshinestickerco.com
The Sassy Mal: http://thesassymal.com
Keelindori by Imperfectly Perfekt: http://imperfectlyperfekt.com
In my A5 inserts, I have the Lauren floral design, which I love coordinating colors with. It is such a pretty floral, and it works so well on it’s own or in combination with washi tape or stickers. For the month of March, I knew I wanted to incorporate some green washi tape for St. Patrick’s Day, but without going over the top with green. For me, my foiled bow washi tape is always a perfect solution. When it comes to applying washi tape in each month, I like to cover up the white space for days not included in the month. It helps me focus in more on the specific days in that particular month.
For the month of March, I added in my coffee washi and a green polka dot to go for a cozy theme. I live in Illinois so March definitely still means winter, but I have my fingers crossed for spring (though something tells me that’s not going to happen). With the washi tape, I used a couple of stickers from weekly kits that I had leftover to add to my cozy theme. In the daily boxes, I use some wacky holidays that I purchased from a shop on Etsy. Obviously this part is optional, but I think it adds a little bit of fun to my monthlies while still giving me plenty of room to write in each box. To give myself enough space, I center them on the top line (not in the exact center of the box) so I can write beneath them.
For me, one of the key aspects of functional in a monthly spread is color-coding. I can easily see at a quick glance whether something is for work, home, finance (like bills or payday), or important appointments. For work, this can be days off, early release days for students, end of the quarter, etc. Home is separate from appointments because I consider it to be my more fun things -- my friend’s baby shower, my dad’s birthday, and even the premiere of Celebrity Big Brother, which now that I see the cast could probably be crossed out of my list. Finance includes bills and payday, and appointments are doctors, hair, nails, vet, etc.
I always carry my four colors of pens with me in my purse, in case I need to mark something down, and I love having everything available to me at a quick glance in case I need to schedule an appointment or mark down something at work. What do you use your monthly spreads for? Let me know, and be sure to tag me on Instagram with your monthly inspiration! I could always use more ideas.
Instagram: @JennS_90
]]>Who We Want
We want passionate planners. We want the people that keep it simple and the people that get creative with all of the bells and whistles. We want anyone who is passionate about productivity, goals, and the power of writing it down. We want people that are into their art journals and lovers of the Traveler's Notebook systems!
Stand out applicants will have:
Beautiful Photography
A lot of what we ask from you is pretty images. We love sharing your pictures of Limelife products on Instagram and we want to see your planning in all it's HD glory. Here's an example of an excellent photo from a blog post written by past M&CT member Meka Allen.
You don't need a fancy lighting rig or super expensive camera (although that's great if you do have that!). Find some time to take your pictures during the day, in front of a window with natural light and capture a nice picture with your phone. Here are some resources with tips on how to get great photos. There is a lot of info on flat lay photography but don't be afraid to break the stationery mold and take a different route:
Creativity
By creativity we don't mean you have to be the next Michelangelo. What we really want is for you to have a creative mind so you can write about topics that you would want to read about. A big part of the M&CT job is writing blog posts. We want you to come to the team full of ideas on what you want to write and what images you want to share with our readers. Here's an example of a great post from Katie Clark.
10 Dollar Tree Planner Supplies
Passion
We want folks who are passionate about Limelife Planners. We are proud of being a small business. We are proud to create products that help people achieve their goals. We want our Media & Creative Team members to feel the same way.
How It Works
In exchange for us sending you Limelife Planners goodies, you will write blog posts and share Instagram images of your Limelife "stuff."
Responsibilities
In return, you'll get a FREE Limelife Planner of you choice as well as an advance sample of new products that we release during your time on our Media and Creative Team.
Media and Creative Team members are hired for 5 month contracts.
How to Apply
Email your application to media@limelifeplanners.com.
Include the following:
We will be choosing members by January 10th, and we are asking that you apply no later than January 5th at midnight. Good luck!
]]>
I’ve also used the pages near the monthly spread as a place to make a packing list. I went on a trip over my spring break in March, so I made my packing list on the March notes pages. This is one of my favorite uses for the notes pages, not only because it helps me ensure I have everything I need for a trip, but because it also means I have a fun trip planned :) In this case, my categories were clothes, toiletries, and miscellaneous. I split clothes into tops & dresses, bottoms, shoes, and miscellaneous to make sure I covered everything.
I typically use the notes section at the back of the planner for taking notes at miscellaneous meetings. During this last year of college, I had a variety of groups and meetings I had to attend, but none of them were frequent enough to need their own notebook. I also use it for notes about things I need to get set up – for example, I was recently looking for an apartment so I used the notes pages as a place to keep information about that (phone numbers, addresses, prices, dates of showings, etc.).
]]>
As a midwesterner through and through, I have learned to love each season as it is present. I miss winter in the summer, and I miss the summer in the winter. I think having four pretty distinct seasons makes me appreciate each one more.
This is my first summer whose end won’t be marked by returning to school. During the last few weeks, I’ve been making little notes in my planner when I got ideas of things to do this summer. I’ve compiled some of them here!
]]>
In addition to all of the wonderful products you can purchase from Limelife, they also offer a variety of printables for FREE! You can view them all here!
There are general ones such as calendar pages, a meal tracker, and several home-related checklists. I’m using the calendar pages this summer while I have a roommate so we can be aware of each others’ schedules/when one of us might be gone for a bit. We keep it on a bulletin board in the kitchen!
Also available are a variety of education printables, which are really awesome according to some teachers I’ve heard from (I think they look awesome too, but I’m not a teacher).
Lastly, there are also desktop wallpaper downloads. I used the Mandy Desktop Wallpaper on my computer at my internship last summer and was always getting comments from others about how cute it is. Once I get situated at my new job, I’ll get a Limelife wallpaper on that computer too – they are great for adding a pop of color to your workspace!
You don’t need any sort of code to get the printables and downloads for free, but if you’re interested in purchasing something else, here’s $10 off!
Feel free to say hi on Instagram @live.life.inspired! I’d love to see how you use Limelife printables!
]]>
Summer Bucket List - Family of Four (Kids under 3)
It's officially summer in our home! With two educators and two kids, not yet in school, you can understand our excitement.
Apollo is just under three years old and Aria a few days from turning one - we have to be creative. During the last few weeks of school, I began to brainstorm different ideas to keep our family entertained in my Limelife Planners A6 lined notebook.
This size went along with me very easily from home to work because it fits nicely in my work bag and diaper bag.
What's missing from this list? Anything you're planning to do with your family this summer break?
]]>
This last school year was my first year using a Limelife Planner, and WOW was it great! I’ve always used a planner, but I hadn’t found a layout that I absolutely loved…until I tried Limelife’s Layout C. I used Layout C for the whole school year, and decided to order Layout B as my next planner since I’ll be transitioning from student to a 9-5 employee.
I loved the six boxes of Layout C and how easy it is to customize them. Because I had a consistent schedule, I mostly kept the boxes the same for an entire semester. If you plan to keep your boxes the same for several months, check out these wonderful customizable box labels!
Here’s how I used the boxes in Layout C:
Class #1
Class #2/Job & Apartment Search (This class was only for the first half of the semester, so once that was done I changed up my labels.)
Class #3
Class #4
Work
Misc (Social Events, Extra Curriculars, Errands, etc.)
I use the boxes for my classes to write down homework for the next class period and big projects or exam dates.
Here’s how the same week looks planned in two different layouts (top is B, bottom is C)!
A little disclaimer about Layout B (hourly): I didn’t get it for college, I got it to start using after my Layout C planner finishes up soon. Though the hourly layout was alright, it wasn’t as great of a fit for my college schedule. I found it to be redundant writing out my class times that are the same every week, and it’s more structured than I liked, especially for homework. However, I loved using an hourly planner for my internship last summer, because meetings were always at different times each day/week, and no two days were the same. That’s why I got a new hourly planner to use for my first adult job!
While I don’t have experience with any other layouts as a college student, I’d highly recommend Layout C for your next academic planner! As a student, another thing I love about Limelife over other planner brands is that you can pick your starting month. No more having to buy a January start and have one academic year in two calendar year planners!
Start thinking about what planner you want to use next school year, and order soon! There’s still plenty of time to order in time for August or September, but remember to allow about 3 weeks from the time you order for all of the customization goodness that Limelife does + shipping. That would mean ordering in early July if you want an August start!
Ready to buy your next planner or other Limelife goodies? Have fun shopping—here’s $10 off!
Follow me on Instagram @live.life.inspired or check out my blog to see more Limelife goodness!
]]>
Marketing, spring fever, retail therapy - whatever caused this budget slip, it happens. The great thing is, you can get back on budget TODAY.
Before we get into the steps, I do want to say that l believe a budget should have built-in opportunities for you to have fun. There should be fun money/blow money/allowances for you to enjoy things that you like. Even after going off track.
Okay, so...
1: Start today!
Mistakes happen. Don't beat yourself up about it. Get back on track by recommitting to your budget today. Maybe the mistake was that your budget needed a little tweaking. Did you forget to build in that fun money? Whatever it was, focus on moving forward.
2: Write it out.
If you are not writing out a plan for your budget, stop reading after this step and get to it! This is essential for getting back on track. Write down what you plan to use your income for. Plan for it all of the way down to the last penny. (Zero-based budgeting) Hello - savings! I'm a tried and true fan of The Total Money Makeover. A [written] budget is telling your money where to go, instead of wondering where it went. (Dave Ramsey)
3: Assess What Happened
It's easy to get off track with your budget if you cannot see where your money is going. Not only should you write down what you plan to do with your income, you should write out what actually happens. Last month, we were hit with several Dr. visit co-payments when our youngest caught a nasty virus. Fortunately we'd started a sinking fund for medical payments. I wrote all of that out in my budget notebook because it helped us to better understand where our money went and how much we need to adjust our budget for future months.
4: Make Adjustments
As I mentioned before, you should have fun. Budgeting is not a way to eliminate the things that you want. Following a budget should put you in a place of confidence when you're making a purchase. Confident that the money isn't needed for something else, confident that your necessities are taken care of, and confident that the card transaction won't be declined. Each month will be different. Some months you'll need a oil change or a new transit pass. Some months, you won't. It's so important to plan out each and every month. I really like having the budget notebook because I can see when certain annual or semi-annual payments are, right away. Revisiting your budget each week may even be necessary for the first few months. Things shift and you will have to plan for it.
5: Celebrate your success
Going from no budget to a zero-based budget may feel like a big step. I get it. How do you keep on track? You celebrate the baby steps. Stay within budget, of course. Small celebrations don't have to cost money. Let's say you get back on track and have a full two weeks of on-budget-spending. Celebrate! Spend an extra 10 minutes in your bubble bath or watch an extra episode of whatever show you're trying not to completely binge watch. You deserve it! You adulted and adulting is hard.
Let me know in the comments how you're doing on your 2017 budget. Also, check out the budget notebook that I use in the Limelife Planners Shop.
]]>
I wasn’t really a note-taker in the past at church, but sometimes I would find myself wishing I had written something down. Then I discovered Limelife’s Sermon Notes notebook! It’s a beautiful 7x9” notebook with space to take notes for 64 sermons. I love the size of the notebook; it has a good amount of writing space for each sermon, but it’s not too big to toss in my purse! While the cover it comes with is wonderful, you can also pick a different cover if you’d like (I got the standard cover). For those of you who are loving traveler’s notebooks right now, it also comes in Cahier and A6 (both have room for notes on 13 sermons).
One thing I like about watching it online is being able to pause the video when I want to write something down. I am able to watch the sermon at my own pace, which is great. Here’s what my first spread in my Sermon Notes notebook looked like!
I love the flexibility that this notebook offers, while still providing some structure for the date, speaker, and title of the sermon, along with a box on the left and a quote and “what I want to remember” area on right. For example, in the box on the left side of the spread, sometimes I hand letter a short phrase or quote from the sermon, while other times I write out something longer like a Bible verse.
The notebook is made of the same lovely paper that Limelife uses for their planners. I’ve been using a purple Ink Joy Gel pen (my favorite pens at the moment), and I haven’t had any issues with the ink bleeding through, even where I did some hand lettering. It shadows just a tiny bit, but that doesn’t bother me at all!
This sermon notebook would be great if you usually take notes on the back of your church bulletin, or if you’re like me and wish you would take notes but not have a place to keep them. You can also use the notebook for taking notes on special church events, conferences, or guest speakers in addition to taking notes on the regular weekend sermons.
If you’re new to Limelife and would like to try the Sermon Notes notebook, you can get $10 off your purchase!
Follow me on Instagram @live.life.inspired or check out my blog to see more of my sermon notes and planning goodness!
First I laid the foundation of the layout by choosing a darker purple ink and used a sponge to blot and smear ink the ink around the edges of the pages and in my notes section. There are two main ways I mask in my layouts. The first is to stamp an image on a scrap piece of paper and fussy cut it out. I then stamp then use that to cover up an image I don’t want to get ink on. That’s what i did in the following photo for the rocket ship.
The second is to use post it notes to block off sections that I don’t want to stamp on or ink or to partially stamp an image on the paper.
To really give this layout an outer space look, I used a white gel pen to add stars. Gel pens can be temperamental, so to get the ink flowing I always do small circular motions on my thumb, and then I don’t have any problems with a good ink flow on the paper, especially when using it on pigment ink. It’s important to vary the size of the dots, otherwise it will end up looking like snow!
I also stamped some images on sticker paper to color and use in my Notes section. Colored pencils are my go to, and the blending pencil is amazing for blending colors together. For example, I colored one planet a light pink color all over, and then went over the pink in sections with a purple pencil using medium pressure. I then took the blending pencil and used soft circular motions to blend the purple out giving the planet a more interesting and dimensional look. The nice thing about stamping decorative images on sticker paper is that I can move them all around before I decide on where to stick them in my layout.
I saved my planner stamping for the end of this layout. Since I went pretty heavy on the decorative stamping this week, I needed to make sure I could still fit my lined boxes. That’s the great thing about stamps! You can see perfectly how they will fit, and you can easily mask off to make a box smaller if you need to! I wanted to keep with the outer space theme, so I used star check boxes and a star header box, and chose an ink that would compliment my stars and sky.
Thank you for stopping by and checking out my blog post. Have fun with your planner, try new things, and I hope that I have made planner stamping a little less intimidating.
Lindsay IG: @glam2plan_pnw